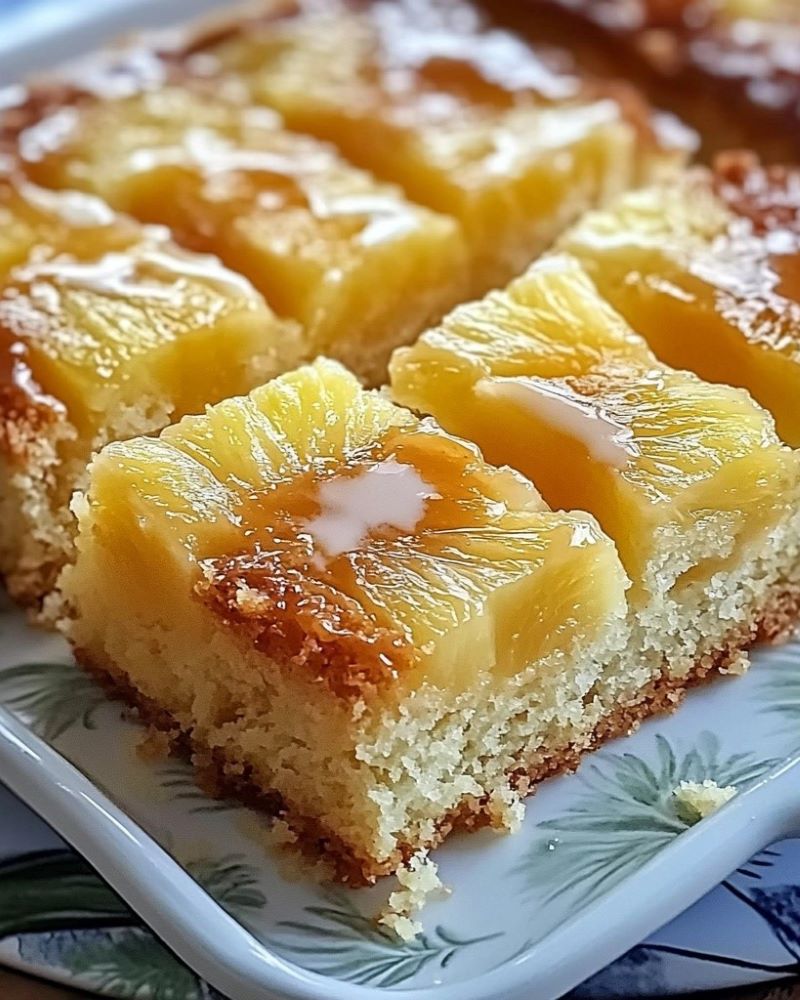
Pineapple Condensed Milk Cake is one of those delightful treats that feels like sunshine in every bite. I first baked it for a summer picnic, and it quickly became one of my most-requested recipes. With its moist texture, tropical flavor, and rich sweetness from the condensed milk, it strikes the perfect balance of fruity and indulgent.

Whether you're looking for a new dessert for your next gathering or a simple way to brighten up a weekday, this cake is always a hit. Best of all, it uses pantry staples and doesn't require any frosting-just slice and serve.
Why You'll Love This Recipe
- Tropical and Comforting: Sweet pineapple and creamy condensed milk make a dreamy combo.
- Super Moist Texture: Melted butter and condensed milk keep it ultra soft.
- Simple Ingredients: Everything you need is likely already in your pantry.
- No Mixer Needed: Just bowls, a whisk, and a spatula.
- Great for Any Occasion: Perfect for brunch, potlucks, or afternoon tea.
- One-Bowl Magic: Fewer dishes, more dessert!
Ingredients You'll Need
- 1 can (14 oz) sweetened condensed milk
- 1 ½ cups crushed pineapple, drained
- 3 large eggs
- 1 ½ cups all-purpose flour
- 1 teaspoon baking powder
- ½ cup melted butter
- 1 teaspoon vanilla extract
- Pinch of salt
Substitution Tips:
- Use canned pineapple in juice, not syrup, for a cleaner flavor.
- Swap vanilla for almond extract for a subtle twist.
- Add a handful of shredded coconut for extra tropical flair.
Step-by-Step Instructions
Step 1: Preheat and Prepare
Preheat your oven to 350°F (175°C). Grease and flour an 8x8-inch or 9x9-inch square baking pan.
Step 2: Mix the Wet Ingredients
In a large mixing bowl, combine the condensed milk, crushed pineapple, eggs, melted butter, and vanilla extract. Mix until smooth.
Tip: Make sure the pineapple is well-drained to avoid a soggy cake.
Step 3: Combine the Dry Ingredients
In another bowl, whisk together the flour, baking powder, and salt.
Step 4: Combine Wet and Dry
Gradually add the dry ingredients to the wet mixture, stirring just until no streaks of flour remain. Do not overmix.
Step 5: Pour and Bake
Pour the batter into your prepared pan and smooth the top with a spatula.
Bake for 35-40 minutes, or until the top is golden and a toothpick inserted in the center comes out clean.
Step 6: Cool and Serve
Let the cake cool in the pan for 10 minutes, then transfer to a wire rack to cool completely.
Optional: Serve with whipped cream or a dusting of powdered sugar.
Serving and Storage Tips
Enjoy this cake slightly warm or at room temperature. It pairs beautifully with coffee, tea, or a scoop of vanilla ice cream. Store leftovers covered at room temperature for 2 days, or refrigerate for up to 5 days.
To freeze, wrap individual slices tightly in plastic wrap and foil. Thaw overnight in the fridge or at room temperature.
Helpful Notes
- Drain Pineapple Well: Press out excess juice using a sieve or paper towels.
- Check Doneness: The cake should spring back when lightly touched.
- Customize It: Add chopped nuts or coconut to the batter for texture.
- Bake Evenly: Use a light-colored metal pan for even browning.
Frequently Asked Questions
- Can I use fresh pineapple?
Yes, but chop it finely and drain any excess juice. - Why is my cake soggy?
Most likely due to too much moisture from undrained pineapple. Be sure to drain it well. - Can I double the recipe?
Absolutely. Use a 9x13-inch pan and extend baking time by 5-10 minutes. - What if I don't have condensed milk?
You can make a homemade version using milk and sugar, but condensed milk is best for texture and sweetness. - Can I add frosting?
It's not necessary, but a cream cheese glaze or simple powdered sugar icing works well. - How do I serve it for a party?
Slice into bars, top with whipped cream and a pineapple wedge for a pretty presentation.
Final Thoughts
Pineapple Condensed Milk Cake is a tropical, tender delight that's as easy to make as it is delicious to eat. Whether for a family dessert or a sweet surprise for guests, this cake delivers flavor and charm with every slice.
Have you tried this recipe? Share your favorite toppings or twists-I'd love to hear how you made it your own!

Pineapple Condensed Milk Cake
Ingredients
- 1 can 14 oz sweetened condensed milk
- 1 ½ cups crushed pineapple drained
- 3 large eggs
- 1 ½ cups all-purpose flour
- 1 teaspoon baking powder
- ½ cup melted butter
- 1 teaspoon vanilla extract
- Pinch of salt
Substitution Tips:
- Use canned pineapple in juice not syrup, for a cleaner flavor.
- Swap vanilla for almond extract for a subtle twist.
- Add a handful of shredded coconut for extra tropical flair.
Instructions
Step 1: Preheat and Prepare
- Preheat your oven to 350°F (175°C). Grease and flour an 8×8-inch or 9×9-inch square baking pan.
Step 2: Mix the Wet Ingredients
- In a large mixing bowl, combine the condensed milk, crushed pineapple, eggs, melted butter, and vanilla extract. Mix until smooth.
- Tip: Make sure the pineapple is well-drained to avoid a soggy cake.
Step 3: Combine the Dry Ingredients
- In another bowl, whisk together the flour, baking powder, and salt.
Step 4: Combine Wet and Dry
- Gradually add the dry ingredients to the wet mixture, stirring just until no streaks of flour remain. Do not overmix.
Step 5: Pour and Bake
- Pour the batter into your prepared pan and smooth the top with a spatula.
- Bake for 35-40 minutes, or until the top is golden and a toothpick inserted in the center comes out clean.
Step 6: Cool and Serve
- Let the cake cool in the pan for 10 minutes, then transfer to a wire rack to cool completely.
- Optional: Serve with whipped cream or a dusting of powdered sugar.
Notes
- Drain Pineapple Well: Press out excess juice using a sieve or paper towels.
- Check Doneness: The cake should spring back when lightly touched.
- Customize It: Add chopped nuts or coconut to the batter for texture.
- Bake Evenly: Use a light-colored metal pan for even browning.


Leave a Reply