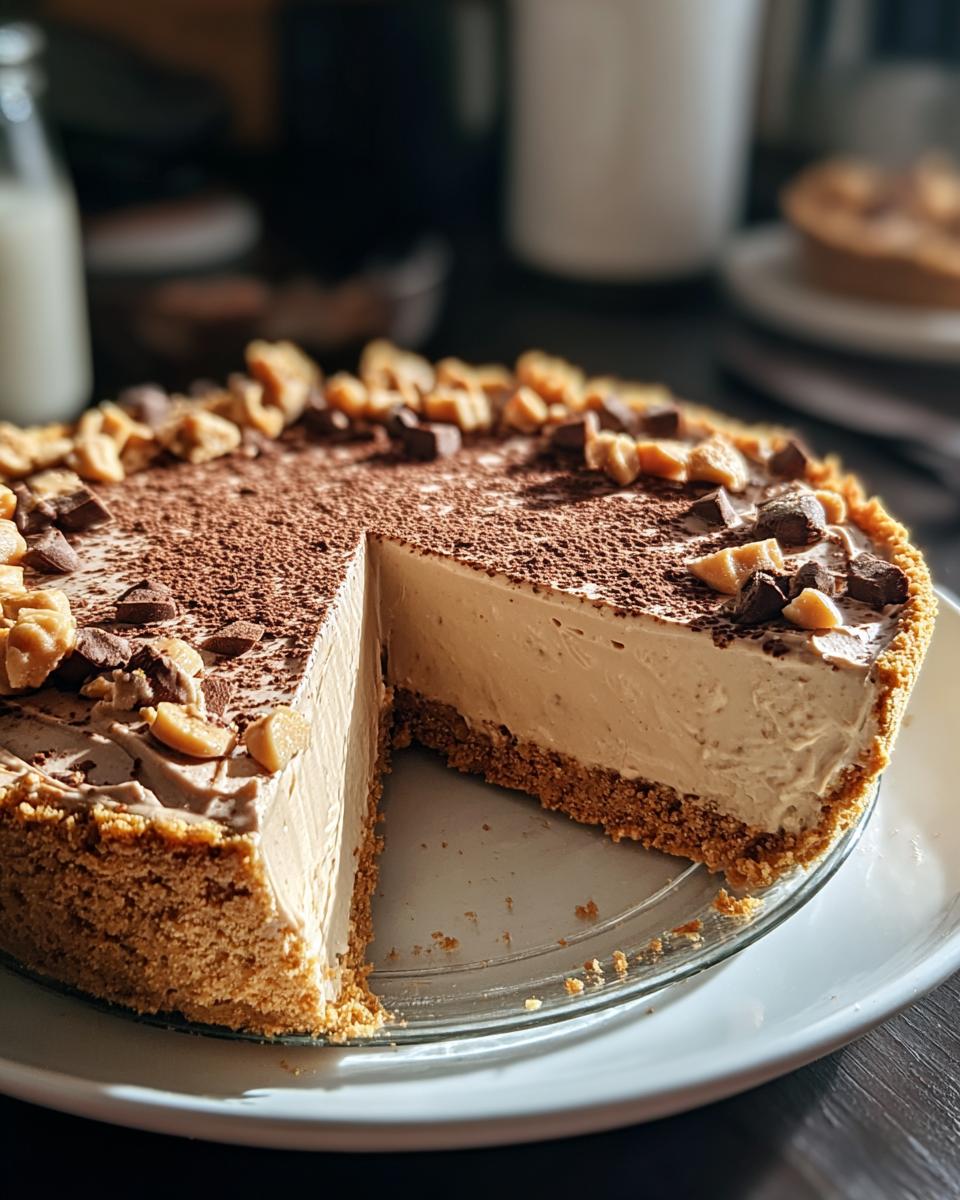
I still remember the first time I made my No-Bake Peanut Butter Pie-it was one of those sweltering summer days when turning on the oven felt like a crime against humanity. I needed something cool, creamy, and ridiculously easy, and boy, did this pie deliver. The graham cracker crust comes together in minutes, and the filling? Just a dreamy mix of peanut butter, cream cheese, and whipped cream that's so smooth, it practically melts on your tongue. No oven, no stress, just pure peanut butter bliss.

This pie has since become my go-to for everything from last-minute potlucks to "I deserve a treat" Tuesdays. The fact that you can whip it up in 20 minutes (plus chilling time) makes it a lifesaver, and trust me, nobody ever guesses how simple it is. One bite of that rich, creamy filling against the crisp, buttery crust, and you'll be hooked. If you love peanut butter and hate complicated recipes, this one's for you.
Why You'll Love This No-Bake Peanut Butter Pie
Let me count the ways this pie will steal your heart (and probably your waistline). It's the kind of dessert that makes people think you slaved for hours, when really, you just threw a few things together and let the fridge do the work. Here's why it's a forever favorite in my kitchen:
- Quick and No-Bake Convenience: No oven? No problem. This pie comes together in 20 minutes flat-just mix, chill, and devour. Perfect for when you're craving something sweet but can't bear to turn on the stove.
- Creamy and Irresistible Flavor: That silky peanut butter filling is like a cloud of happiness, and the graham cracker crust adds the perfect crunch. It's rich without being heavy, sweet without being cloying-basically, dessert magic.
- Perfect for Any Occasion: Bring it to a potluck, and you'll be the hero. Serve it at a birthday party, and kids (and adults) will lose their minds. Or, you know, eat it straight from the pan on a random Wednesday. No judgment here.
Ingredients You'll Need for No-Bake Peanut Butter Pie
Grab your favorite peanut butter and let's get started! The beauty of this pie is that it uses simple ingredients you probably already have in your pantry. Here's everything you'll need, broken down so you can prep like a pro:
For the Crust
- 1 ½ cups graham cracker crumbs - You can buy them pre-crushed or blitz whole crackers in a food processor. Honey or cinnamon grahams work great here too!
- ½ cup unsalted butter, melted - Salted butter works in a pinch, but skip adding extra salt to the crust if you use it. And yes, melted means MELTED-no lazy room-temperature butter here!
For the Filling
- 8 oz cream cheese, softened - Full-fat is best for that luscious texture. Pro tip: Leave it on the counter for an hour, or microwave for 10-second bursts if you forgot (we've all been there).
- 1 cup creamy peanut butter - Use the regular kind, not natural (it can separate). Jif or Skippy are my go-tos for that perfect sweetness and consistency.
- 1 cup confectioners' sugar - Also called powdered sugar. Sift it if yours is lumpy-trust me, it makes a difference.
- 1 cup heavy whipping cream - The higher the fat content, the fluffier your filling. Cold cream whips best, so keep it chilled until the last second.
- 3 tablespoon cocoa powder - Optional, but adds a subtle chocolatey depth. Dutch-processed or regular both work.
That's it! No fancy ingredients, no weird substitutions-just pure, pantry-friendly deliciousness. Now let's turn this into pie magic.
Step-by-Step Instructions for No-Bake Peanut Butter Pie
Alright, let's dive in! I promise this is so easy, you'll wonder why you ever bothered with oven-baked desserts. Just follow these steps, and you'll have a pie that'll make you look like a pastry pro (even if you're really just winging it).
Prepare the Crust
- Mix the crumbs and butter: Grab a medium bowl and toss in the graham cracker crumbs and melted butter. Stir until every last crumb is coated-it should look like wet sand and hold together when you pinch it. If it's too dry, add another tablespoon of melted butter. Too wet? A sprinkle more crumbs. Easy fix!
- Press it in: Dump the mixture into a 9-inch pie dish and press it firmly into the bottom and up the sides. I like to use the bottom of a glass to really pack it down-no fragile crusts here! Pop it in the fridge for 10 minutes to set while you make the filling. (Bonus: This keeps the crust from getting soggy later.)
Make the Filling
- Beat the base: In a large bowl, whip the softened cream cheese with a hand mixer or stand mixer until it's smooth and fluffy, about 1 minute. Scrape down the sides, then add the peanut butter and confectioners' sugar. Beat again until everything's fully combined and silky-no lumps allowed! If you're using cocoa powder, toss it in here too.
- Whip the cream: In another bowl (or wash and reuse the first one-no shame), beat the cold heavy cream until stiff peaks form. You'll know it's ready when you lift the beaters and the cream holds its shape. Don't overdo it, or you'll end up with butter (been there, cried over that).
- Fold it all together: Gently fold the whipped cream into the peanut butter mixture with a rubber spatula. Keep folding until no white streaks remain, but don't go wild-you want to keep that fluffy texture. Taste a spoonful (quality control!) and add a pinch of salt if it needs a little balance.
Assemble and Chill
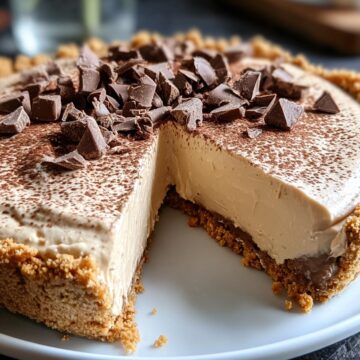
- Fill the crust: Scoop the filling into your chilled crust and smooth the top with a spatula. Want it fancy? Swirl the top with a spoon or add a drizzle of melted chocolate. I sometimes sprinkle crushed peanuts on top for extra crunch.
- Chill out: Cover the pie loosely with plastic wrap and refrigerate for at least 4 hours, but overnight is even better. This is the hardest part-waiting. But trust me, the filling needs time to set so you get those perfect, clean slices.
And that's it! When you're ready to serve, slice it up with a sharp knife (dip it in hot water for cleaner cuts) and watch everyone's eyes light up. No one needs to know you barely broke a sweat making it.
No-Bake Peanut Butter Pie Variations
One of the best things about this pie? It's like a blank canvas for your peanut butter dreams. Once you've mastered the basic version, try these fun twists to mix things up. I've tested them all (for science, obviously), and each one brings something special to the table.
Chocolate Drizzle
Because peanut butter and chocolate are soulmates, right? After chilling the pie, melt ½ cup of chocolate chips with a teaspoon of coconut oil (microwave in 30-second bursts, stirring between). Drizzle it artfully-or messily, no rules here-over the top. Let it set for 10 minutes before slicing. Bonus: Sprinkle sea salt on top for that sweet-salty kick.
Crunchy Peanut Butter
If you're all about texture, swap the creamy peanut butter for crunchy. You'll get little bursts of nutty goodness in every bite. I also love folding in ¼ cup of chopped roasted peanuts into the filling for extra crunch. Just don't tell the smooth peanut butter purists-they might revolt.
Vegan Option
Easy peasy! Use dairy-free cream cheese (I like Kite Hill) and swap the heavy cream for full-fat coconut cream (chill the can overnight and scoop out the solid part). For the crust, coconut oil works instead of butter. The filling will be slightly less fluffy but just as delicious. Top with coconut flakes if you're feeling fancy.
See? This pie is whatever you want it to be. Play around, taste as you go, and make it your own. That's the joy of no-bake desserts-they're forgiving and fun!
Serving and Storage Tips for No-Bake Peanut Butter Pie
Okay, you've waited (im)patiently for this pie to chill-now let's talk about the best ways to serve and store it. Because let's be real, you're probably not eating the whole thing in one sitting (unless it's been that kind of day, in which case, no judgment). Here's how to keep it looking and tasting its best:
Slicing: Run a sharp knife under hot water and dry it before slicing-it'll glide right through that creamy filling without dragging. Wipe the blade between cuts for picture-perfect slices. If you're serving a crowd, cut smaller pieces-this pie is rich!
Garnishes: A dollop of whipped cream and a sprinkle of crushed peanuts never hurt anybody. Or go wild with chocolate shavings, a dusting of cocoa powder, or even a drizzle of caramel. It's your pie-accessorize it!
Storage: Cover leftovers tightly with plastic wrap or pop them in an airtight container. It'll keep in the fridge for up to 5 days (if it lasts that long). Want to freeze it? Wrap individual slices in plastic, then foil, and stash them for up to 2 months. Thaw in the fridge overnight, and it'll taste just as dreamy.
Pro tip: If your kitchen's warm, let the pie chill for another 10 minutes after slicing-it helps the filling hold its shape. Now grab a fork (or just your hands) and dig in!
Helpful Notes for Perfect No-Bake Peanut Butter Pie
Listen, I've made this pie more times than I can count, and along the way, I've learned a few tricks (and made a few mistakes so you don't have to). Here's the inside scoop for pie perfection:
- Softened cream cheese is non-negotiable. If it's cold, you'll end up with lumpy filling-nobody wants that. No time to wait? Microwave it for 10 seconds at a time (no more, or it'll melt!), or pop it in a zip-top bag and dunk it in warm water for 5 minutes.
- Don't overmix the whipped cream. Stop when you see stiff peaks! Keep going, and you'll have sweetened butter (yes, I've cried over this). If it happens, just start over-your pie deserves better.
- Natural peanut butter is a no-go. It separates and makes the filling oily. Stick with the regular stuff for that creamy, dreamy texture.
- Chill time matters. I know, waiting is hard, but slicing too soon = soup. Set a timer if you must-your patience will be rewarded.
There you go-my hard-earned wisdom in a nutshell. Now go forth and pie like a pro!
Frequently Asked Questions About No-Bake Peanut Butter Pie
I get it-even the simplest recipes come with questions. Here are the ones I hear most often (and the answers I give while sneakily eating pie filling straight from the bowl). Save yourself some trial and error!
- Can I use a store-bought crust?
Absolutely! A pre-made graham cracker crust works in a pinch. Just skip the crust steps and go straight to the filling. Your pie might be slightly shallower, so adjust expectations (or lick the extra filling bowl-problem solved). - How long does it keep in the fridge?
Up to 5 days, covered tightly. The crust softens after day 3, but let's be honest-it rarely lasts that long. If you see condensation, blot it with a paper towel before serving. - Can I make this ahead for a party?
Yes! It's actually better the next day. Make it up to 24 hours in advance, but hold off on garnishes until serving. Keep it refrigerated until the last minute-warm kitchens turn this pie into a delicious puddle. - What if I don't have confectioners' sugar?
Blend granulated sugar in a blender until powdery (1 cup granulated = ~1 cup confectioners'). Or swap in ¾ cup brown sugar for a caramel-like twist-just expect a slightly grainier texture.
Still stumped? Toss me a question in the comments. But first: grab a spoon and taste-test. That's usually the answer to everything.
Final Thoughts on No-Bake Peanut Butter Pie
If there's one dessert that never lets me down, it's this No-Bake Peanut Butter Pie. It's the ultimate crowd-pleaser-simple enough for weeknights but fancy enough for special occasions. Every time I serve it, someone asks for the recipe (and then looks shocked when I reveal how easy it is). The creamy filling, that buttery crust, the way it melts in your mouth... it's pure comfort in pie form. So go ahead, make it, share it, and watch it disappear. And when you do, tag me or leave a comment-I'd love to hear how yours turns out! Now, who's ready for seconds?
No-Bake Peanut Butter Pie
Ingredients
For the Crust
- 1 ½ cups graham cracker crumbs
- ½ cup unsalted butter melted
For the Filling
- 8 oz cream cheese softened
- 1 cup creamy peanut butter
- 1 cup confectioners' sugar
- 1 cup heavy whipping cream
- 3 tablespoon cocoa powder

Leave a Reply