There's something magical about the aroma of Garlic Herb Dutch Oven Bread wafting through the house, reminiscent of cozy family gatherings around the dinner table. I remember my grandmother kneading dough, her hands dusted with flour, and the anticipation of that first warm slice slathered with butter. This bread is not just easy to make; it's a comforting hug in loaf form, perfect for sharing on chilly evenings or sunny brunches alike.

What Is Garlic Herb Dutch Oven Bread?
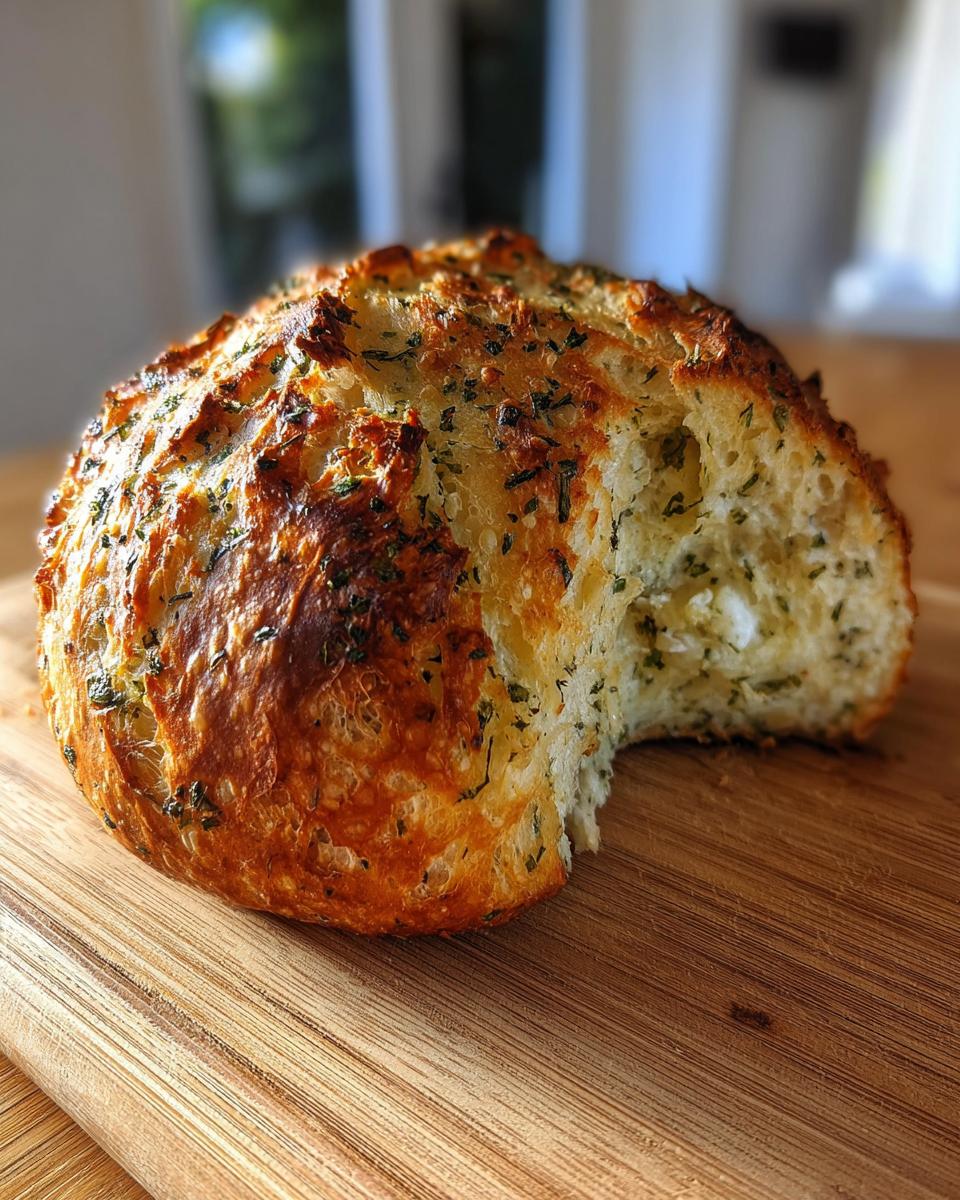
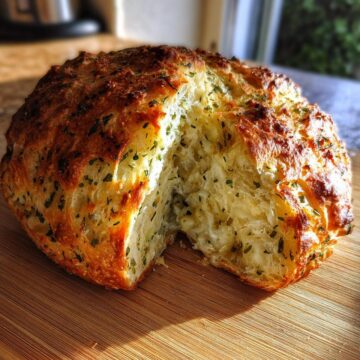
Garlic Herb Dutch Oven Bread is a delightful homemade bread that combines the rich flavors of garlic and fresh herbs, creating a warm and inviting loaf. Baked in a Dutch oven, this bread achieves a crusty exterior while remaining soft and airy on the inside. It's the perfect addition to any meal or simply enjoyed on its own.
- Prep Time: 15 minutes
- Cook Time: 45 minutes
- Total Time: 60 minutes
- Servings: 8 slices
Why You'll Love Garlic Herb Dutch Oven Bread
- This recipe features simple ingredients that are likely already in your pantry, making it easy to whip up at a moment's notice.
- With a quick preparation time, you can have fresh, homemade bread without spending all day in the kitchen.
- It's beginner-friendly and requires minimal skill, perfect for anyone looking to try their hand at baking.
- This bread is a crowd-pleaser, ideal for family gatherings, holiday meals, or cozy dinners with friends.
- It can be made ahead of time, allowing you to enjoy warm, fresh bread whenever you desire.
Ingredients You'll Need
- 3 cups all-purpose flour (for best results, use unbleached flour)
- 1 ½ teaspoons salt (sea salt is ideal for flavor)
- ½ teaspoon instant yeast (active dry yeast can be used, but will require additional proofing)
- 1 ½ cups warm water (around 110°F for optimal yeast activation)
- 4 cloves garlic, minced (fresh garlic adds a robust flavor)
- 2 tablespoons fresh herbs (rosemary and thyme), chopped (feel free to mix with parsley or basil)
- 1 tablespoon olive oil (extra virgin olive oil enhances the taste)
Using quality ingredients makes all the difference in flavor and texture, so opt for fresh herbs and good-quality flour if possible. You can also experiment with different herbs based on your preference, making this bread uniquely yours!
Step-by-Step Instructions
Preparing the Ingredients
- Gather all your ingredients: flour, salt, yeast, warm water, garlic, herbs, and olive oil.
- Measure the flour into a mixing bowl, ensuring there are no lumps.
- Chop the fresh herbs finely, and mince the garlic for even flavor distribution.
Mixing the Dough
- In the mixing bowl, combine the flour, salt, and instant yeast. Stir gently to mix.
- Add the warm water, minced garlic, and chopped herbs into the dry mixture.
- Using a wooden spoon or your hands, mix until a shaggy dough forms. It should be slightly sticky but cohesive.
Letting the Dough Rise
- Cover the bowl with a clean kitchen towel or plastic wrap to retain warmth.
- Allow the dough to rise at room temperature for 12-18 hours; it should become bubbly and double in size.
- Pro Tip: If your kitchen is cool, consider placing the dough in a slightly warm oven (turned off) to encourage rising.
Prepping the Dutch Oven
- About 30 minutes before baking, place your Dutch oven (with its lid) in the oven.
- Preheat the oven to 450°F (232°C) to ensure the Dutch oven gets hot enough for a crispy crust.
Shaping the Dough
- Once the dough has risen, lightly flour a clean surface and turn the dough out onto it.
- With floured hands, shape the dough into a round ball, folding it over itself to create tension.
- Let it rest for 30 minutes on the counter, covered with a towel.
Baking the Bread
- Carefully remove the hot Dutch oven from the oven (use oven mitts!).
- Transfer the dough ball into the Dutch oven. It may stick, so use a spatula if needed.
- Cover with the lid and bake for 30 minutes to create steam and a soft interior.
- After 30 minutes, remove the lid and bake for an additional 15 minutes until the bread is golden brown on top.
Cooling the Bread
- Once baked, remove the Dutch oven from the oven and carefully transfer the bread to a wire rack.
- Let the bread cool for at least 30 minutes before slicing to allow the texture to set.
- Enjoy the delightful smell filling your kitchen as you wait!
Variations
- Add grated cheese like Parmesan or cheddar for a cheesy twist.
- Incorporate sun-dried tomatoes or olives for a Mediterranean flair.
- Experiment with seasonal herbs like sage in the fall or basil in the summer.
- Try using whole wheat flour for a heartier bread or gluten-free flour for a gluten-free version.
- Top with sesame or poppy seeds before baking for added texture.
Serving and Storage Tips
Serving
Serve your warm Garlic Herb Dutch Oven Bread with a smear of butter or a drizzle of olive oil. It pairs beautifully with soups, stews, or alongside a fresh salad. For a delightful twist, enjoy it with garlic herb cream cheese or your favorite jam.
Storage
Store the bread in an airtight container at room temperature for up to 3 days. For longer storage, wrap it tightly in plastic wrap and freeze for up to 3 months. To enjoy, simply thaw and reheat in the oven for a few minutes to restore its fresh-baked texture.
Common Mistakes
- Not allowing enough rising time-make sure to let the dough rise for at least 12 hours for the best flavor and texture.
- Skipping the preheating of the Dutch oven-this step is crucial for achieving a crispy crust.
- Using cold water instead of warm-warm water helps activate the yeast properly.
- Not letting the bread cool before slicing-this can lead to a gummy texture, so patience is key!
Helpful Notes
- For a dairy-free option, use olive oil instead of butter for serving.
- Consider adding chopped nuts or seeds for added crunch and nutrition.
- If you don't have fresh herbs, dried herbs can be used-just reduce the amount to 1 tablespoon.
- Ensure your yeast is fresh for the best rise; check the expiration date if unsure.
Frequently Asked Questions
Can the recipe be frozen?
Yes, you can freeze Garlic Herb Dutch Oven Bread! Once the bread has cooled completely, wrap it tightly in plastic wrap and then in aluminum foil. It will stay fresh in the freezer for up to 3 months.Can ingredients be substituted?
Absolutely! You can substitute all-purpose flour with whole wheat or gluten-free flour. Fresh herbs can be replaced with dried herbs, just use less since dried herbs are more concentrated.How to store leftovers?
Store leftover bread in an airtight container at room temperature for up to 3 days. If you want it to last longer, wrap it in plastic wrap and freeze it for up to 3 months.Can the recipe be made ahead?
Yes, you can prepare the dough in advance and allow it to rise overnight. This makes it easy to bake fresh bread whenever you’re ready, just follow the baking instructions the next day!Final Thoughts
I truly hope you give this Garlic Herb Dutch Oven Bread a try. There's something special about sharing a warm, homemade loaf with family and friends, creating memories over comforting food. As the aroma fills your kitchen, it will bring warmth and joy to your home. So, roll up your sleeves, enjoy the process, and let each slice of this bread remind you of the love and care that goes into cooking. Happy baking!
Garlic Herb Dutch Oven Bread
Equipment
- Dutch oven
- Mixing bowl
Ingredients
For the Bread
- 3 cups all-purpose flour
- 1 ½ teaspoons salt
- ½ teaspoon instant yeast
- 1 ½ cups warm water
- 4 cloves garlic, minced
- 2 tablespoons fresh herbs (rosemary and thyme), chopped
- 1 tablespoon olive oil
Instructions
- In a mixing bowl, combine the flour, salt, and instant yeast.
- Add the warm water, minced garlic, and chopped herbs. Mix until a dough forms.
- Cover the bowl and let the dough rise for 12-18 hours at room temperature.
- Preheat your Dutch oven in the oven at 450°F (232°C).
- Shape the dough into a ball and let it rest for 30 minutes.
- Transfer the dough to the hot Dutch oven, cover, and bake for 30 minutes.
- Remove the lid and bake for an additional 15 minutes until golden brown.
- Let the bread cool before slicing.


Leave a Reply