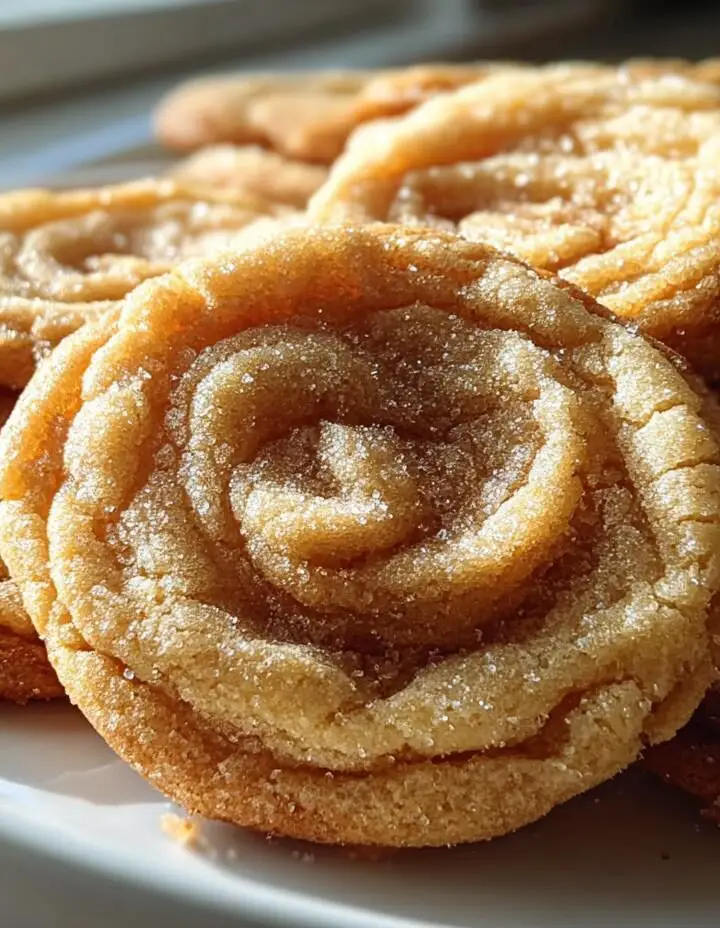
Every holiday season, the smell of freshly baked Cream Cheese Cookies brings back cherished memories of my grandmother's kitchen. As the soft, pillowy cookies baked to a golden hue, I could hardly wait to taste their delightful sweetness. These cookies are not just easy to make; they melt in your mouth, bringing comfort and joy to any gathering. Perfect for sharing, they remind me of love, family, and the simple pleasures that fill our hearts.

What Is Cream Cheese Cookies?
Cream Cheese Cookies are soft, delightful treats that blend the richness of cream cheese with the comforting sweetness of traditional cookies. They're incredibly simple to prepare, making them a favorite for both seasoned bakers and beginners alike. With just a few ingredients, you'll have a batch of cookies perfect for any occasion.
- Prep Time: 20 minutes
- Cook Time: 12 minutes
- Total Time: 32 minutes
- Servings: 24 cookies
Why You'll Love Cream Cheese Cookies
- Quick Preparation: With just 20 minutes of prep time, you can have these cookies ready to bake.
- Simple Ingredients: Only a handful of pantry staples are needed, making it easy to whip them up anytime.
- Beginner-Friendly: The straightforward method ensures that even novice bakers can achieve perfect results.
- Perfect for Any Occasion: Whether it's a holiday gathering or a casual get-together, these cookies are sure to impress.
- Make-Ahead Convenience: You can prepare the dough in advance and bake them fresh when needed, saving time and effort.
Ingredients You'll Need
- ½ lb softened butter - make sure it's at room temperature for easy mixing.
- 4 oz softened cream cheese - this adds richness; don't skip it!
- ½ cup granulated sugar - for that perfect sweet touch.
- 2 cups all-purpose flour - sifted for a lighter texture.
- 1 teaspoon vanilla extract - always use pure vanilla for better flavor.
- For the Frosting:
- 3 tablespoon softened butter - again, room temperature works best.
- 1½ cups powdered sugar - this will give your frosting that delightful sweetness.
- 1-2 tablespoon milk - adjust for your desired frosting consistency.
Feel free to substitute the butter with a dairy-free alternative if needed, and using high-quality vanilla can elevate the flavor of your cookies. Always check the freshness of your baking ingredients for the best results!
Step-by-Step Instructions
Preparing the Ingredients
- Preheat your oven to 350°F (175°C). This will ensure the cookies bake evenly and become perfectly golden brown.
- Gather your mixing bowl and measuring tools. Having everything ready will make the process smooth and enjoyable.
Mixing the Dough
- In your mixing bowl, cream together the softened butter and cream cheese until the mixture is smooth and fluffy. This step is crucial for achieving that soft texture.
- Add in the granulated sugar, flour, and vanilla extract. Mix until everything is well combined and forms a soft dough. It should be slightly sticky but manageable.
Pro Tip: Make sure both the butter and cream cheese are at room temperature; this helps them blend seamlessly together!
Baking the Cookies
- Using a spoon or cookie scoop, drop rounded tablespoons of dough onto a baking sheet lined with parchment paper, spacing them about 2 inches apart.
- Bake in the preheated oven for 10-12 minutes or until the edges are lightly golden. The centers may look soft, but they will firm up as they cool.

Making the Frosting
- While the cookies are cooling, prepare the frosting by beating together the softened butter and powdered sugar in a clean mixing bowl.
- Gradually add the milk until you reach your desired frosting consistency. It should be smooth and spreadable, not too runny.
Frosting the Cookies
- Once the cookies have completely cooled, spread a generous layer of frosting on top of each cookie using a butter knife or offset spatula.
- If you like, add a few drops of food coloring to the frosting for a fun twist, especially for special occasions!
Pro Tip: Allow the frosting to set for a few minutes before serving, so it holds its shape and looks inviting.
Variations
- Add lemon or orange zest for a refreshing citrus twist.
- Incorporate chocolate chips or dried fruit for added texture and flavor.
- Try a gluten-free flour blend to make these cookies gluten-free.
- Top with crushed nuts or sprinkles for a festive touch.
- Substitute the frosting with a simple glaze made from powdered sugar and milk for a lighter option.
Serving and Storage Tips
Serving
These Cream Cheese Cookies are delightful on their own or paired with a hot cup of coffee or tea. For a special touch, serve them on a festive platter at gatherings, or package them as sweet gifts for friends and family. They're sure to be a hit!
Storage
Store leftover cookies in an airtight container at room temperature for up to 5 days. For longer storage, freeze them in a single layer, then transfer to a freezer bag, where they can last up to 3 months. Thaw before serving!
Common Mistakes
- Using cold butter or cream cheese: This can make it difficult to achieve a smooth dough. Always ensure they are at room temperature.
- Baking too long: Overbaking can lead to dry cookies. Keep an eye on them and remove them from the oven when the edges are golden.
- Not measuring ingredients accurately: This can affect the texture. Use proper measuring cups and spoons for best results.
- Frosting while cookies are warm: Frosting can melt and become messy. Wait until cookies are completely cooled before applying frosting.
Helpful Notes
- For a dairy-free version, substitute butter and cream cheese with plant-based alternatives.
- Experiment with different extracts like almond or lemon for unique flavors.
- Add a pinch of salt to the frosting for a delightful contrast to the sweetness.
- Consider using whole wheat flour for a heartier texture and flavor.
Frequently Asked Questions
Can the recipe be frozen?
Yes, you can freeze these Cream Cheese Cookies! Allow them to cool completely, then place them in a single layer on a baking sheet and freeze until firm. Transfer to an airtight container or freezer bag, where they can be stored for up to 3 months. Thaw before serving for the best taste and texture.Can ingredients be substituted?
Absolutely! You can substitute the butter with a dairy-free alternative for a vegan version. If you're out of cream cheese, try using mascarpone or a vegan cream cheese. For a healthier option, whole wheat flour can replace all-purpose flour, although it may alter the texture slightly.How to store leftovers?
Store leftover Cream Cheese Cookies in an airtight container at room temperature for up to 5 days. If you want to keep them fresh longer, you can freeze them as mentioned earlier. Just be sure to let them cool completely before storing to maintain their texture.Can the recipe be made ahead?
Yes, you can definitely make the dough ahead of time! Prepare the dough, wrap it tightly in plastic wrap, and refrigerate for up to 3 days. When ready to bake, simply scoop and bake directly from the fridge.Final Thoughts
I hope you feel inspired to try these Cream Cheese Cookies and share them with your loved ones. They embody the warmth and joy of home baking, perfect for creating new memories around the table. Whether it's a cozy night in or a festive gathering, these cookies are sure to bring smiles and satisfaction. So roll up your sleeves, gather your ingredients, and savor the delightful experience of baking something truly special. Enjoy every bite!

Cream Cheese Cookies
Equipment
- Mixing bowl
- Baking sheet
Ingredients
For the Cookies
- ½ lb butter softened
- 4 oz cream cheese softened
- ½ cup sugar
- 2 cups flour
- 1 teaspoon vanilla extract
For the Frosting
- 3 tablespoon butter
- 1½ cups powdered sugar
- 1-2 tablespoon milk
Instructions
- Preheat your oven to 350°F (175°C).
- In a mixing bowl, cream together the softened butter and cream cheese until smooth. Add the sugar, flour, and vanilla extract, mixing until well combined.
- Drop rounded tablespoons of dough onto a baking sheet. Bake for 10-12 minutes or until the edges are lightly golden.
- For the frosting, beat together the butter, powdered sugar, and milk until smooth. Add food coloring if desired.
- Frost the cooled cookies and enjoy!

Leave a Reply