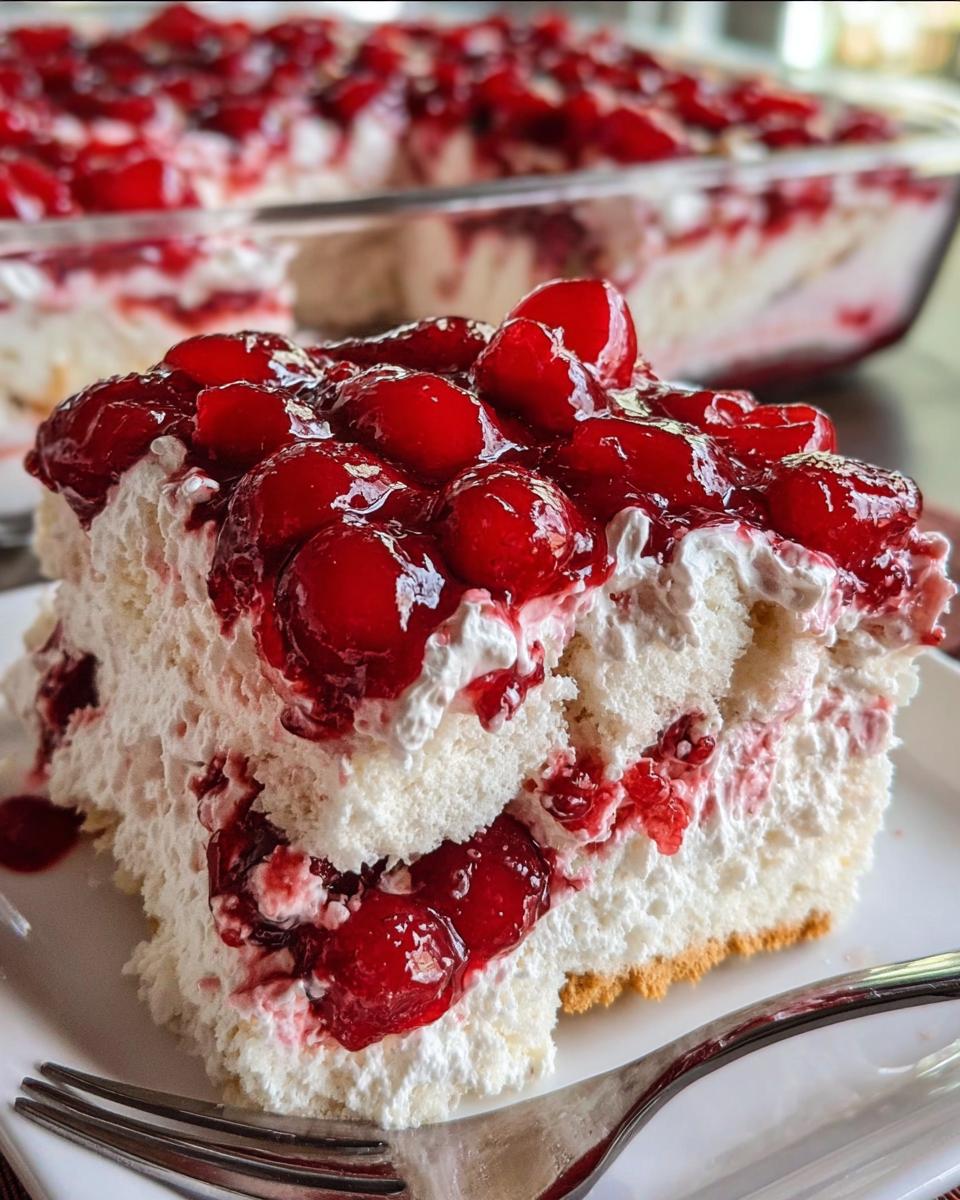
Cherries in the Snow has always held a special place in my heart, a dessert that takes me back to sunny summer picnics in my grandmother's backyard. I can still hear the laughter of my cousins as we raced around, while Grandma would be in the kitchen whipping up this creamy treat. It was her go-to for family gatherings, and I remember the way the sweet cherry topping looked against the fluffy white cream, resembling a snowy landscape. It felt like magic to us kids, and even today, it brings that same sense of joy and nostalgia every time I make it.

This recipe is perfect for any occasion that calls for a little sweetness, whether it's a summer barbecue, holiday gathering, or just a cozy night in. With its quick prep time and minimal ingredients, Cherries in the Snow is a delightful way to create memories, just like I did with my family. It's a dessert that invites everyone to gather around the table and savor the moment, making it a true keeper in my recipe collection.
Why You'll Love "Cherries in the Snow"
- Quick and easy to make with just 15 minutes of prep time.
- Requires minimal ingredients, making it budget-friendly and accessible.
- Perfect for family gatherings, as it serves eight people generously.
- No baking required, so it's a hassle-free dessert option.
- Can be made ahead of time and stored for later, making it ideal for busy days.
- Deliciously creamy and fruity, it's a crowd-pleaser that everyone will love!
Ingredients You'll Need
- 12 oz block-style cream cheese, room temperature for easy blending
- ¾ cup powdered sugar, sifted to avoid lumps
- ⅓ cup whole milk, for that creamy texture
- ½ teaspoon vanilla extract, pure for the best flavor
For the Cream Mixture
- 12 oz block-style cream cheese, make sure it's at room temperature so it blends smoothly
- ¾ cup powdered sugar, sifted to ensure a silky cream
- ⅓ cup whole milk, the creaminess will make all the difference
- ½ teaspoon vanilla extract, because who doesn't love a hint of vanilla?
For the Assembly
- 8 oz whipped topping, thawed to keep it light and fluffy
- 1 pre-baked angel food cake, torn into ¾-1 inch pieces for that perfect texture
- 2 cans cherry pie filling, 21 oz each, for that beautiful and fruity topping
Step-by-Step Instructions
Preheat the Oven
Now, I know what you might be thinking - there's no baking involved! That's right! You don't need to preheat your oven for this recipe. Just gather your mixing bowls and a serving dish, and we're ready to dive in. It's all about the assembly, so make sure your workspace is clean and you have everything you need at hand.
Make the Cream Mixture
- In a mixing bowl, add the 12 oz of room temperature cream cheese. Make sure it's soft enough to blend easily!
- Next, sprinkle in ¾ cup of sifted powdered sugar. This will sweeten our cream mixture and make it wonderfully smooth.
- Pour in ⅓ cup of whole milk. This is where the creaminess comes from, so don't skip it!
- Add ½ teaspoon of vanilla extract for that lovely flavor. Trust me, it makes a world of difference!
- Using a hand mixer or a sturdy whisk, blend all the ingredients together until the mixture is completely smooth and creamy. You want it to be light and airy, so take your time!
Assemble the Dessert
- Grab your serving dish and start layering! Begin by placing the torn pieces of angel food cake in the bottom of the dish. Don't worry about making it perfect; a little rustic charm is what we're after!
- Next, spoon the cherry pie filling generously over the cake pieces. Make sure to spread it out evenly so every bite has that sweet cherry goodness!
- Now, it's time to spread that creamy mixture you just made on top of the cherries. Use a spatula to ensure it covers everything nicely.
- Lastly, you can add a few more cherries on top if you like, just to make it extra pretty! It's like a cherry crown on top of a snow-white dessert.
- For the best flavor, chill the assembled dessert in the fridge for at least an hour before serving. This allows all the flavors to meld together beautifully!
Variations
- For a tropical twist, substitute cherry pie filling with crushed pineapple and add shredded coconut to the cream mixture.
- Try using lemon or lime zest in the cream for a refreshing citrus flavor.
- Make it gluten-free by using a gluten-free angel food cake.
- For a lighter version, opt for low-fat cream cheese and reduced-fat whipped topping.
- Add chopped nuts like walnuts or pecans for a delightful crunch.
Serving and Storage Tips
Serving
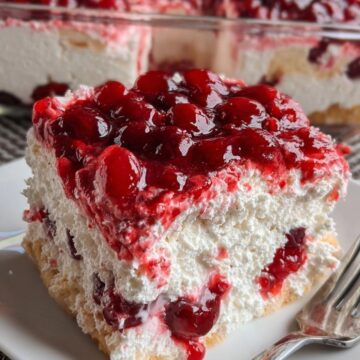
Serve Cherries in the Snow chilled for the best flavor. Scoop it into bowls and top with a dollop of whipped cream for an extra touch of indulgence. Garnish with a few fresh cherries on top to enhance that beautiful presentation. It's a dessert that not only tastes great but looks stunning too!
Storage
Store any leftovers covered in the refrigerator for up to 3 days to maintain freshness. Avoid freezing, as the cream mixture may change texture. If you need to keep it longer, consider making it fresh for your next gathering!
Helpful Notes
- For a dairy-free option, use vegan cream cheese and a dairy-free whipped topping.
- Feel free to swap out the whipped topping for homemade whipped cream if you prefer.
- You can use fresh cherries if they're in season, just make sure to pit and chop them.
- If you want a more indulgent version, add a layer of chocolate sauce between the cake and cherries.
- Remember to let the dessert chill for a couple of hours for the best flavor blending!
Frequently Asked Questions
Can "Cherries in the Snow" be frozen?
You really shouldn't freeze this dessert. The cream mixture may change in texture and become grainy once thawed. It's best enjoyed fresh, but you can store it in the fridge for up to three days!
How can I substitute the cream cheese?
If you're looking for a substitute, you can use mascarpone cheese for a richer flavor, or even Greek yogurt for a lighter option. Just keep in mind that it may alter the taste a bit.
What can I use instead of cherry pie filling?
If you want to switch things up, you can use other fruit pie fillings like blueberry or peach. Alternatively, fresh fruit mixed with a little sugar can also work beautifully!
Final Thoughts
Cherries in the Snow is more than just a dessert; it's a way to create lasting memories and share joy with those you love. I hope you give this recipe a try and bring a slice of that nostalgia into your own home. Remember, cooking should be fun and full of laughter, so don't sweat the small stuff! Whether it's a family gathering or a simple weeknight treat, this dessert is sure to delight. So gather your ingredients, roll up your sleeves, and let's make some delicious memories together. Happy cooking!
Cherries in the Snow
Equipment
- Mixing bowl
- Serving dish
Ingredients
For the Cream Mixture
- 12 oz block-style cream cheese room temperature
- ¾ cup powdered sugar sifted
- ⅓ cup whole milk
- ½ teaspoon vanilla extract
For the Assembly
- 8 oz whipped topping thawed
- 1 each pre-baked angel food cake torn into ¾-1 inch pieces
- 2 cans cherry pie filling 21 oz each
Instructions
- In a mixing bowl, blend cream cheese, powdered sugar, whole milk, and vanilla extract until smooth.
- Fold in the whipped topping until combined. Layer the torn angel food cake pieces in a serving dish, spoon the cherry pie filling over the cake, and spread the cream mixture on top.

Leave a Reply