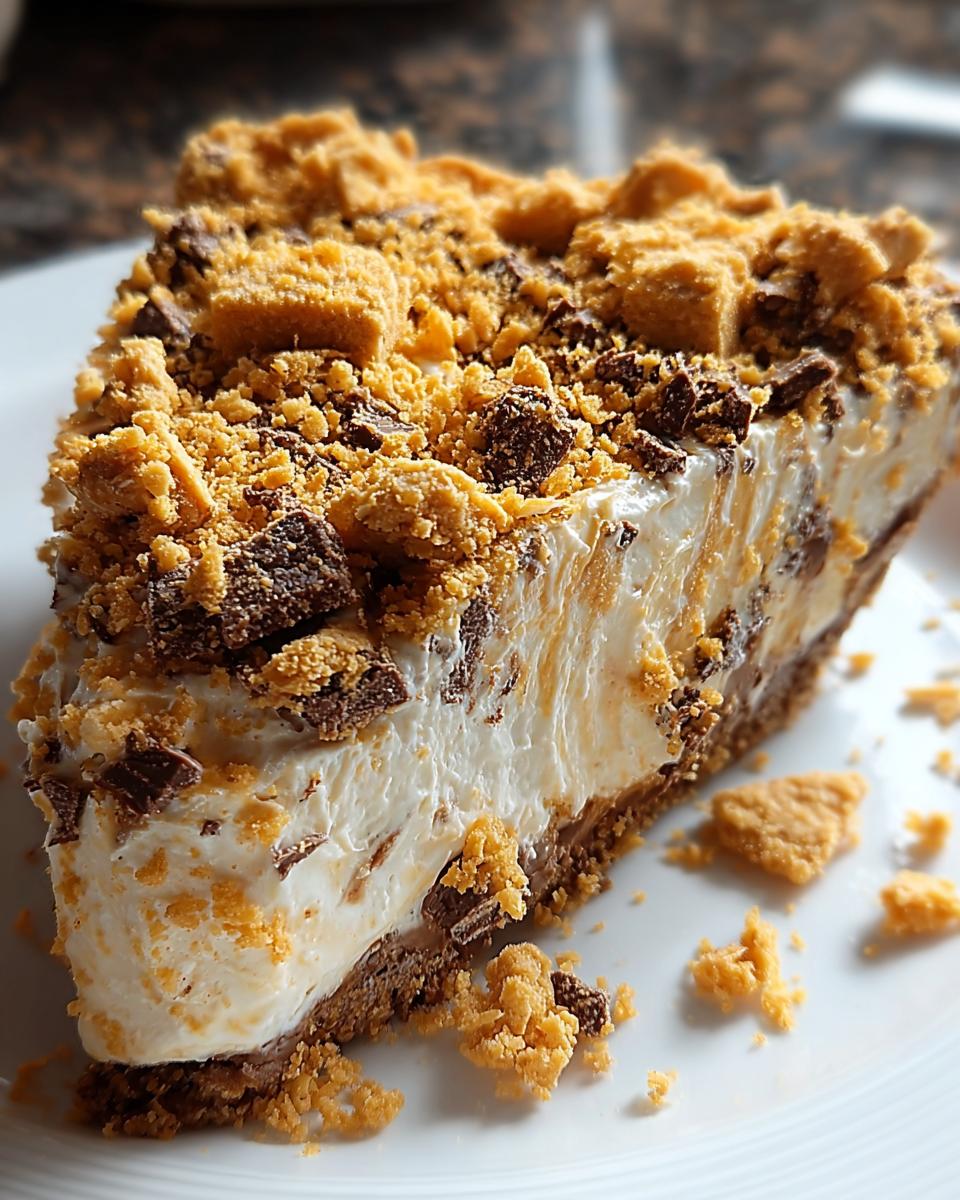
I still remember the first time I tasted Butterfinger pie at my cousin's birthday party. One bite of that creamy, crunchy, peanut buttery goodness and I was hooked! It's the perfect no-bake dessert - rich enough to feel indulgent but easy enough to whip up when you need something quick and impressive.

What makes this Butterfinger pie so special is how the flavors and textures play off each other. The smooth cream cheese and peanut butter filling contrasts beautifully with those crispy Butterfinger bits. And that chocolatey crust? Absolute perfection. It's become my go-to dessert for potlucks, family gatherings, and those nights when I just need a little something sweet (okay, who am I kidding - a big something sweet!).
Why You'll Love This Butterfinger Pie
This pie is a total crowd-pleaser for so many reasons:
- No baking required - Just mix, pour, and chill! Perfect for hot summer days when you don't want to turn on the oven.
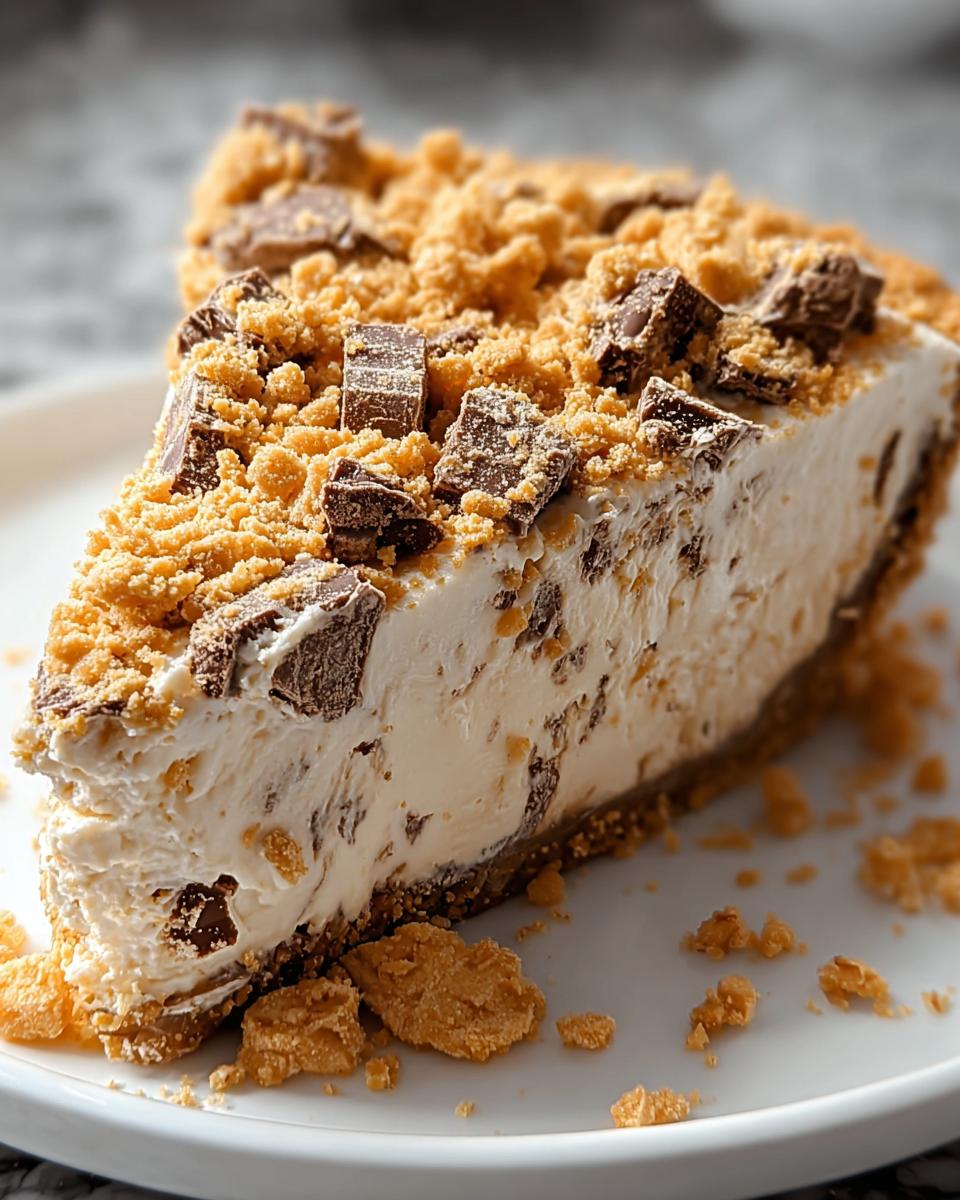
- Creamy meets crunchy - That velvety peanut butter filling paired with crispy Butterfinger bits? Pure magic.
- Nostalgia in every bite - Tastes just like those Butterfinger candy bars you loved as a kid (but better!).
- Party perfect - Always disappears fast at potlucks and family gatherings.
- Foolproof - Even beginner bakers can nail this one.
Ingredients for Butterfinger Pie
Here's everything you'll need to make this dreamy Butterfinger pie. Trust me, I've made this so many times I could probably recite the ingredients in my sleep! The beauty of this recipe is that most items are pantry staples or easy to find at any grocery store.
Filling Ingredients
- 1 (8-ounce) package cream cheese - Must be at room temperature! Cold cream cheese will leave lumps in your filling, and nobody wants that.
- ½ cup creamy peanut butter - I use Jif or Skippy for that classic nostalgic taste, but any smooth peanut butter works.
- 2 teaspoons vanilla extract - The real stuff, not imitation! It makes a difference in flavor.
- 1½ cups powdered sugar - Sift it if yours is clumpy for the smoothest filling.
- 1 (12.5-ounce) bag fun-sized Butterfinger bars, crushed (save 2 for topping) - Pro tip: crush them in the bag to minimize mess!
- 1 (8-ounce) container Cool Whip, thawed - Don't use frozen or it'll be lumpy.
Crust Ingredients
- 1 store-bought Oreo or chocolate graham cracker crust - The 6-ounce size is perfect. Yes, we're taking the easy route here - it works perfectly!
See? Simple ingredients for something that tastes like you spent hours in the kitchen. Now let's put it all together!
How to Make Butterfinger Pie
Alright, let's get to the fun part - making this heavenly Butterfinger pie! I promise it's easier than you think, and the hardest part will be waiting for it to chill. Follow these simple steps, and you'll have a dessert that'll make everyone think you're a baking genius.
Step 1: Prepare the Filling
First things first - grab that room temperature cream cheese (I told you that was important!). Throw it in your mixing bowl with the peanut butter and vanilla. Use your electric mixer on medium speed and beat until it's completely smooth - about 1-2 minutes should do it. Scrape down the sides with your spatula to make sure everything gets incorporated. Now slowly add the powdered sugar while mixing on low speed. You don't want a powdered sugar explosion all over your kitchen (been there, done that)! Keep mixing until it's silky and well combined.
Step 2: Add the Crunch
Here comes the best part - the Butterfingers! Take about 10 of those fun-sized bars (remember to save 2 for later) and crush them up. I like to put them in a plastic bag and whack them with a rolling pin (great stress relief!). Fold about ¾ of the crushed Butterfingers into your creamy mixture gently - we want to keep some of that wonderful crunch. Then, add the thawed Cool Whip and fold it in until just combined. Don't overmix or your filling will lose its fluffiness!
Step 3: Chill and Serve
Spoon that beautiful mixture into your crust and smooth out the top. Now take those reserved Butterfinger bars, crush them up, and sprinkle them over the top for that perfect finishing touch. Pop it in the fridge for at least 2 hours - 4 if you can wait that long! The longer it chills, the firmer and more sliceable your Butterfinger pie will be. When you're ready to serve, slice it up and watch everyone's eyes light up with that first bite!
Tips for the Perfect Butterfinger Pie
After making this Butterfinger pie more times than I can count (seriously, my friends keep requesting it!), I've picked up some tricks to make it absolutely foolproof. These little tips take it from good to "Oh my gosh, can I have the recipe?" territory.
Use full-fat cream cheese
I know it's tempting to grab the reduced-fat stuff, but trust me on this - full-fat cream cheese gives your Butterfinger pie that dreamy, rich texture we're all craving. The low-fat versions can make your filling watery and sad.
Crush those Butterfingers just right
You want some bigger chunks for texture but mostly small pieces that distribute evenly. I put mine in a ziplock bag and roll them with a rolling pin until I've got a mix of sizes. Pro tip: crush them frozen - they break up cleaner!
Don't skimp on chilling time
I know it's hard to wait, but that 2-hour minimum chill is non-negotiable. If you cut into your Butterfinger pie too soon, it'll be a delicious mess (ask me how I know). For perfect slices, I actually prefer making it the night before.
Fold gently to keep it fluffy
When adding the Cool Whip and Butterfinger bits, use a spatula and fold like you're turning pages in a book. Rough mixing will deflate all that airy goodness we worked so hard to create!
Butterfinger Pie Variations
One of my favorite things about this Butterfinger pie recipe is how easily you can mix it up! After making the classic version about a million times (okay, maybe a slight exaggeration), I started playing around with different twists. Here are my go-to variations when I'm feeling adventurous:
Reese's Pieces Twist
Sometimes I swap out the Butterfingers for crushed Reese's Pieces or peanut butter cups. The peanut butter flavor gets even more intense, and those little candy shells add a fun pop of color. Just be warned - this version disappears even faster than the original at parties!
Homemade Oreo Crust
While the store-bought crust is super convenient, making your own is surprisingly easy. I pulse about 20 Oreos (filling included) in the food processor with 5 tablespoons of melted butter, then press it into the pie dish. Bake at 350°F for 8 minutes to set it. The extra chocolatey crunch takes this Butterfinger pie to another level.
Chocolate Drizzle Upgrade
When I really want to impress guests, I melt some chocolate chips with a bit of coconut oil and drizzle it over the top before adding the final Butterfinger sprinkles. It looks fancy but takes just minutes - my kind of upgrade! Dark chocolate works beautifully with the sweet filling.
The best part? You can mix and match these ideas or come up with your own spin. That's the beauty of a great recipe - it becomes a canvas for your creativity!
Serving and Storing Butterfinger Pie
Now for the best part - enjoying your masterpiece! This Butterfinger pie is delicious straight from the fridge, but I've got some serving tricks that'll make it even more special. And don't worry - if (by some miracle) there are leftovers, I'll tell you exactly how to keep them tasting fresh.
How to Serve It Like a Pro
I love serving this pie with an extra dollop of whipped cream on each slice - it makes it feel extra decadent. For parties, I'll sometimes sprinkle a few mini chocolate chips around the plate for a pretty presentation. If you're feeling fancy, a drizzle of caramel sauce pairs amazingly with all those peanut butter and chocolate flavors. Pro tip: let the pie sit at room temperature for about 10 minutes before slicing - it makes for cleaner cuts through that creamy filling!
Keeping It Fresh
This Butterfinger pie stores beautifully in the fridge for up to 3 days (though it rarely lasts that long in my house!). Just cover it tightly with plastic wrap or transfer slices to an airtight container. The crust might soften slightly by day 3, but the flavor only gets better as the Butterfinger bits soften into the filling. One warning - don't freeze it! The texture of the filling changes and becomes grainy when thawed.
Fun fact: I once "hid" a slice in the back of the fridge behind the milk carton so I'd have a secret midnight snack. Best decision ever - it was waiting for me after a long day, still perfectly creamy and delicious. Not that I'm suggesting you do the same... or am I?
Butterfinger Pie FAQs
After making this Butterfinger pie for years (and fielding endless questions from friends and family), I've heard it all! Here are the answers to the most common questions that pop up about this irresistible dessert.
Can I use natural peanut butter in this recipe?
I'd recommend sticking with regular creamy peanut butter (like Jif or Skippy) for this Butterfinger pie. Natural peanut butter tends to separate and can make the filling too oily. If natural is all you have, give it a really good stir before measuring and be prepared for a slightly different texture.
How do I prevent a soggy crust?
The secret is all in the timing! Don't fill the crust until you're ready to refrigerate the pie. If it sits at room temperature too long before chilling, the moisture from the filling can soften the crust. Also, make sure your filling is well chilled before serving - a firmer filling puts less pressure on the crust when slicing.
Can I make this Butterfinger pie ahead of time?
Absolutely! In fact, I think it tastes even better the next day. You can assemble the whole pie up to 24 hours before serving. Just wait to add the final Butterfinger topping until about an hour before serving so it stays nice and crunchy.
What if I can't find fun-sized Butterfingers?
No worries! You can use regular-sized Butterfinger bars instead - just crush them up to get about 1½ cups total. The baking aisle usually has Butterfinger baking bits too, which work perfectly in a pinch (though I do miss the fun of crushing those candy bars!).
Why does my filling seem runny?
Usually this means either the cream cheese wasn't at room temperature (cold cream cheese doesn't incorporate well) or the pie needs more chill time. If it's still too soft after proper chilling, try adding an extra ¼ cup of powdered sugar next time - different brands of cream cheese can vary in moisture content.
Nutritional Information
Okay, let's be real - we're not eating Butterfinger pie because it's health food! But if you're curious about what you're indulging in (or need to plan your portions), here's a general idea of what's in each glorious slice:
- Calories: About 450 per slice (but totally worth it!)
- Fat: 25g (that creamy filling packs a punch)
- Carbs: 50g (hello, powdered sugar and Butterfinger goodness)
- Protein: 7g (thank you, peanut butter!)
Remember, these numbers can change based on the specific brands you use and how generous you are with those Butterfinger toppings. I've found that using reduced-fat cream cheese or sugar-free Cool Whip can lower the numbers slightly, but honestly? I say go for the full-fat experience when it comes to this pie - life's too short!
Important note: Nutritional values vary based on ingredients used. This is an estimate and not a substitute for professional dietary advice. But hey, sometimes you just need to enjoy a slice (or two) of pure happiness!
Butterfinger Pie
Equipment
- Mixing bowl
- electric mixer
- Spatula
Ingredients
Filling
- 1 8-ounce package cream cheese, room temperature
- ½ cup creamy peanut butter
- 2 teaspoons vanilla extract
- 1 ½ cups powdered sugar
- 1 12.5-ounce bag fun-sized Butterfinger bars, crushed reserve 2 bars to sprinkle on top
- 1 8-ounce container Cool Whip, thawed
Crust
- 1 store-bought Oreo or chocolate graham cracker crust
Instructions
- In a large bowl, beat the cream cheese, peanut butter, and vanilla extract until smooth.
- Gradually add the powdered sugar and mix until fully combined.
- Fold in the crushed Butterfinger bars and Cool Whip until evenly distributed.
- Spoon the mixture into the crust and smooth the top.
- Sprinkle the reserved crushed Butterfinger bars on top.
- Refrigerate for at least 2 hours before serving.


Leave a Reply