Every holiday season, my kitchen transforms into a cozy haven, filled with the warm, sweet aromas of baking. One of my absolute favorite treats to whip up is my Winter Wonderland Chocolate Chip Cookies. I can still remember the first time I baked them with my mom, our hands dusted with flour and laughter filling the air. It was a delightful mess, and the cookies turned out to be the star of our family gatherings, each bite a little piece of joy.

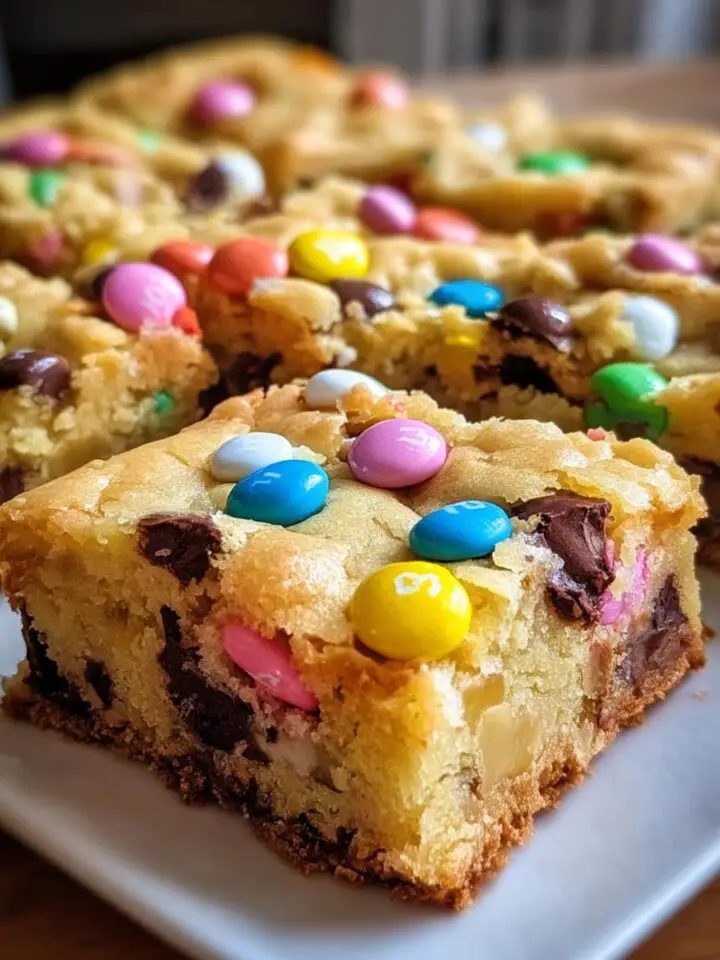
These cookies are more than just a dessert; they're a celebration of the season, perfect for sharing with friends and family. The combination of rich chocolate, festive sprinkles, and a hint of peppermint from crushed candy canes makes them a true representation of winter magic. Whether you're gathering around the table with loved ones or enjoying a quiet evening by the fire, these Winter Wonderland Chocolate Chip Cookies are bound to create sweet memories.
Why You'll Love "Winter Wonderland Chocolate Chip Cookies"
- Quick prep time of just 15 minutes, perfect for busy holiday schedules.
- Only requires simple ingredients that you likely already have on hand.
- Family-friendly recipe that everyone will love, from kids to grandparents.
- Freezer-friendly dough allows you to bake fresh cookies whenever the craving hits.
- Festive and colorful, making them a delightful addition to any holiday gathering.
- Versatile enough to customize with your favorite mix-ins or sprinkles.
Ingredients You'll Need
- 1 cup unsalted butter, softened (room temperature is crucial here)
- 1 cup granulated sugar
- 1 cup brown sugar, packed tight
- 2 large eggs (room temperature for the best results)
- 1 tablespoon pure vanilla extract (don't skimp on quality; it makes a difference!)
- 3 cups all-purpose flour
- 1 teaspoon baking soda
- ½ teaspoon baking powder
- 1 teaspoon salt (I know the original recipe said ½, but trust me on this)
- ¼ teaspoon ground cinnamon (secret weapon alert!)
- 1 cup white chocolate chips
- 1 cup dark chocolate chips (or semi-sweet if you prefer)
- ¾ cup holiday sprinkles (look for red, green, and white)
- ½ cup crushed candy canes (optional but amazing for that festive touch)
Step-by-Step Instructions
Preheat the Oven
- Preheat your oven to 350°F (175°C). This step is crucial for getting those cookies perfectly baked and golden on the edges!
Make the Cookie Base
- In a mixing bowl, cream together the softened butter, granulated sugar, and brown sugar until smooth. You want it to be light and fluffy, which takes about 2-3 minutes of mixing.
Add Eggs and Vanilla
- Add the eggs and vanilla extract to the mixture, mixing until well combined. Scrape down the sides of the bowl to make sure everything is incorporated.
Combine Dry Ingredients
- In another bowl, whisk together the flour, baking soda, baking powder, salt, and ground cinnamon. This helps to evenly distribute the leavening agents and spices, ensuring every bite is delicious!
Mix Wet and Dry Ingredients
- Gradually add the dry ingredients to the wet ingredients, mixing until just combined. Don't overdo it - you want a nice, soft dough to form!
Fold in the Fun Stuff
- Now for the fun part! Fold in the white chocolate chips, dark chocolate chips, holiday sprinkles, and crushed candy canes if you're using them. Get ready for a festive explosion of flavors and colors!
Scoop and Bake
- Drop spoonfuls of dough onto a baking sheet lined with parchment paper. Make sure to leave some space between each cookie, as they will spread a little while baking.
- Bake for 10-12 minutes or until the edges are lightly golden. Keep an eye on them - you want the centers to be soft and a little gooey!
Cool and Enjoy
- Allow the cookies to cool on the baking sheet for a few minutes before transferring them to a wire rack to cool completely. This part is crucial for achieving that perfect texture!
Variations
- Swap out the white chocolate chips for butterscotch or peanut butter chips for a different flavor profile.
- Use crushed Oreos instead of candy canes for a cookies-and-cream twist.
- For a gluten-free version, substitute the all-purpose flour with a 1:1 gluten-free baking blend.
- Add a teaspoon of peppermint extract for an extra minty kick.
- Try using coconut oil instead of butter for a dairy-free option.
Serving and Storage Tips
Serving
These cookies are best served warm, right out of the oven, but they're also delightful at room temperature. Consider stacking them in a festive tin or on a decorative plate for holiday gatherings. A drizzle of melted chocolate on top adds an extra touch of decadence!
Storage
Store cookies in an airtight container at room temperature for up to a week to keep them soft and fresh. You can also freeze the dough for up to three months, ready to bake whenever a cookie craving strikes!
Helpful Notes
- If you don't have unsalted butter, you can use salted butter and reduce the added salt slightly.
- Feel free to replace brown sugar with coconut sugar for a lighter taste.
- For nut allergies, skip any nut-based add-ins or toppings.
- Adding a pinch of sea salt on top before baking enhances the flavor beautifully.
- These cookies are perfect for holiday gifting - just wrap them in pretty cellophane!
Frequently Asked Questions
Can I freeze the cookie dough?
Yes, you can freeze the cookie dough! Just scoop the dough into balls and place them on a baking sheet to freeze individually. Once frozen, transfer them to an airtight container or zip-top bag. They'll last for up to three months in the freezer. When you're ready to bake, just pop them straight into the oven without thawing - add a minute or two to the baking time.
What can I substitute for white chocolate chips?
If you're not a fan of white chocolate chips, you can easily substitute them with butterscotch chips, peanut butter chips, or even additional dark chocolate chips. Each option brings a unique flavor twist to your Winter Wonderland Chocolate Chip Cookies!
How long do the cookies last?
These cookies will stay fresh in an airtight container at room temperature for about a week. If you want to keep them longer, you can freeze the baked cookies for up to three months. Just make sure they're completely cooled before freezing to maintain their texture!
Final Thoughts
As the holiday season approaches, there's nothing quite like the joy of baking together and sharing treats with loved ones. I truly hope you give these Winter Wonderland Chocolate Chip Cookies a try! They are sure to bring smiles and warmth to your gatherings, just like they do in my home. Remember, cooking is all about having fun and creating memories, so don't stress if things get a little messy. Enjoy the process, savor the flavors, and watch as these cookies become a cherished tradition in your family too. Happy baking!

Winter Wonderland Chocolate Chip Cookies
Equipment
- Mixing bowl
- Baking sheet
Ingredients
The Base
- 1 cup unsalted butter, softened room temp is crucial here
- 1 cup granulated sugar
- 1 cup brown sugar, packed tight
- 2 large eggs room temperature
- 1 tablespoon pure vanilla extract don't skimp on quality
The Dry Team
- 3 cups all-purpose flour
- 1 teaspoon baking soda
- ½ teaspoon baking powder
- 1 teaspoon salt I know the original said ½, but trust me on this
- ¼ teaspoon ground cinnamon secret weapon alert!
The Fun Stuff
- 1 cup white chocolate chips
- 1 cup dark chocolate chips or semi-sweet if you prefer
- ¾ cup holiday sprinkles red, green, and white
- ½ cup crushed candy canes optional but amazing
Instructions
- Preheat your oven to 350°F (175°C).
- In a mixing bowl, cream together the softened butter, granulated sugar, and brown sugar until smooth.
- Add the eggs and vanilla extract, mixing until well combined.
- In another bowl, whisk together the flour, baking soda, baking powder, salt, and ground cinnamon.
- Gradually add the dry ingredients to the wet ingredients, mixing until just combined.
- Fold in the white chocolate chips, dark chocolate chips, holiday sprinkles, and crushed candy canes if using.
- Drop spoonfuls of dough onto a baking sheet lined with parchment paper.
- Bake for 10-12 minutes or until the edges are lightly golden.
- Allow to cool on the baking sheet for a few minutes before transferring to a wire rack to cool completely.

Leave a Reply