Growing up, the sweet aroma of Lunch Lady Peanut Butter Bars wafting through the kitchen always signaled a special treat for us kids after school. With their chewy texture and rich peanut butter flavor, these bars are a nostalgic reminder of simpler times and gatherings filled with laughter. Each bite is comforting, evoking memories of family and warmth. They're easy to make and even easier to love, making them the perfect addition to any cozy evening or festive occasion.

What Is Lunch Lady Peanut Butter Bars?
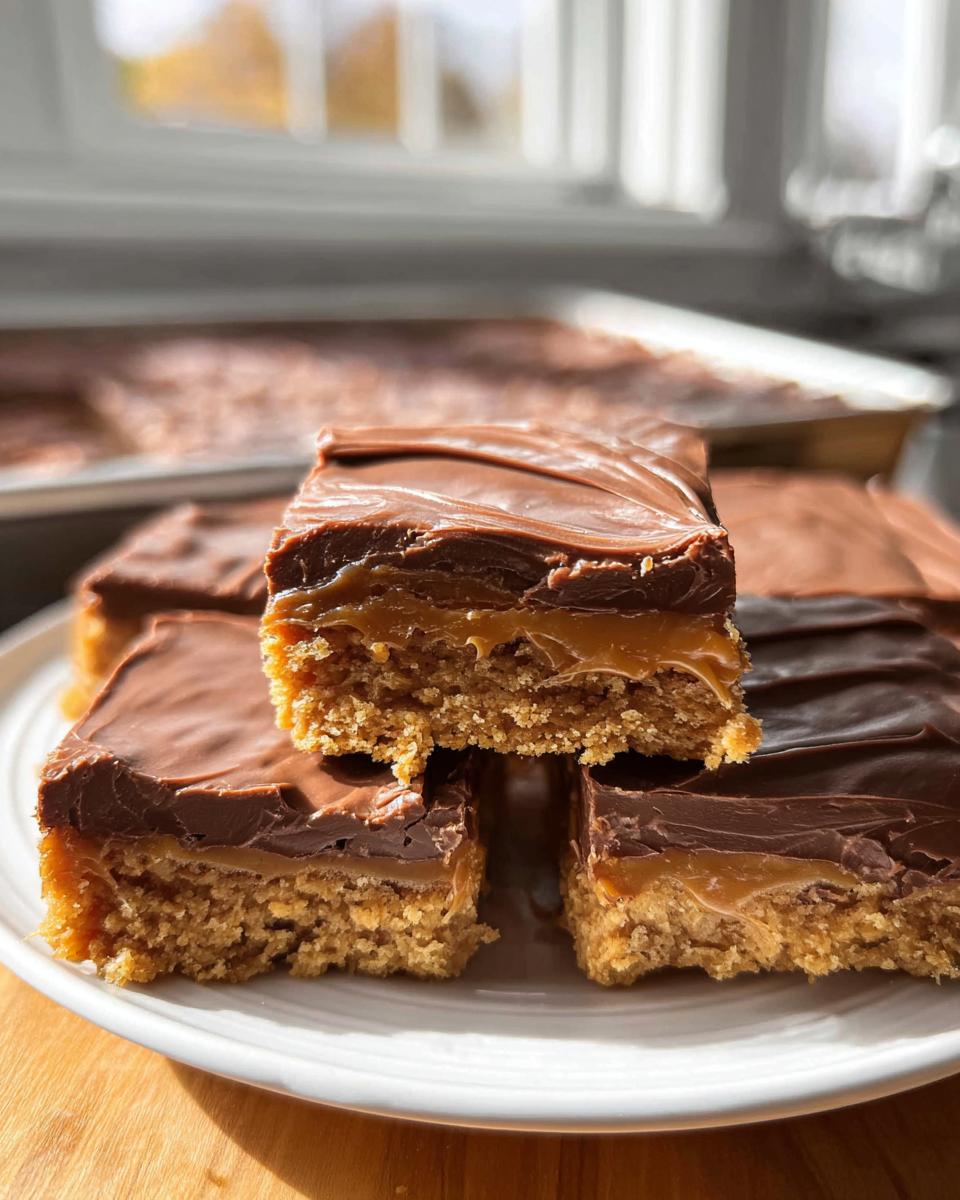
Lunch Lady Peanut Butter Bars are a delightful dessert that combines creamy peanut butter with a chewy oat base, topped with a rich chocolate frosting. They are perfect for satisfying your sweet tooth and are incredibly easy to make, making them a beloved treat for families.
- Prep Time: 20 minutes
- Cook Time: 30 minutes
- Total Time: 50 minutes
- Servings: 12 bars
Why You'll Love Lunch Lady Peanut Butter Bars
- Quick preparation: These bars come together in just 20 minutes, making them perfect for last-minute dessert cravings.
- Simple ingredients: With pantry staples like peanut butter, oats, and sugars, you can whip these up anytime.
- Beginner-friendly: Even novice bakers can easily follow the straightforward steps to create these delicious bars.
- Perfect for gatherings: Their rich flavor and chewy texture make them a hit at any holiday or family event.
- Make-ahead convenience: Prepare them in advance, and they'll stay fresh for days, ready for a sweet snack whenever you desire.
Ingredients You'll Need
- For the Bars:
- 1 cup salted butter, softened
- 1 cup granulated sugar
- 1 cup packed light brown sugar
- 2 ½ cups creamy peanut butter, divided
- 2 large eggs
- 2 teaspoons vanilla extract
- 2 cups all-purpose flour, scooped & leveled
- 2 cups old-fashioned oats
- 1 teaspoon baking soda
- 1 teaspoon salt
- For the Frosting:
- ½ cup salted butter, softened
- 3 cups powdered sugar
- 4 tablespoons cocoa powder
- ¼ cup milk
- 2 teaspoons vanilla extract
For a healthier twist, consider using natural peanut butter or substituting half of the granulated sugar with honey. Always choose high-quality ingredients for the best flavor and texture. If you're looking for a nut-free option, sunflower seed butter works wonderfully in place of peanut butter!
Step-by-Step Instructions
Preparing Ingredients
- Preheat your oven to 350°F (175°C) and grease a 9x13 inch baking pan.
- Gather all your ingredients and measure them out for easy mixing.
Mixing the Batter
- In a large mixing bowl, cream together the softened butter, granulated sugar, and brown sugar until the mixture is smooth and fluffy.
- Add in 2 ½ cups of creamy peanut butter, eggs, and vanilla extract. Mix until everything is well combined and creamy.
- Gradually add in the scooped and leveled flour, oats, baking soda, and salt. Stir until just combined, being careful not to overmix.
Pro Tip: Use a spatula to scrape down the sides of the bowl to ensure all ingredients are mixed evenly.
Baking the Bars
- Spread the batter evenly into the prepared baking pan, smoothing the top with a spatula.
- Bake in the preheated oven for 30 minutes, or until the bars are golden brown and a toothpick inserted into the center comes out clean.
Preparing the Frosting
- While the bars cool, prepare the frosting by beating together the softened butter, powdered sugar, cocoa powder, milk, and vanilla extract in a mixing bowl.
- Continue mixing until the frosting is smooth and creamy, ensuring there are no lumps.
Finishing Touches
- Once the bars have cooled completely, spread the chocolate frosting generously over the top.
- Cut the bars into squares or rectangles, and serve them up for a delightful treat!
Variations
- Add chocolate chips or chopped nuts for extra texture and flavor.
- Try using almond butter or cashew butter for a different nutty taste.
- Top with sliced bananas or strawberries for a fresh, fruity twist.
- Make them gluten-free by substituting with gluten-free flour and oats.
- Use a cream cheese frosting instead of chocolate for a tangy contrast.
Serving and Storage Tips
Serving
These Lunch Lady Peanut Butter Bars are best served slightly chilled or at room temperature. Pair them with a glass of cold milk or a scoop of vanilla ice cream for a delightful treat. They make a perfect snack for after school or a sweet addition to any gathering.
Storage
Store the bars in an airtight container at room temperature for up to 5 days. For longer storage, freeze them in a single layer, then transfer to a freezer-safe container for up to 3 months. Thaw at room temperature before serving.
Common Mistakes
- Not softening the butter: Make sure your butter is softened to room temperature for easier mixing.
- Overmixing the batter: Mix just until combined to keep the bars from becoming tough.
- Baking too long: Check the bars a few minutes early; they should be golden brown and firm to the touch.
- Not cooling before frosting: Allow the bars to cool completely to prevent the frosting from melting.
Helpful Notes
- For a richer flavor, consider adding a pinch of cinnamon to the batter.
- If you're allergic to nuts, sunflower seed butter is a great alternative.
- Feel free to add in mini chocolate chips or dried fruit for extra sweetness and texture.
- For a lower sugar option, use a sugar substitute that measures like sugar.
Frequently Asked Questions
Can the recipe be frozen?
Yes, these Lunch Lady Peanut Butter Bars can be frozen! Once they are completely cooled, wrap them tightly in plastic wrap or aluminum foil, and place them in a freezer-safe container. They can be stored in the freezer for up to 3 months.Can ingredients be substituted?
Absolutely! You can substitute the creamy peanut butter with almond or sunflower seed butter for a different flavor or a nut-free option. Additionally, you can replace the granulated sugar with honey or maple syrup, adjusting the quantity as needed.How to store leftovers?
Store any leftover bars in an airtight container at room temperature for up to 5 days. If you prefer them cold, you can refrigerate them, but allow them to come to room temperature before serving for the best texture.Can the recipe be made ahead?
Yes, you can make these bars ahead of time! They stay fresh for several days and are perfect for preparing in advance for parties, gatherings, or even as a sweet snack throughout the week. Just be sure to frost them just before serving for the best flavor.Final Thoughts
There's something truly special about sharing Lunch Lady Peanut Butter Bars with family and friends. I hope you give this recipe a try and create your own sweet memories in the kitchen. Whether you enjoy them after school, at a gathering, or simply as an afternoon treat, these bars are sure to bring smiles all around. So roll up your sleeves, embrace the warmth of baking, and enjoy each delicious bite together. Happy baking!
Lunch Lady Peanut Butter Bars
Equipment
- Mixing bowl
- baking pan
Ingredients
For the Bars
- 1 cup salted butter softened
- 1 cup granulated sugar
- 1 cup packed light brown sugar
- 2 ½ cups creamy peanut butter divided
- 2 large eggs
- 2 teaspoons vanilla extract
- 2 cups all-purpose flour scooped & leveled
- 2 cups old-fashioned oats
- 1 teaspoon baking soda
- 1 teaspoon salt
For the Frosting
- ½ cup salted butter softened
- 3 cups powdered sugar
- 4 Tablespoons cocoa powder
- ¼ cup milk
- 2 teaspoons vanilla extract
Instructions
- Preheat your oven to 350°F (175°C) and grease a baking pan.
- In a large mixing bowl, cream together the butter, granulated sugar, and brown sugar until smooth. Add the peanut butter, eggs, and vanilla extract, mixing until well combined.
- Gradually mix in the flour, oats, baking soda, and salt until just combined.
- Spread the mixture evenly in the prepared baking pan and bake for 30 minutes or until golden brown.
- While the bars cool, prepare the frosting by beating together the softened butter, powdered sugar, cocoa powder, milk, and vanilla extract until smooth.
- Once the bars are cool, spread the frosting over the top and cut into squares.


Leave a Reply