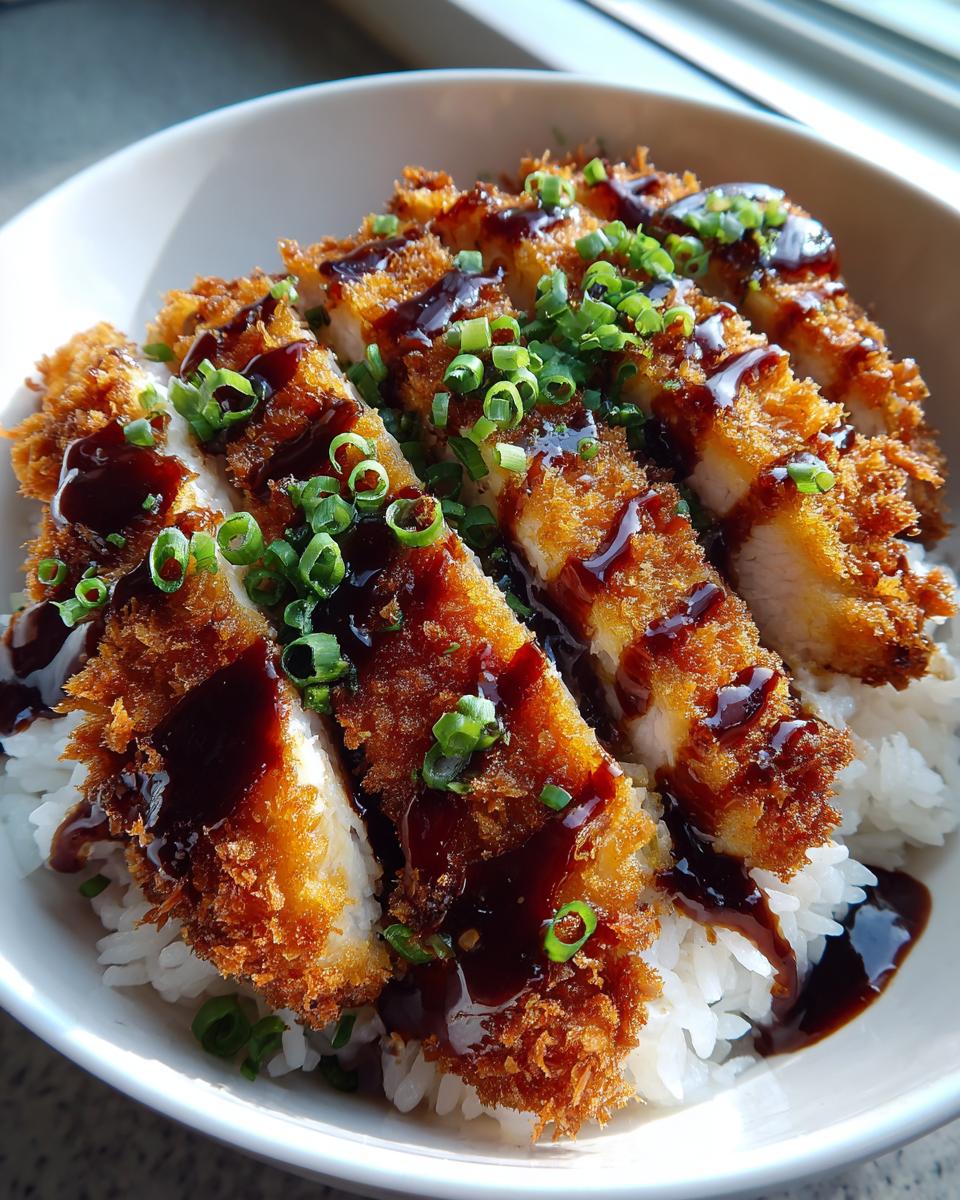
You know that perfect bite-the crispy crunch giving way to juicy meat, all coated in that rich, tangy-sweet tonkatsu sauce? That's exactly what I fell in love with at a tiny Tokyo eatery years ago. Now I make these Japanese Katsu Bowls at home whenever I need a taste of that magic. The secret? That golden panko crust and the way the sauce clings to every bite.

What makes this dish special is how simple ingredients transform into something extraordinary. My version stays true to traditional Japanese flavors while keeping it weeknight-friendly. Whether you use chicken or pork, that satisfying crunch paired with fluffy rice will have everyone at your table reaching for seconds-just like mine does!
Why You'll Love These Japanese Katsu Bowls
Trust me, once you try this recipe, you'll be hooked. Here's why:
- Crazy crispy: That golden panko crust stays perfectly crunchy, even with the sauce drizzled on top.
- Weeknight magic: From pantry to plate in 30 minutes - faster than takeout!
- Flavor bomb: The tangy-sweet tonkatsu sauce is seriously addictive.
- Customizable: Use chicken or pork - both turn out amazing.
My kids beg for these bowls, and honestly? I never say no because they're that easy to make.
Ingredients for Japanese Katsu Bowls
Gather these simple ingredients - you probably have most already! The magic happens when they all come together. I've learned the hard way that measuring matters here, so don't eyeball it like I used to (my first attempt was… let's just say extra crispy in all the wrong ways).
- 2 boneless, skinless chicken breasts (or pork chops if you're feeling traditional)
- 1 cup all-purpose flour - for that perfect first coating
- 2 large eggs, beaten - I whisk mine until no streaks remain
- 2 cups panko breadcrumbs - the Japanese-style ones make ALL the difference
- 1 teaspoon salt - I use kosher for even seasoning
- ½ teaspoon black pepper - freshly ground if you've got it
- ½ teaspoon garlic powder - our secret flavor booster
- ½ cup vegetable oil - for frying (trust me, don't skimp)
- 2 cups cooked white rice - short-grain is best if you can find it
- ¼ cup tonkatsu sauce - Bulldog brand is my go-to
- 2 tablespoon Japanese mayo (optional but HIGHLY recommended)
- Chopped parsley or green onions - for that fresh pop of color
Pro tip from my many katsu experiments: set up your breading station (flour, egg, panko) before you start - it makes the process so much smoother when your hands are messy!
Equipment You'll Need
Don't worry - you don't need fancy gadgets for these katsu bowls! Just grab:
- A large heavy-bottomed pan (cast iron works wonders)
- Meat mallet or rolling pin to pound the chicken evenly
- Three shallow bowls for the flour, egg, and panko setup
That's it! Though I confess - I sometimes use chopsticks to flip the cutlets for extra crispiness without messy fingers.
How to Make Japanese Katsu Bowls with Tonkatsu Sauce
Okay, let's get cooking! I've made this recipe dozens of times, and I've learned all the little tricks to get that perfect golden crunch. Follow these steps, and you'll have restaurant-quality katsu bowls in no time.
Preparing the Meat
First things first - we need to get our chicken (or pork) ready. Here's how I do it:
- Place your chicken breasts between two pieces of plastic wrap or parchment paper. This is crucial - trust me, you don't want chicken juice flying everywhere!
- Grab your meat mallet (or rolling pin in a pinch) and pound evenly until about ½ inch thick. Don't skip this! Uneven thickness means some parts will overcook while others stay raw - and nobody wants that.
- Season both sides with the salt, pepper, and garlic powder. I like to rub it in gently with my fingers to make sure every bite is flavorful.
See? Easy peasy. Now let's get to the fun part - the crispy coating!
Coating and Frying
This is where the magic happens. My golden rule? Keep one hand dry and one hand wet to avoid breadcrumb fingers (learned that the messy way).
- Set up your breading station: flour in one bowl, beaten eggs in another, panko in a third. Line them up in that order - it'll make your life easier.
- Coat each piece first in flour (shake off excess!), then dip in egg (let the excess drip off!), then press firmly into the panko. Here's my secret: flip and press again to double-coat for extra crunch!
- Heat oil in your pan over medium heat until shimmering (about 350°F if you have a thermometer). Test with a breadcrumb - it should sizzle immediately.
- Carefully add your breaded cutlets. Don't crowd the pan - I do one at a time if needed. Fry for about 3-4 minutes per side until deep golden brown.
- Drain on a wire rack or paper towels. Resist the urge to cut right away - let them rest for 2 minutes so they stay juicy inside.
Now slice into beautiful strips, arrange over steaming rice, and drizzle with that glorious tonkatsu sauce. The first bite will transport you straight to Tokyo - I promise!
Serving Suggestions for Japanese Katsu Bowls
Now comes the fun part - making these bowls look as incredible as they taste! I always serve my katsu bowls with a small mound of shredded cabbage (it adds the perfect fresh crunch against the crispy cutlet). A side of miso soup makes it feel like a proper meal, and if I'm feeling fancy, I'll add some bright pink pickled ginger for color contrast.
Presentation tip: slice the katsu right before serving and fan it out over the rice at a slight angle. Drizzle the tonkatsu sauce in zigzags across everything, then add a dollop of Japanese mayo if you're using it. Sprinkle with chopped green onions or sesame seeds for that final restaurant-quality touch. The first "oohs" from your dinner guests are guaranteed!
Variations and Substitutions
One of my favorite things about this recipe? How easily you can mix it up! Swap chicken for pork cutlets if you want that classic tonkatsu experience - just adjust cooking time since pork's a bit thicker. Gluten-free? No problem! I've had great results with gluten-free panko (just check your flour too).
For my vegetarian friends, try this with thick slices of eggplant or even firm tofu. The method's the same, and that crispy crust still satisfies. Just remember - the joy is in the crunch, so feel free to play around!
Storage and Reheating Tips
Here's the unfortunate truth - that gorgeous panko crunch doesn't last forever. But I've learned a few tricks to keep your leftover katsu tasting almost as good as fresh! Always store the cutlets separate from rice and sauce - the moisture is the enemy of crispiness. Just pop them in an airtight container in the fridge for up to 2 days.
When reheating, skip the microwave (trust me, soggy sadness awaits). Instead, use your toaster oven or regular oven at 350°F for about 5 minutes. That gentle heat brings back the crunch while keeping the inside tender. If you're feeling extra, a quick 30-second fry in fresh oil works miracles!
Nutrition Information
Nutrition varies based on your ingredients and portion sizes, but this dish packs plenty of protein alongside those crave-worthy carbs. Everything in moderation-especially when that tonkatsu sauce is involved!
Frequently Asked Questions
Can I bake the katsu instead of frying?
Absolutely! For a lighter version, bake at 400°F on a wire rack (this keeps the bottom crispy) for about 20 minutes, flipping halfway. It won't be quite as crunchy as fried, but still delicious. Spritz with oil before baking for extra browning!
Where can I find tonkatsu sauce?
Most Asian grocery stores carry Bulldog brand (my favorite), but you can also make a quick version with ketchup, Worcestershire, and a dash of soy sauce and sugar. It's not identical, but it'll do in a pinch!
Why did my breading fall off?
Ah, the heartbreak! Usually means: 1) Didn't shake off excess flour, 2) Oil wasn't hot enough (test with a breadcrumb first!), or 3) You moved the cutlets too soon after putting them in the pan. Let them fry undisturbed for at least 1-2 minutes before checking.
Can I use regular breadcrumbs?
Please don't! Panko's light, flaky texture makes the signature crunch. Regular breadcrumbs turn dense and soggy. In emergencies, pulse stale bread in a food processor for a rougher texture closer to panko.
Final Thoughts
Now that you've got all my katsu secrets, it's time to make some magic! Snap a photo of your golden cutlets and tag me - I love seeing your kitchen wins. Happy crunching!
Print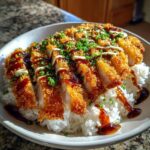
Addictive Japanese Katsu Bowls with Tonkatsu Sauce
- Total Time: 30 minutes
- Yield: 2 servings 1x
- Diet: Low Lactose
Description
A crispy Japanese-inspired dish featuring breaded chicken or pork served with rice and tonkatsu sauce.
Ingredients
- 2 boneless, skinless chicken breasts (or pork chops)
- 1 cup all-purpose flour
- 2 large eggs, beaten
- 2 cups panko breadcrumbs
- 1 tsp salt
- ½ tsp black pepper
- ½ tsp garlic powder
- ½ cup vegetable oil (for frying)
- 2 cups cooked white rice
- ¼ cup tonkatsu sauce (store-bought or homemade)
- 2 tbsp Japanese mayo (optional)
- Chopped parsley or green onions for garnish
Instructions
- Pound chicken or pork to an even thickness.
- Season with salt, pepper, and garlic powder.
- Coat each piece in flour, then dip in beaten eggs.
- Press into panko breadcrumbs until fully coated.
- Heat oil in a pan over medium heat.
- Fry the breaded meat until golden brown and cooked through.
- Drain on paper towels.
- Slice and serve over rice.
- Drizzle with tonkatsu sauce and Japanese mayo.
- Garnish with chopped parsley or green onions.
Notes
- You can substitute chicken with pork chops.
- For extra crispiness, double-coat with egg and panko.
- Adjust frying time based on meat thickness.
- Prep Time: 15 minutes
- Cook Time: 15 minutes
- Category: Main Dish
- Method: Frying
- Cuisine: Japanese
Nutrition
- Serving Size: 1 bowl
- Calories: 650
- Sugar: 5g
- Sodium: 800mg
- Fat: 32g
- Saturated Fat: 5g
- Unsaturated Fat: 20g
- Trans Fat: 0g
- Carbohydrates: 55g
- Fiber: 2g
- Protein: 35g
- Cholesterol: 180mg
Hannah says
This recipe nails it — crispy, golden katsu on fluffy rice with that perfect sweet-savory sauce. So want to try this tonight!