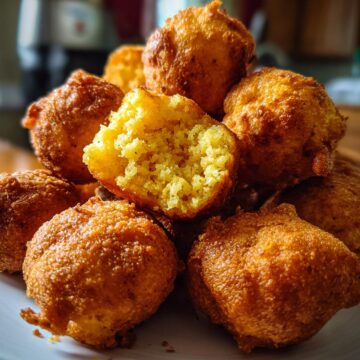
There's something magical about biting into a warm, crispy hush puppy fresh from the fryer. That golden crunch giving way to a tender, cornbread-like center is pure Southern comfort. My family's been making these for generations - we'd fry up huge batches for fish fries and backyard gatherings. The smell alone would have neighbors wandering over with empty plates!
Now here's my little secret - I use Jiffy Cornbread Mix as the base. It saves so much time while still delivering that classic hush puppy taste we all love. In about 20 minutes, you can have a pile of these golden nuggets ready to disappear. Trust me, they never last long - my kids start swiping them the moment they hit the paper towels to drain!
Why You’ll Love These Homemade Hush Puppies
Let me tell you why these little golden nuggets will become your new go-to snack. First off, they're ridiculously easy - we're talking pantry staples and 220 minutes from bowl to belly. That Jiffy mix? Pure genius for cutting corners without sacrificing flavor.
The magic happens in the fryer. Each bite gives you that satisfying crunch giving way to a cloud-like center. I swear, they're like little edible pillows of joy. Perfect for when the gang comes over for game day or when you just need something crispy to dunk in comeback sauce.
Here's what makes them special:
- Pantry-friendly ingredients (no fancy shopping required)
- That perfect crispy-tender texture you crave
- Disappears faster than you can fry them at parties
My kids call them "crack puppies" because honestly? They're that addictive. One batch and you'll understand why we keep the Jiffy mix stocked at all times.
Ingredients for Homemade Hush Puppies
Now let's talk ingredients - simple stuff you probably already have in your kitchen! The beauty of these hush puppies is how basic the components are while still packing so much flavor. I'll walk you through each one so you understand why they matter.
First up, that trusty blue box of Jiffy mix - the secret weapon that makes this recipe foolproof. It's got just the right cornmeal-to-flour ratio that gives our hush puppies their signature texture. Don't even think about substituting here - this is the magic base that makes everything work.
Here's what you'll need to gather:
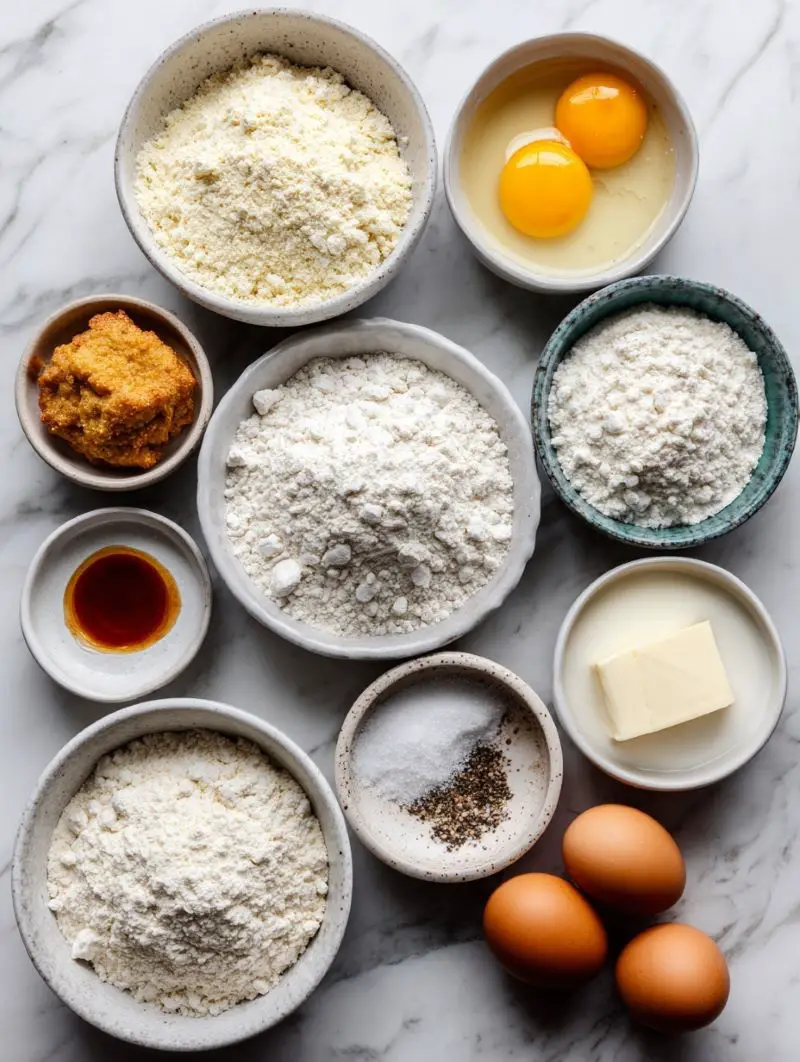
- 1 box Jiffy Cornbread Mix - Our golden foundation!
- ½ small onion, finely grated - No big chunks here - we want that onion flavor distributed evenly
- ½ cup buttermilk - The tang makes all the difference (regular milk works in a pinch)
- 1 large egg, beaten - Helps bind everything together beautifully
- ¼ cup panko bread crumbs - My secret for extra crunch factor
- ¼ cup all-purpose flour - Just enough to give the batter perfect consistency
- ½ teaspoon salt - Enhances all the flavors
- ¼ teaspoon black pepper - That subtle kick makes them irresistible
- 1 teaspoon baking powder - Gives them that perfect rise in the fryer
- Oil for frying - Vegetable or peanut oil works best - you'll need enough for about 2 inches depth
See? Nothing fancy, just good honest ingredients that transform into something magical when combined. I always tell my kids - great cooking isn't about expensive ingredients, it's about knowing how to make the simple stuff shine!
Equipment You’ll Need
Don't stress - you don't need fancy gadgets to make perfect hush puppies! Here's the short list of what I grab every time:
- A heavy-bottomed pot or deep fryer (my cast iron skillet never lets me down)
- Candy or deep-fry thermometer - crucial for that golden crisp without grease
- Mixing bowl (I use my grandma's old yellow Pyrex - it's seen decades of hush puppy batches)
- Ice cream scoop or two spoons for dropping that perfect dollop of batter
That's it! Simple tools for seriously delicious results. Now let's get frying!
How to Make Homemade Hush Puppies
Alright, let's get to the fun part - making these golden bites of heaven! I've made this recipe so many times I could do it in my sleep, but I'll walk you through each step carefully so yours turn out perfect on the first try. The key is taking your time and not rushing any of the steps - trust me, it's worth the little bit of patience!
Step 1: Prepare the Batter
First, grab your biggest mixing bowl - things are about to get messy in the best possible way! Start by whisking together all your dry ingredients: the Jiffy mix, flour, panko, salt, pepper, and baking powder. Get them nice and combined - no flour pockets hiding in there!
Now for the wet team! In a separate bowl (or right in your measuring cup if you're feeling lazy like me sometimes), beat that egg like it owes you money. Stir in the buttermilk and grated onion - yes, your eyes might water a bit from the onion, but push through! It's what gives these puppies their signature flavor.
Here's the magic moment: pour the wet ingredients into the dry and stir just until combined. Don't overmix! A few lumps are totally fine - they'll disappear when frying. The batter should be thick enough to hold its shape on a spoon but still drop easily. If it seems too thick, add a splash more buttermilk. Too thin? A sprinkle of flour will fix it right up.
Step 2: Fry to Perfection
While your batter rests for a few minutes (this helps the flour hydrate), let's get that oil heating. Pour enough vegetable or peanut oil to reach about 2 inches deep in your pot or skillet. Clip on that candy thermometer - we're aiming for a steady 375°F. This is crucial! Too cold and your hush puppies will soak up oil like sponges. Too hot and they'll burn before cooking through.
When the oil hits temperature, it's showtime! I use my trusty small ice cream scoop for perfectly portioned balls, but two spoons work great too. Carefully drop spoonfuls of batter into the oil - don't crowd the pan! I do about 5-6 at a time max. They'll sink at first, then float up like little golden islands as they cook.
Set your timer for 2-3 minutes per side. You'll know they're ready when they're deep golden brown all over - no pale spots! I give them a gentle flip halfway through with a slotted spoon. Listen for that happy sizzle - music to any Southern cook's ears!
Step 3: Drain and Serve
As each batch finishes frying, transfer them to a paper towel-lined plate or baking sheet. This step is non-negotiable - those paper towels soak up any excess oil so your hush puppies stay crispy, not greasy. Resist eating them straight from the fryer (I know, it's hard!) - they're crazy hot inside!
Now comes the best part: serving! I like to keep them warm in a low oven (about 200°F) if I'm making a big batch for company. Serve them in a basket lined with a red checkered towel for that authentic fish fry vibe. They're amazing plain, but oh boy - wait until you try them with...

Tips for the Best Homemade Hush Puppies
After making hundreds (maybe thousands!) of these hush puppies, I've picked up some tricks that make all the difference. Here are my can't-live-without tips for hush puppy perfection every single time:
- Thermometer is key - That 375°F sweet spot isn't just a suggestion. Too low and they're greasy; too high and they burn. I keep mine clipped to the pan the whole time.
- Small batches win - I know it's tempting to fry them all at once, but crowding drops the oil temp fast. Five at a time max keeps them golden and crisp.
- Taste your batter - Before frying, fry a tiny test puppy to check seasoning. I often add an extra pinch of salt or dash of hot sauce!
- Grate that onion fine - Big chunks = uneven cooking. I use the small holes on my box grater until it's almost paste-like.
- Let batter rest 5 minutes - This lets the flour hydrate fully for the perfect texture. No skipping - set a timer if you must!
Follow these and I promise - you'll be the hush puppy hero at your next gathering. Just don't be surprised when everyone begs you for the recipe!
Serving Suggestions for Homemade Hush Puppies
Oh honey, let's talk about the best ways to serve these golden nuggets of joy! While they're absolutely addictive on their own (I can't count how many I've eaten straight off the paper towels), pairing them right takes them to a whole new level. Here are my favorite ways to serve them up:
First up - classic fish fry style. There's nothing better than a pile of crispy hush puppies next to golden fried catfish or flounder. The combo is pure Southern heaven. Add some coleslaw and tartar sauce, and you've got yourself a meal that'll have everyone coming back for seconds.
For parties, I love setting out a dipping sauce bar with:
- Creamy comeback sauce (my personal favorite)
- Spicy remoulade for a kick
- Sweet honey butter - trust me on this one!
- Cool ranch dressing for the kids
They're also amazing alongside BBQ - something about that smoky meat and crispy cornbread just works. I always make a double batch when we smoke ribs or pulled pork. And don't even get me started on how perfect they are with a bowl of chili on a chilly night!
The absolute best way to serve them? Straight from the fryer, passed around the table while they're still too hot to handle properly. There's nothing like that first crispy bite shared with good company. Just be warned - you might need to make more than you think. These disappear faster than you can say "y'all come get it!"
Storing and Reheating Homemade Hush Puppies
Now let's talk leftovers - though in my house, that's a rare occurrence! If you somehow end up with extra hush puppies (bless your heart for having that kind of self-control), here's how to keep them tasting almost as good as fresh.
First rule: let them cool completely before storing. I spread mine out on a baking sheet so they don't steam each other and get soggy. Once cooled, tuck them into an airtight container with a paper towel on top to absorb any moisture. They'll stay crispy for about 2 days in the fridge - if they last that long!
For longer storage, freeze them in a single layer on a baking sheet first, then transfer to a freezer bag. They'll keep for a month - not that mine ever make it that far. My kids raid the freezer like little hush puppy detectives!
Bringing Them Back to Life
- Oven method: Preheat to 375°F (sound familiar?). Spread puppies on a rack over a baking sheet and bake for 5-7 minutes until hot and crispy again.
- Air fryer magic: 350°F for 3-4 minutes shakes off that leftover sadness. No preheating needed!
- Skillet trick: A quick toss in a dry skillet over medium heat works in a pinch. Just keep them moving!
Whatever you do, don't microwave them unless you enjoy sad, rubbery hockey pucks. Trust me - I learned that lesson the hard way back in college! The extra few minutes for proper reheating makes all the difference.
Pro tip: If you're planning ahead, you can freeze the uncooked batter too! Just scoop portions onto a parchment-lined sheet, freeze solid, then transfer to bags. Fry straight from frozen, adding an extra minute or two to the cooking time. Game changer for last-minute cravings!

Homemade Hush Puppies Variations
Now let's get creative! While my classic recipe is perfect as-is, sometimes it's fun to mix things up. Over the years, I've played with all sorts of add-ins and swaps - some winners, some... well, let's just say my family still teases me about the blue cheese experiment. Here are my favorite variations that actually work:
Spicy Kick
For those who like a little heat (like my brother-in-law who puts hot sauce on everything):
- Jalapeño joy: Add 1-2 finely diced jalapeños (seeds removed if you're a wimp like me)
- Cayenne boost: Just ¼ teaspoon cayenne pepper gives them a nice warm glow
- Hot honey drizzle: After frying, drizzle with spicy honey for sweet heat
Cheesy Goodness
Because let's be honest - cheese makes everything better:
- Cheddar classic: ½ cup shredded sharp cheddar turns them into cheesy bites
- Pepper jack: For that melty, spicy cheese pull we all love
- Parmesan punch: ¼ cup grated parm adds umami depth
Gluten-Free Option
For my gluten-sensitive friends (tested by my cousin Sarah who's brutally honest):
- Swap the Jiffy mix for 1 cup gluten-free cornbread mix
- Use GF all-purpose flour instead of regular
- Skip the panko or use gluten-free breadcrumbs
The beauty of hush puppies is how forgiving they are. Want to add crumbled bacon? Go for it! Fresh corn kernels? Absolutely! Just keep your batter consistency in check - if it gets too wet from add-ins, sprinkle in a bit more flour or cornmeal. The possibilities are endless, just like my family's appetite for these crispy little wonders!
Nutrition Information
Now let's talk numbers - but don't let this scare you off! These golden bites are meant to be enjoyed, not counted. That said, I know some folks like to keep track, so here's the scoop on what's in each hush puppy.
Based on my recipe (and how much oil they actually absorb - not as much as you'd think!), here's the breakdown per hush puppy:
- Calories: About 70
- Carbs: 10g (that cornbread mix gives it that sweet heartiness)
- Protein: 2g (thank you, egg and buttermilk!)
- Fat: 3g (mostly from the frying oil)
- Sugar: Just 2g - not bad for something so satisfying!
Now here's my kitchen truth bomb: Nutritional values are estimates and vary by ingredients. Your exact numbers might dance around a bit depending on:
- How much oil your puppies actually absorb (I drain mine well!)
- Whether you use full-fat buttermilk or a lighter version
- The exact size of your hush puppies (mine tend to be "generous")
At the end of the day, these are fried treats - not health food. But life's too short not to enjoy crispy, golden hush puppies with people you love. My philosophy? Everything in moderation... including moderation! Now go enjoy a few (or six) without guilt.
FAQs About Homemade Hush Puppies
I've gotten so many questions about these hush puppies over the years - turns out everyone wants to know the secrets to perfecting them! Here are the answers to the ones I hear most often. Trust me, I've tested all these scenarios myself (sometimes with hilarious fails that my family still teases me about).
Can I use regular cornmeal instead of Jiffy mix?
Oh honey, I get this one all the time! While you can use plain cornmeal in a pinch, you'll need to adjust the recipe. The Jiffy mix already has flour, leavening, and salt perfectly balanced. If substituting, use 1 cup cornmeal plus ¼ cup flour, 1 tablespoon sugar, 1 teaspoon baking powder, and ½ teaspoon salt. But honestly? That little blue box is magic - I keep a stockpile in my pantry just for hush puppy emergencies!
How do I keep hush puppies from being greasy?
Nothing worse than a sad, oily hush puppy! Here's what I've learned: First, keep that oil at a steady 375°F - use a thermometer religiously. Second, don't overcrowd the pan (I do 5-6 max). Most importantly, drain them well on paper towels immediately after frying - I even pat the tops gently with another towel. If they're still greasy? Your oil probably wasn't hot enough. Live and learn!
Can I make the batter ahead?
Good news! You can mix the dry and wet ingredients separately up to a day ahead - just combine them right before frying. The batter itself? It holds up okay for about an hour in the fridge, but any longer and the baking powder starts losing its oomph. My favorite make-ahead trick? Scoop the batter onto a parchment-lined tray and freeze solid, then pop the frozen scoops straight into hot oil when you're ready. Works like a charm!
Why did my hush puppies turn out dense?
Oh bless your heart - we've all been there! Usually it's from overmixing the batter (stop when just combined!) or old baking powder (check that expiration date). Also, make sure your oil is hot enough - if it's too cool, they'll absorb oil instead of puffing up. My grandma would say "it's not the ingredients, it's the hands" - sometimes the batter just needs love and a light touch!
Can I bake instead of fry?
Okay, I'll be honest - baked "hush puppies" just aren't the same. But if you must, try this: Scoop batter onto a greased baking sheet, spray with oil, and bake at 400°F for 15-18 minutes. They'll be more like cornbread bites - tasty, but missing that magical crispy shell. For the real deal? Embrace the fry! Life's too short for baked hush puppies, sugar.
If you've made this recipe, I'd love to hear how it turned out for you! Did you stick to the classic version or try any fun variations? Maybe you've got a family twist I should know about? Drop a comment below and let me in on your hush puppy secrets.
This recipe holds such a special place in my heart - every time I make these golden bites, I think of my grandma teaching me to fry them just right. Now I'm passing that tradition to you. Whether you're a first-timer or a seasoned hush puppy pro, I'm cheering for you from my kitchen to yours!
And hey - if you snap a photo of your crispy creations, tag me on social media! There's nothing I love more than seeing your smiling faces enjoying these little bites of Southern joy. Happy frying, y'all!
Print
Hush Puppies Recipe
- Total Time: 20 mins
- Yield: 20 hush puppies 1x
- Diet: Vegetarian
Description
Delicious homemade hush puppies made with Jiffy Cornbread Mix for a quick and flavorful snack.
Ingredients
- 1 box Jiffy Cornbread Mix
- ½ small onion, grated
- ½ cup buttermilk
- 1 large egg, beaten
- ¼ cup panko bread crumbs
- ¼ cup all-purpose flour
- ½ tsp salt
- ¼ tsp black pepper
- 1 tsp baking powder
- Oil, for frying
Instructions
- Mix Jiffy Cornbread Mix, grated onion, buttermilk, beaten egg, panko bread crumbs, flour, salt, black pepper, and baking powder in a bowl.
- Heat oil in a deep fryer or skillet to 375°F.
- Drop spoonfuls of batter into the hot oil.
- Fry until golden brown, about 2-3 minutes per side.
- Remove and drain on paper towels.
- Serve warm.
Notes
- Use a thermometer to maintain oil temperature.
- Grate onion finely for even distribution.
- Adjust seasoning to taste.
- Prep Time: 10 mins
- Cook Time: 10 mins
- Category: Appetizer
- Method: Frying
- Cuisine: American
Nutrition
- Serving Size: 1 hush puppy
- Calories: 70
- Sugar: 2g
- Sodium: 150mg
- Fat: 3g
- Saturated Fat: 0.5g
- Unsaturated Fat: 2g
- Trans Fat: 0g
- Carbohydrates: 10g
- Fiber: 1g
- Protein: 2g
- Cholesterol: 10mg
Keywords: homemade hush puppies, cornbread mix, fried snack
Leave a Reply