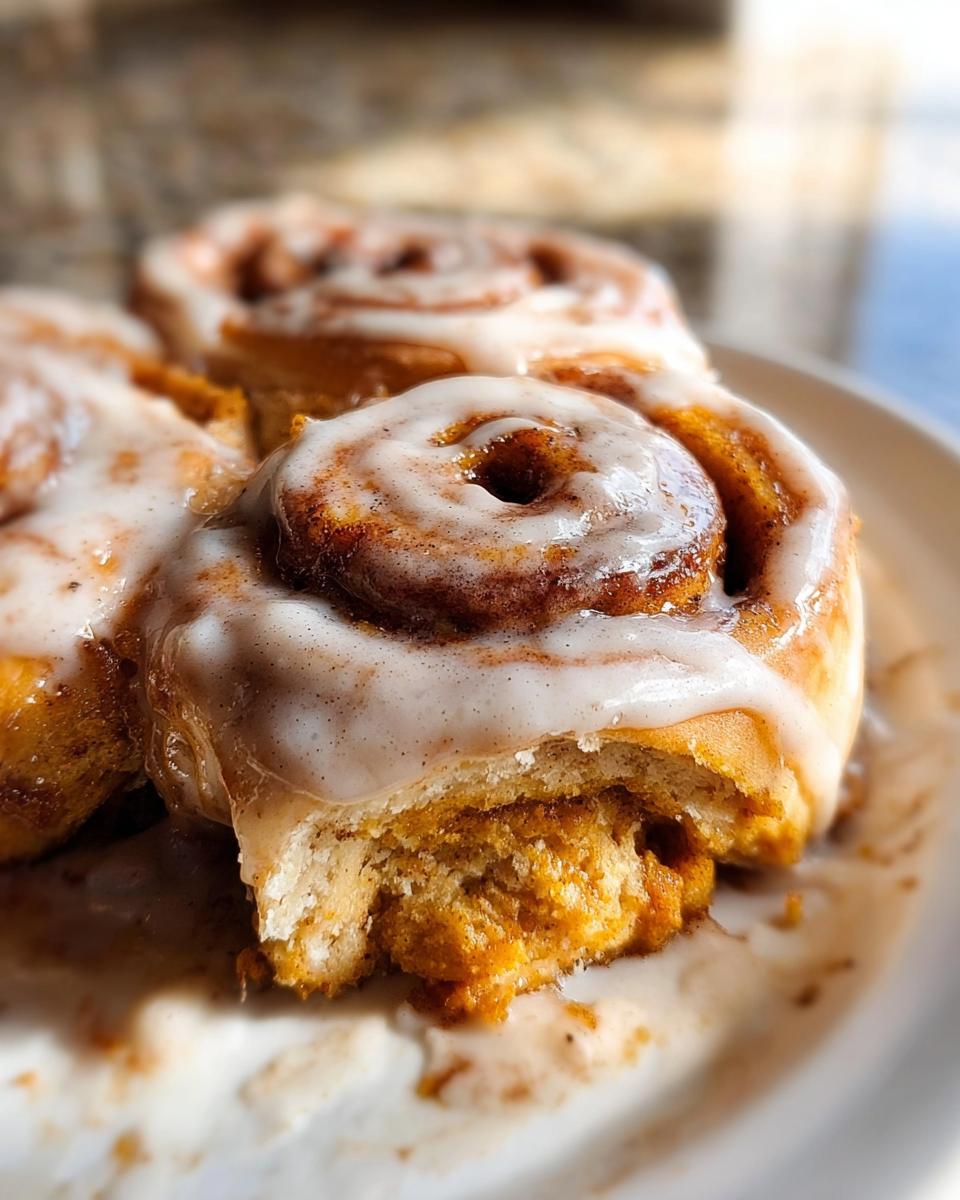
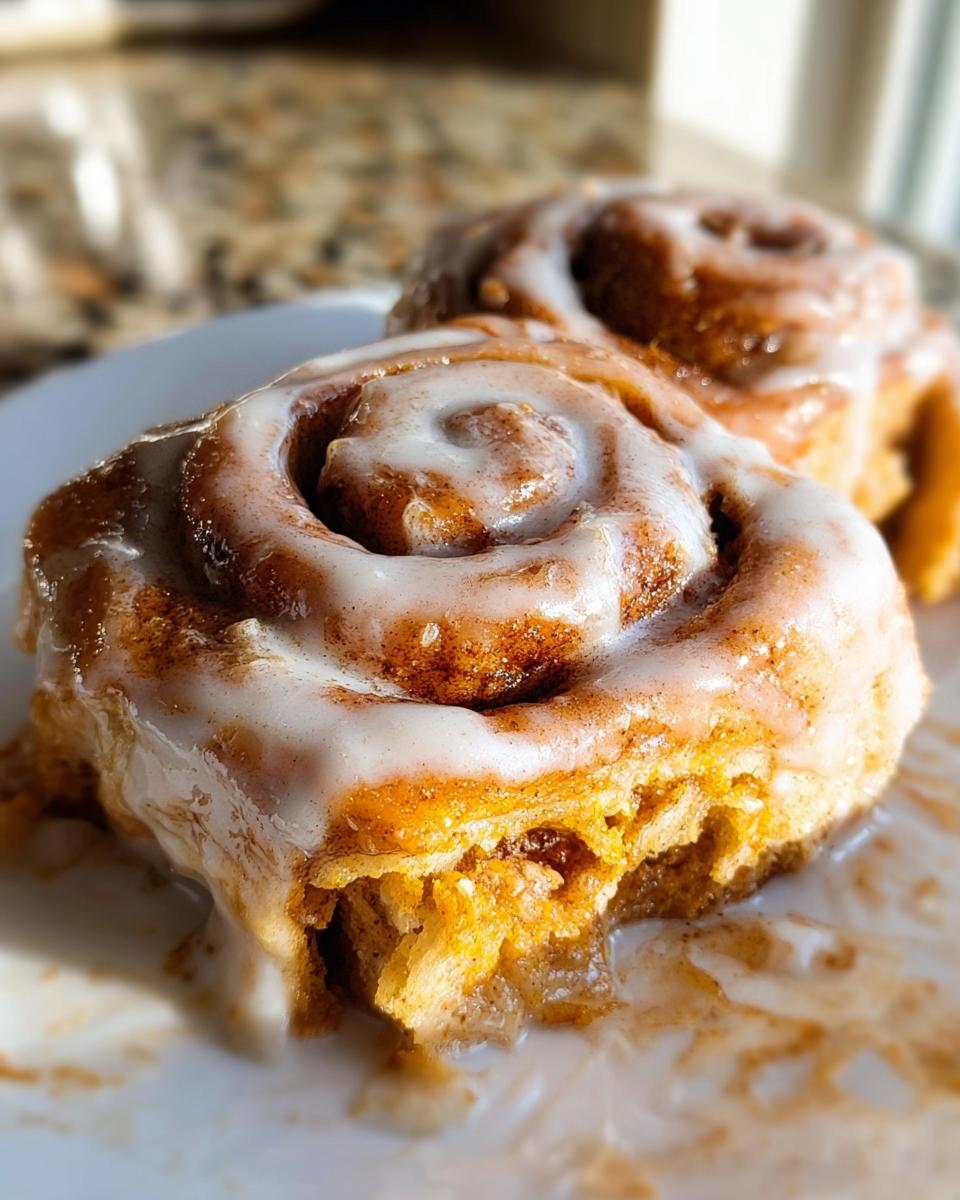
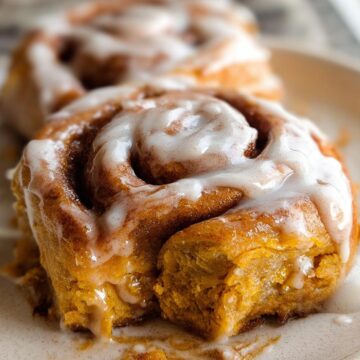
You know that moment when you walk into a kitchen and the warm, spicy scent of pumpkin and cinnamon wraps around you like a cozy blanket? That's exactly what happens when you bake these gluten free pumpkin cinnamon rolls - they're pure fall magic in every bite. I first made these for a family Thanksgiving years ago, and now they've become our must-have holiday breakfast. My niece, who's usually suspicious of anything "gluten free," took one bite and immediately asked for seconds - that's when I knew this recipe was a keeper!

What makes these rolls so special? It's that perfect balance of sweet pumpkin, warm spices, and gooey cinnamon filling, all wrapped up in a soft, fluffy dough that no one would guess is gluten-free. And let's be honest - there's something downright therapeutic about rolling out that dough and watching it transform into those beautiful spirals in the pan. Whether you're gluten-free by necessity or just looking for a delicious twist on classic cinnamon rolls, these pumpkin beauties will have everyone reaching for just one more... and then maybe sneaking another when no one's looking.
I've tweaked this recipe over the years to get it just right - the secret is using Bob's Red Mill gluten free bread mix as the base (trust me, it works like a dream). The pumpkin puree keeps them moist, while the pumpkin pie spice adds that quintessential autumn flavor. Best part? They come together faster than you'd think, leaving you plenty of time to enjoy that second cup of coffee while they bake.
Why You'll Love These Gluten Free Pumpkin Cinnamon Rolls
Oh friends, let me count the ways these pumpkin cinnamon rolls will steal your heart! Whether you're gluten-free or just looking for something deliciously different, these rolls check all the boxes:
- Fall flavors that'll make you swoon - That perfect blend of pumpkin, cinnamon, and warm spices will fill your kitchen with the coziest autumn aroma
- Surprisingly simple to make - No fancy techniques here! The bread mix does most of the heavy lifting so you can enjoy homemade goodness without the stress
- Soft, fluffy texture no one will believe is gluten-free - Seriously, my gluten-loving family can't tell the difference!
- Perfect for sharing (or not!) - They disappear fast at potlucks but are just as wonderful for a quiet weekend breakfast
- Customizable to your taste - Add nuts, swap the icing, or play with spice levels to make them your own
Honestly, the hardest part is waiting for them to cool before digging in - but that gooey cream cheese icing makes it totally worth it!
Ingredients for Gluten Free Pumpkin Cinnamon Rolls
Gathering your ingredients is the first step to pumpkin cinnamon roll bliss! Here's everything you'll need - I've included all my little notes about temperatures and prep that make all the difference. Trust me, taking those extra few minutes to get things just right pays off in that first heavenly bite.
- For the rolls:
- 1 (16 ounce) bag Bob's Red Mill gluten free bread mix (this is our magic base!)
- 1 packet instant yeast (check the expiration date!)
- ½ cup sugar (I use regular granulated)
- 2 teaspoons baking powder (make sure it's fresh)
- 4 teaspoons pumpkin pie spice (or make your own blend if you're feeling fancy)
- ½ teaspoon salt (I always use fine sea salt)
- ¾ cup milk, dairy or non-dairy (room temp is best)
- ⅓ cup butter, melted but not hot (let it cool slightly)
- ¾ cup pumpkin puree (not pumpkin pie filling - see my note below!)
- 2 eggs, room temperature (this helps them incorporate better)
- 1 teaspoon vanilla extract (the good stuff makes a difference)
- For the sugar filling:
- 6 tablespoons butter, softened (not melted - this is key!)
- ¾ cup white sugar
- 3 teaspoons cinnamon (I may or may not sneak in an extra pinch...)
- 4 teaspoons pumpkin pie spice (yes, more! It's worth it)
- For the cream cheese icing:
- ¼ cup melted butter (just barely melted, not hot)
- 4 ounces cream cheese, softened (leave it out for 30 minutes first)
- 1 ½ cups powdered sugar (sift it if yours is lumpy)
- 1 teaspoon vanilla extract (you know the drill - the good stuff!)
Important note about pumpkin puree: Make sure you're using 100% pure pumpkin puree, not pumpkin pie filling! The pie filling has added sugars and spices that will throw off our careful balance. I like Libby's canned puree when fresh isn't available - it's consistently good.
Equipment Needed
Okay, let's talk tools! One of the things I love about this recipe is that you don't need any fancy gadgets - just some basic kitchen workhorses that you probably already have. Here's your simple equipment checklist:
- Large mixing bowl - Big enough to hold all that pumpkin-y goodness with room to stir (I use my favorite ceramic one that's seen many cinnamon roll batches)
- 9x13 inch baking pan - Glass or metal both work, but grease it well either way (nothing sadder than stuck-on bits of roll!)
- Rolling pin - My trusty wooden one does the job, but if you've only got a wine bottle, that works in a pinch
- Sharp knife or unflavored dental floss - For cleanly slicing the dough log into perfect little spirals (the floss trick is genius - just slide it underneath and pull the ends to pull the ends to cut)
- Measuring cups and spoons - Because eyeballing pumpkin pie spice never ends well
- Rubber spatula - For scraping every last bit of that delicious dough into the pan
- Hand mixer or stand mixer - Totally optional but nice for the icing (though a little elbow grease with a whisk works too)
That's it! No special equipment required - just the basics to create your new favorite fall treat. Now let's get to the fun part - making the dough!
How to Make Gluten Free Pumpkin Cinnamon Rolls
Alright, let's dive into the fun part - turning these ingredients into warm, gooey pumpkin cinnamon roll perfection! I'll walk you through each step just like I would if we were baking together in my kitchen. Don't worry if your dough isn't perfectly smooth - gluten-free dough behaves a little differently than regular dough, but trust me, it'll taste amazing!
Preparing the Dough
First things first - let's make that pumpkin-y dough that'll become our delicious rolls. Here's how I do it:
- Preheat your oven to 350°F (175°C) and grease a 9x13 inch baking pan really well. I use butter or non-stick spray - get into those corners!
- In your large mixing bowl, whisk together all the dry ingredients - that's the gluten free bread mix, yeast, sugar, baking powder, pumpkin pie spice, and salt. Make sure they're evenly distributed - no clumps of spice!
- In another bowl or large measuring cup, whisk together all the wet ingredients - milk, melted butter, pumpkin puree, eggs, and vanilla. The eggs incorporate best if they're room temperature (I just pop them in warm water for 5 minutes if I forgot to take them out earlier).
- Pour the wet ingredients into the dry ingredients and stir until just combined. The dough will be sticky - that's normal! Resist the urge to add more flour. Let it rest for 5 minutes while you clean up (or sip your coffee). This gives the gluten-free flours time to absorb the liquid.
Rolling and Filling the Dough
Now for the therapeutic part - rolling out that dough and creating those gorgeous cinnamon swirls. Here's my tried-and-true method:
- Turn the dough out onto a well-floured surface (I use the gluten free bread mix flour for dusting). Use floured hands to gently pat it into a rectangle shape, then roll it to about 12x18 inches. Don't stress about perfection - rustic is charming!
- Spread the softened butter evenly over the dough, leaving about a ½ inch border around the edges. This helps seal the roll later. Pro tip: If your butter is too firm, zap it for 5 seconds in the microwave.
- Sprinkle on the sugar mixture - a mix of white sugar, cinnamon, and pumpkin pie spice. Use your fingers to gently press it into the butter so it doesn't all fall out when rolling.
- Starting from a long side, roll the dough up tightly but gently. If it sticks a little, use a bench scraper or spatula to help loosen it. Don't worry if it's not perfect - mine rarely are!
- Cut into 12 even rolls using a sharp knife or unflavored dental floss (my secret weapon!). Slide the floss under the roll, cross the ends over the top, and pull - clean slices every time! Arrange them in your prepared pan with some space to grow.
Baking and Icing
Almost there! While those beauties bake, let's whip up that dreamy cream cheese icing:
- Bake for 25 minutes or until golden brown on top. Your kitchen will smell like a pumpkin spice wonderland! The rolls should spring back lightly when touched.
- While they bake, make the icing: Beat together the softened cream cheese and melted butter until smooth (no lumps!). Gradually add powdered sugar and vanilla, beating until creamy. If it's too thick, add milk a teaspoon at a time.
- When the rolls come out of the oven, let them cool for about 5 minutes (the hardest wait ever!) before drizzling with icing. This keeps the icing from melting completely into the rolls.
- Serve warm and watch faces light up! That first pull-apart bite with all the gooey layers is pure happiness.
See? Not nearly as complicated as you might think! The secret is not overworking the dough and embracing that gluten-free texture. Even if yours don't look bakery-perfect (mine rarely do), I promise they'll taste incredible.
Tips for Perfect Gluten Free Pumpkin Cinnamon Rolls
After making these pumpkin cinnamon rolls more times than I can count (and eating even more!), I've picked up some tricks that make all the difference between "good" and "oh-my-goodness-I-need-another-one" amazing. Here are my absolute must-know tips:
- Test your yeast first - Even though we're using instant yeast, I always do a quick test by mixing a pinch with warm water and sugar. If it doesn't bubble within 5 minutes, toss it and grab a fresh packet. Nothing's sadder than flat cinnamon rolls!
- Don't skip the dough rest - That 5-minute pause after mixing lets the gluten-free flours hydrate properly. I use this time to clean up or sneak a spoonful of pumpkin puree (quality control, right?).
- Roll between parchment - Gluten-free dough can be sticky, so I place it between two sheets of floured parchment paper to roll. No sticking, no frustration, and easy cleanup!
- Watch the bake time - Gluten-free goods can go from perfect to dry fast. Start checking at 20 minutes - you want golden tops that spring back lightly when touched. The smell will tell you when they're close!
- Warm your icing ingredients - Cold cream cheese = lumpy icing. I leave mine out for 30 minutes before mixing. If you're impatient (like me), microwave the cream cheese for 10 seconds at 50% power.
One last secret? Let them cool just enough - about 5 minutes - before icing. This keeps that gorgeous drizzle from melting straight into the rolls while still letting it soak in slightly. Trust me, it's worth the wait!
Ingredient Substitutions
One of the best things about these pumpkin cinnamon rolls is how forgiving they are! Whether you're dealing with food allergies or just ran out of something, here are my tried-and-true swaps that'll still give you delicious results:
- For dairy-free:
- Milk → Any unsweetened non-dairy milk (almond, oat, or coconut work great)
- Butter → Vegan butter sticks or coconut oil (measure when solid)
- Cream cheese → Dairy-free cream cheese alternative (I like Kite Hill)
- For refined sugar-free:
- White sugar → Coconut sugar (it'll darken the dough slightly but tastes amazing)
- Powdered sugar → Blend coconut sugar to a powder in a high-speed blender
- For egg-free:
- Eggs → ¼ cup unsweetened applesauce per egg (adds nice moisture too!)
- Pumpkin puree alternatives:
- Fresh pumpkin → Canned puree works just as well (just not pie filling!)
- No pumpkin? → Mashed sweet potato in a pinch (adds a lovely earthy sweetness)
A quick note about flour mixes: While I swear by Bob's Red Mill for this recipe, I've had decent results with King Arthur and Cup4Cup gluten-free blends too. Just don't use plain gluten-free flour - the bread mix has essential ingredients like xanthan gum already added!
Storing and Reheating Gluten Free Pumpkin Cinnamon Rolls
Okay, let's be real - these pumpkin cinnamon rolls rarely last long enough to need storing in my house! But when you do have leftovers (or if you're smart and make a double batch), here's how to keep them tasting fresh and delicious:
For storing: Let the rolls cool completely before transferring to an airtight container. I like to separate layers with parchment paper so they don't stick together. They'll stay fresh at room temperature for about 2 days, or you can refrigerate them for up to 5 days. The icing actually helps keep them moist!
Freezing tip: These freeze beautifully! Wrap individual rolls tightly in plastic wrap, then place in a freezer bag. They'll keep for about 3 months. No need to thaw - just reheat straight from frozen (see below).
Reheating magic:
- Microwave method: My go-to for quick cravings! Place a roll on a microwave-safe plate and heat for 15-20 seconds. The icing will get melty and glorious.
- Oven method: For that fresh-baked feel, wrap rolls in foil and warm at 300°F for about 10 minutes. Remove the foil for the last 2 minutes if you like the edges slightly crisp.
- Air fryer hack: If you've got one, air fry at 320°F for 3-4 minutes - it revives them perfectly!
Pro tip: If you're reheating frozen rolls, add an extra 10-15 seconds in the microwave or 5 minutes in the oven. And don't be shy about adding a fresh drizzle of icing when serving - it makes them taste like they just came out of the oven!
Nutritional Information
Okay, let's talk numbers - because I know some of you like to keep track! Here's the approximate nutritional breakdown per roll (and let's be honest, who stops at just one?). Remember, these are estimates and will vary slightly depending on your specific ingredients and how generous you are with that icing!
- Calories: About 320-350 per roll (that cream cheese icing is worth every delicious calorie!)
- Carbohydrates: 45-50g
- Protein: 4-5g
- Fat: 14-16g
- Fiber: 2-3g (thank you, pumpkin!)
- Sugar: 25-30g (it's a treat, after all!)
Important note: These values are calculated using standard brands and measurements, but your exact nutrition will vary based on the specific products you use, any substitutions you make, and how much icing you drizzle (no judgment here!). For precise nutritional information, I recommend using a calculator with your exact ingredients.
While these pumpkin cinnamon rolls might not be an everyday breakfast, they're packed with real ingredients and that cozy pumpkin goodness. Everything in moderation, right? And with all that pumpkin, I like to think we're getting some vitamin A in there too - that counts for something!
Frequently Asked Questions
Q1. Can I use canned pumpkin puree instead of fresh?
Absolutely! I actually use canned pumpkin puree (like Libby's) most of the time - just make sure it's 100% pure pumpkin, not pumpkin pie filling. The pie filling has added sugars and spices that would throw off our perfect balance. Canned puree gives consistent results year-round, and no one will know the difference when they're gobbling up these rolls!
Q2. How can I make these cinnamon rolls dairy-free?
Easy peasy! For the milk, use any unsweetened non-dairy alternative (I love oat milk here). Swap the butter for vegan butter sticks or coconut oil (measure when solid). The cream cheese icing can be made with dairy-free cream cheese - Kite Hill and Miyoko's both work great. I've made them this way for my lactose-intolerant friends, and they couldn't tell they were dairy-free!
Q3. My dough seems sticky - is that normal?
Don't panic! Gluten-free dough is naturally stickier than regular dough. That's why I recommend rolling it between floured parchment paper - game changer! Resist the urge to add more flour, as it can make the rolls dry. A little sticky is actually good - it means they'll stay moist. Just flour your hands and surface well, and embrace the slightly messy process.
Q4. Can I prepare these the night before?
You sure can! I actually love doing this for stress-free mornings. Prepare up through shaping the rolls in the pan, then cover tightly and refrigerate overnight. In the morning, let them sit at room temp while your oven preheats (about 30 minutes), then bake as usual. The cold rise makes them extra fluffy! The icing is always best made fresh though.
Q5. Why didn't my rolls rise very much?
A few things could be at play here. First, check that your yeast isn't expired (I always do the quick bubble test). Second, make sure your milk and melted butter aren't too hot - anything over 110°F can kill the yeast. Also, gluten-free dough doesn't rise as dramatically as wheat dough, but it should still puff up nicely. If all else fails, try letting them proof in a warm spot for 10-15 minutes before baking.
Final Thoughts
Alright, my fellow pumpkin spice lovers - it's time to grab that apron and get baking! These gluten free pumpkin cinnamon rolls have brought so much joy to my kitchen (and my family's tummies), and I can't wait for you to experience that same magic. There's nothing quite like pulling that pan of golden, fragrant rolls from the oven and watching everyone's eyes light up when you drizzle on that creamy icing.
Don't be intimidated if this is your first time working with gluten-free dough - I promise it's more forgiving than you think. And if your rolls aren't picture-perfect? Who cares! Mine rarely are, but they always disappear fast. The important thing is that warm, spiced pumpkin flavor and that incredible soft texture that'll have everyone asking for seconds.
I'd love to hear how your baking adventure goes! Did you add extra cinnamon? Try them dairy-free? Maybe sneak some pecans into the filling? Drop a comment below and let me know - your tips might help other bakers too. And if you snap a photo of your masterpiece (or your happy eaters), tag me so I can celebrate with you!
Now go forth and bake something delicious - your future self will thank you when you're enjoying that first heavenly bite with a hot cup of coffee. Happy baking, friends!
Gluten Free Pumpkin Cinnamon Rolls
Equipment
- Mixing bowl
- baking pan
Ingredients
ROLLS
- 1 16 ounce bag Bob's Red Mill gluten free bread mix
- 1 packet instant yeast
- ½ cup sugar
- 2 teaspoons baking powder
- 4 teaspoons pumpkin pie spice
- ½ teaspoon salt
- ¾ cup milk dairy or non-dairy
- ⅓ cup butter melted
- ¾ cup pumpkin puree see notes
- 2 eggs room temperature
- 1 teaspoon vanilla extract
SUGAR
- 6 tablespoons butter
- ¾ cup white sugar
- 3 teaspoons cinnamon
- 4 teaspoons pumpkin pie spice
ICING
- ¼ cup melted butter
- 4 ounces cream cheese
- 1 ½ cups powdered sugar
- 1 teaspoon vanilla extract
Instructions
- Preheat your oven to 350°F (175°C). Grease a baking pan.
- In a large mixing bowl, combine the gluten free bread mix, instant yeast, sugar, baking powder, pumpkin pie spice, and salt.
- Add the milk, melted butter, pumpkin puree, eggs, and vanilla extract to the dry ingredients. Mix until well combined.
- Roll out the dough into a rectangle on a floured surface.
- Spread the butter for the sugar mixture over the dough. Sprinkle with white sugar, cinnamon, and pumpkin pie spice.
- Roll the dough into a log and cut into 12 rolls. Place them in the prepared baking pan.
- Bake for 25 minutes or until golden brown.
- While the rolls are baking, prepare the icing by mixing melted butter, cream cheese, powdered sugar, and vanilla extract until smooth.
- Drizzle the icing over the warm rolls before serving.
Leave a Reply