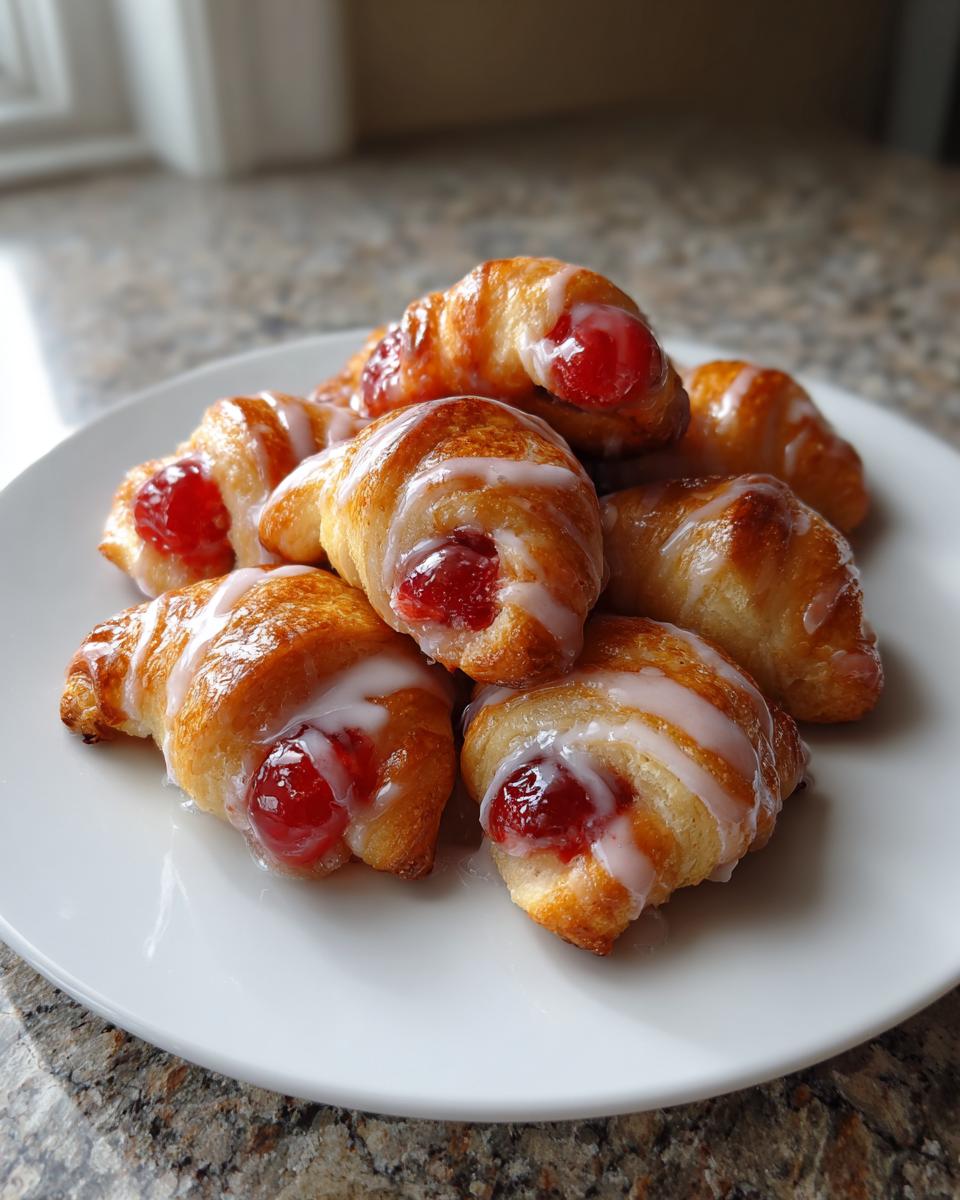
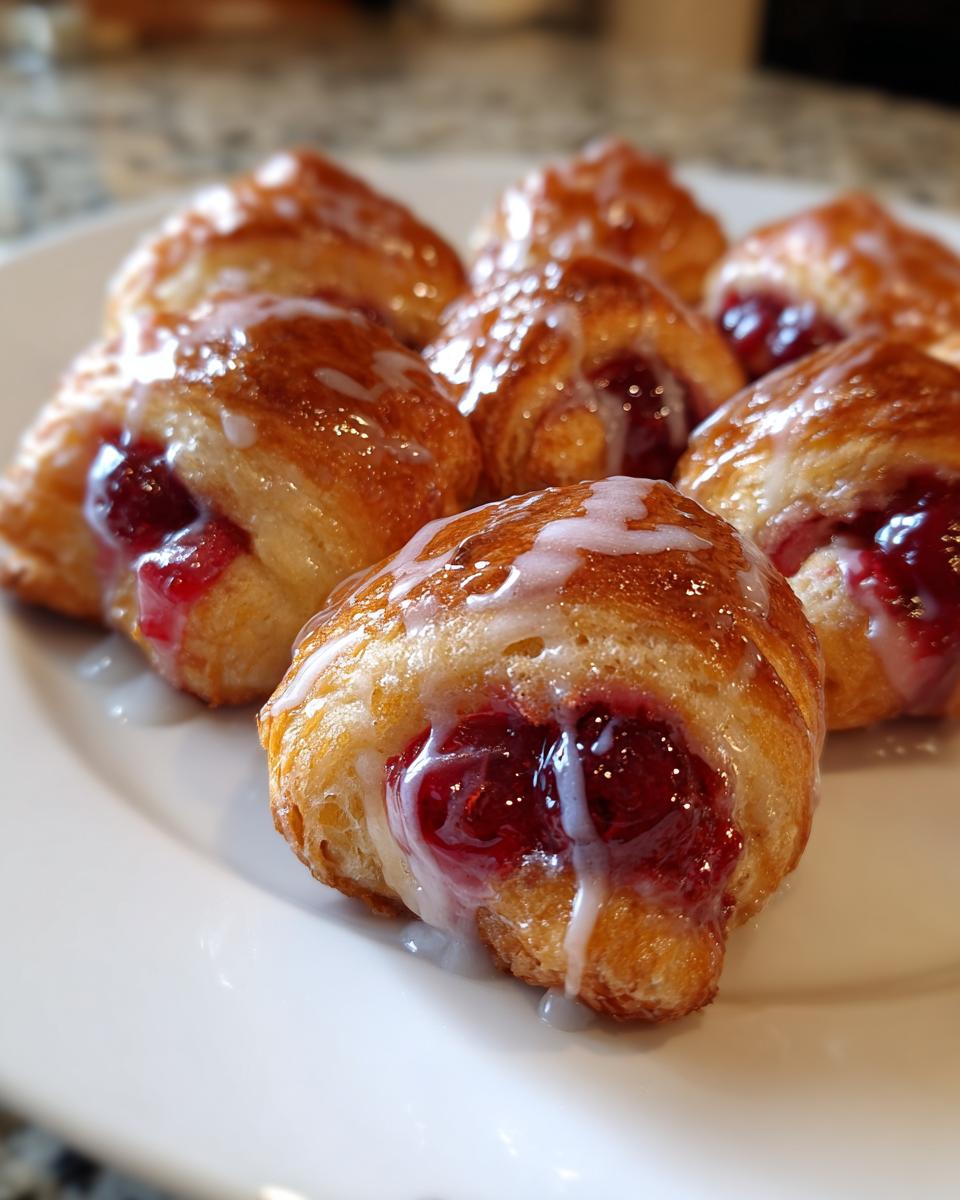
Is there anything better than biting into a warm, gooey cherry pie? Well, how about a whole batch of mini cherry pie bites that come together in minutes? These delicious cherry pie bites are my go-to when I need a quick dessert that feels special-no fancy pastry skills required! Just crescent roll dough, cherry pie filling, and a simple glaze. Trust me, they disappear faster than I can make them.

I first stumbled upon this recipe when I needed a last-minute treat for a family potluck. My grandma's scratch-made pie wasn't happening that day, but these little bites saved the day-and became an instant favorite. The flaky crust, the sweet-tart cherries, that drizzle of glaze… it's like handheld pie magic. And the best part? You probably have all the ingredients in your pantry right now. Let's bake some happiness!
Why You'll Love These Delicious Cherry Pie Bites
These cherry pie bites are pure magic-here's why they're about to become your new obsession:
- Foolproof & fast: 25 minutes start to finish, and no rolling pins or pie crimping required!
- Pantry staples: Just crescent rolls, canned pie filling, and a two-ingredient glaze.
- Party superstars: Perfect for potlucks-everyone goes wild for the hand-held cuteness.
- Kid-approved: My nieces always beg to help assemble them (licking the glaze bowl is half the fun).
- Endlessly adaptable: Swap in apple, blueberry, or even chocolate filling for easy variety.
Seriously-if you need instant dessert joy, these never let me down.
Ingredients for Delicious Cherry Pie Bites
Here's the beautiful part-you only need 3 simple ingredients to make these magical cherry pie bites happen! I always double-check my pantry for these staples before starting:
- 1 can (21 oz) cherry pie filling - Look for the good stuff with plump, juicy cherries (I like Comstock or Oregon brand)
- 2 tubes (8 oz each) refrigerated crescent roll dough - The seamless sheets work best, but the classic triangles are fine too
- 1 cup confectioners' sugar - Sift it first to avoid lumpy glaze
- 1-2 tablespoons milk - Whole milk makes the richest glaze, but any kind works
That's it! Well... plus maybe a little extra flour for dusting your hands when rolling. I told you this recipe was easy.
How to Make Delicious Cherry Pie Bites
Alright, let's get to the fun part-making these adorable little cherry pie bites! I've made this recipe so many times I could do it in my sleep, but I'll walk you through each step like I'm right there in the kitchen with you. Trust me, it's easier than you think, and the results are always worth it.
Step 1: Prepare the Dough
First things first-preheat that oven to 375°F (190°C). While it's heating up, unroll your crescent dough on a clean surface. If you're using the classic triangles, gently separate them along the perforations. (Pro tip: If your dough sticks, a light dusting of flour works wonders.) For the seamless sheets, just unroll and cut into 16 equal rectangles-no fancy shapes needed!
Step 2: Add the Filling
Now, the best part-the cherries! Spoon about a tablespoon of pie filling onto each dough piece. Don't go overboard here, or you'll have a leaky situation (we've all been there). Place the filling near the wider end of the triangle or in the center of your rectangle. Then, just roll 'em up! Tuck the sides in slightly as you go to keep all that cherry goodness inside. Easy, right?
Step 3: Bake to Perfection
Pop those little bundles of joy onto a parchment-lined baking sheet-give 'em about an inch of space to puff up. Slide them into the oven and let the magic happen for 12-15 minutes. You'll know they're done when they're golden brown and your kitchen smells like a bakery. (Resist the urge to eat them straight off the tray-trust me, I speak from experience.)
Step 4: Drizzle the Glaze
While the bites cool for just a minute (seriously, don't glaze piping-hot dough or it'll melt right off), whisk together your confectioners' sugar and milk. You want it thin enough to drizzle but thick enough to cling-add milk a teaspoon at a time until it's just right. Then, go wild with the drizzle! A fork or squeeze bottle works great for those pretty little lines. Wait until they're just warm to serve-that's when the glaze sets up perfectly.
Tips for Perfect Delicious Cherry Pie Bites
After making way too many batches of these cherry pie bites (not that anyone complained!), I've picked up some foolproof tricks:
- Seal those edges tight: Pinch the dough well after rolling-cherry juice leaks fast when it gets hot!
- Parchment is your friend: It prevents sticking and makes cleanup a breeze (no scraping caramelized sugar off pans).
- Glaze control: Too thick? Add milk drop by drop. Too runny? Mix in more powdered sugar till it ribbons nicely.
- Cherry distribution: Break up any big cherry clumps in the can first for even filling in every bite.
Bonus: If your dough gets too warm while working, pop it in the fridge for 5 minutes-cold dough holds its shape better.
Variations for Delicious Cherry Pie Bites
One of my favorite things about this recipe is how easily you can mix it up! Once you've mastered the classic cherry version (which will always be my first love), try these fun twists that keep everyone guessing:
Filling Frenzy
Swap that cherry pie filling for any canned fruit filling you adore-I've had equally amazing results with:
- Apple pie filling (sprinkle with cinnamon sugar before baking for extra coziness)
- Blueberry pie filling (add a squeeze of lemon zest to brighten it up)
- Peach pie filling (top with a dollop of whipped cream and nutmeg)
- Pumpkin pie filling (perfect for fall-just mix canned pumpkin with brown sugar and pumpkin spice)
Glaze Game Changers
That simple powdered sugar glaze is divine, but sometimes I jazz it up:
- Cinnamon glaze: Stir ½ teaspoon cinnamon into the sugar before adding milk
- Citrus burst: Replace milk with orange juice and add zest
- Almond delight: Use ¼ teaspoon almond extract instead of vanilla
- Chocolate drizzle: Melt semisweet chips with a bit of cream for a decadent finish
Last Christmas, I even made a "pie bite bar" with different fillings and glazes-let guests assemble their own combinations. The raspberry filling with chocolate glaze disappeared first!
Serving Suggestions for Delicious Cherry Pie Bites
Listen-these cherry pie bites are downright addictive all on their own, but why stop there? I've had way too much fun playing with different ways to serve them (all in the name of research, of course). Here's how I take them from tasty to downright showstopping:
- The classic combo: Warm bites + cold vanilla ice cream = pure bliss. The way the melty ice cream mingles with the flaky crust? *Chef's kiss*
- Brunch upgrade: Stack them on a platter with fresh berries and a dusting of powdered sugar-suddenly they're fancy enough for bridal showers.
- Party perfect: Skewer them on lollipop sticks for easy grabbing at potlucks (my friend calls them "pie pops").
- Midnight snack: Okay fine… straight from the fridge with a glass of milk is my guilty pleasure.
Pro tip: For holiday parties, I arrange them in a wreath shape with cranberry filling bites-center it with a bowl of eggnog custard dip and watch guests go wild. And if you really want to impress? Warm them slightly and serve alongside espresso shots for an instant dessert charcuterie board. Trust me, nobody will guess how easy they were to make!
Storing and Reheating Delicious Cherry Pie Bites
Here's the beautiful truth-these cherry pie bites rarely last long enough to need storing in my house! But on the off chance you have leftovers (or want to make them ahead), here's exactly how I keep them tasting fresh:
Room Temp Short-Term Storage
If you're serving them within a few hours, just pop them in an airtight container at room temperature. The glaze stays perfect this way-no condensation issues like you'd get in the fridge. I usually stash them under a cake dome if I'm feeling fancy (or just loosely covered with foil if I'm being honest).
Refrigerating for Longer Freshness
For next-day enjoyment, refrigerate them in a sealed container with parchment between layers. They'll keep beautifully for 2-3 days this way. The glaze might lose some shine, but the flavor only gets better as the cherry filling settles into the pastry. Pro tip: Dab any condensation off the glaze with a paper towel before serving.
Freezing for Future Cravings
Yes, you can freeze these! I always make a double batch to freeze half-just wait until they're completely cooled, then freeze them unglazed on a baking sheet before transferring to freezer bags. They'll keep for up to 2 months this way. When the craving hits, pop them straight into a 350°F oven for 8-10 minutes until warm, then drizzle with fresh glaze. The pastry stays miraculously flaky!
The Secret to Perfect Reheating
Microwaving? Don't do it-you'll get sad, soggy bites. Instead, revive them in a 325°F oven for 5-7 minutes until the crust crisps back up. If they seem dry, brush lightly with melted butter before reheating. My favorite trick? Use an air fryer at 300°F for 3-4 minutes-it brings back that just-baked magic better than anything!
One last storage tip: Keep any extra glaze separate in the fridge (it lasts a week). Freshly drizzled glaze makes day-old bites taste brand new. Now go forth and bake with confidence-your future self will thank you for those midnight snack stashes!
Nutritional Information for Delicious Cherry Pie Bites
Now, I'm no nutritionist-just a cherry pie bite enthusiast-but I know some folks like to keep tabs on what they're enjoying. Here's the scoop on these little treats (remember, these are estimates per bite and may vary based on your exact ingredients):
- Calories: About 120 per bite (but seriously, who stops at one?)
- Sugar: 10g (mostly from the natural cherry sweetness and that luscious glaze)
- Fat: 5g (thank that buttery crescent dough for the perfect flakiness)
- Carbohydrates: 18g (worth every delicious gram, if you ask me)
- Protein: 1g (hey, cherries have antioxidants-that counts as health food, right?)
- Sodium: 180mg (less than a bag of chips, so I call that a win)
Here's my philosophy-life's too short to stress over dessert stats! These cherry pie bites are meant to be enjoyed in happy moderation. I always say one bite is a taste test, three bites are proper enjoyment, and six... well, that's just quality control research.
FAQs About Delicious Cherry Pie Bites
Over the years, I've gotten tons of questions about these cherry pie bites-here are the ones that pop up most often (along with my hard-earned answers from many happy-and a few messy-batches!):
Can I use homemade cherry pie filling?
Absolutely! While canned filling is super convenient, homemade lets you control the sweetness and texture. Just make sure your filling isn't too runny-thicken it with an extra tablespoon of cornstarch if needed. My grandma's secret? Simmer fresh cherries with a splash of almond extract and lemon juice before adding thickener.
Help! My pie bites keep leaking-what am I doing wrong?
Oh honey, I've been there-nothing worse than cherry lava erupting mid-bake! Three tricks save me every time: 1) Don't overfill (stick to that 1 tablespoon guideline), 2) Pinch the seams tightly (especially the pointy ends on triangle dough), and 3) Freeze assembled bites for 10 minutes before baking to help the dough set. Bonus tip? Place them seam-side down on the baking sheet.
Can I prep these ahead of time?
You bet! I often assemble them the night before (without glazing) and refrigerate covered with plastic wrap. The cold dough actually bakes up extra flaky! For longer storage, freeze unbaked bites on a tray, then transfer to bags-they'll keep for months. Bake straight from frozen, adding 2-3 extra minutes.
What's the best way to get that perfect drizzle?
After many "glaze disasters," here's my foolproof method: Let baked bites cool for 5 minutes (warm but not hot), make your glaze slightly thicker than pancake batter, and use a zip-top bag with the tiniest corner snipped off. Swirl motions work better than straight lines-and if you mess up? Sugar melts! Just swipe it off and re-drizzle.
Can I make these gluten-free or vegan?
Definitely! For gluten-free, use GF crescent dough (several brands make it now). Vegan? Swap regular dough for plant-based crescent rolls (Annie's and Immaculate have great options) and use powdered sugar with almond milk for the glaze. The filling's usually vegan already-just check labels to be sure.
Got more questions? Drop them in the comments-I love troubleshooting baking adventures with fellow pie bite enthusiasts! And remember-even "failed" batches usually still taste amazing. My first leaky attempt? We just called them "cherry pie nuggets" and ate them with spoons!
Share Your Delicious Cherry Pie Bites
Alright, my fellow cherry pie bite lovers-now it's your turn! I'd absolutely love to hear how your baking adventure went. Did you stick with classic cherry or try a wild variation? Maybe you discovered the perfect glaze trick or had a hilarious kitchen mishap (we've all been there!). Drop a comment below-I read every single one and always reply with tips or commiseration.
And hey, if you snapped a photo of your gorgeous (or adorably messy) creations, tag me on Instagram! There's nothing I love more than seeing your #CherryPieBites masterpieces. Pro tip: Natural lighting makes that glaze glisten like crazy in photos-just sayin'.
Feel free to rate the recipe too-your feedback helps me tweak and improve. Did your family gobble them up in five minutes flat like mine always does? Five stars. Did your cat knock over the powdered sugar mid-drizzle? Still five stars for effort! Now get sharing, because pie bites taste even better when we celebrate them together.
Print
Easy Delicious Cherry Pie Bites Everyone Loves (59 characters)
- Total Time: 25 minutes
- Yield: 16 bites 1x
- Diet: Vegetarian
Description
Quick and easy cherry pie bites made with crescent roll dough and cherry pie filling, topped with a simple glaze.
Ingredients
- 1 can cherry pie filling (21 ounces)
- 2 tubes crescent roll dough (8 ounces each)
- 1 cup confectioners' sugar
- 1-2 tablespoons milk
Instructions
- Preheat oven to 375°F (190°C).
- Unroll crescent roll dough and separate into triangles.
- Place a spoonful of cherry pie filling on each dough triangle.
- Roll up the dough, enclosing the filling.
- Place on a baking sheet and bake for 12-15 minutes or until golden brown.
- Mix confectioners' sugar and milk to make a glaze, then drizzle over warm bites.
Notes
- You can use other pie fillings like apple or blueberry.
- Let the bites cool slightly before glazing.
- Prep Time: 10 minutes
- Cook Time: 15 minutes
- Category: Dessert
- Method: Baking
- Cuisine: American
Nutrition
- Serving Size: 1 bite
- Calories: 120
- Sugar: 10g
- Sodium: 180mg
- Fat: 5g
- Saturated Fat: 2g
- Unsaturated Fat: 3g
- Trans Fat: 0g
- Carbohydrates: 18g
- Fiber: 0g
- Protein: 1g
- Cholesterol: 0mg


Leave a Reply