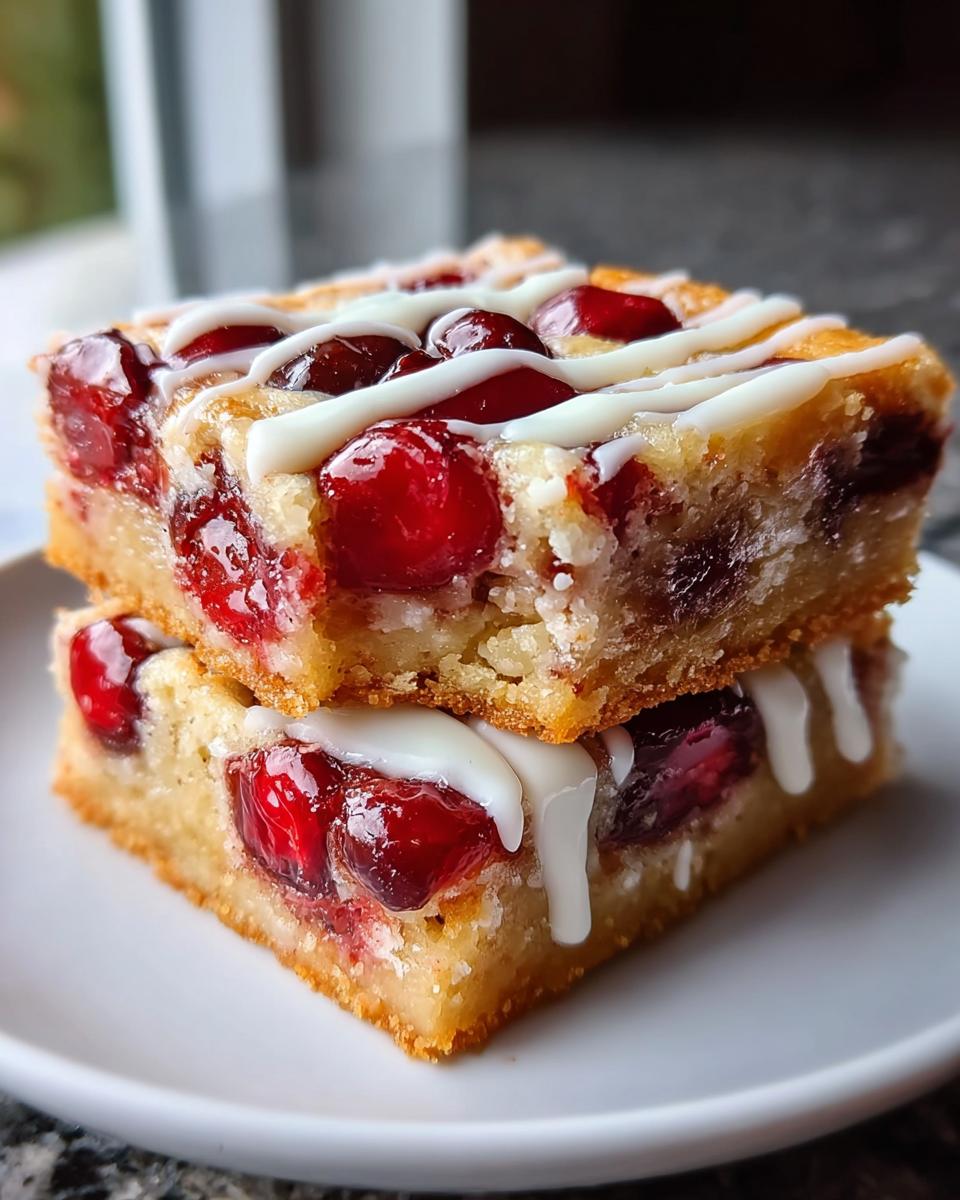
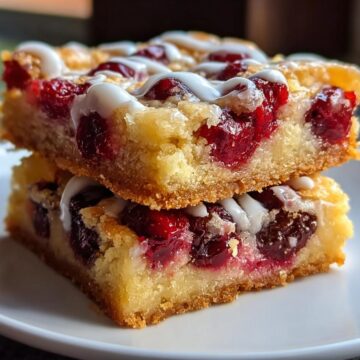
Oh, Christmas Cherry Bars - just saying the name makes me smile. There's something so magical about pulling a pan of these festive treats out of the oven, the scent of buttery pastry and sweet cherries filling the kitchen. I've been making these for years, ever since my grandma handed me her old recipe card, smudged with cherry juice and love. They're the perfect mix of simplicity and holiday charm - no fancy techniques, just a few pantry staples and a big dose of cheer. Whether it's a cookie exchange, a cozy family gathering, or a last-minute gift for the neighbors, these bars always steal the show. That ruby-red cherry layer peeking through golden crumbles? Pure Christmas joy on a plate. Trust me, once you try them, they'll become your holiday tradition too.

What I love most (aside from how easy they are!) is how they balance rich buttery crust with bright, jammy cherries - it's like a hug and a party in every bite. They're sturdy enough to stack on a platter but pretty enough to feel special. And that optional vanilla glaze? Just a little drizzle makes them look bakery-worthy. Honestly, I've never brought these to a holiday potluck without someone asking for the recipe. So grab your mixing bowl - let's make some merry memories!
Why You'll Love Christmas Cherry Bars
Okay, let me count the ways these bars will steal your heart (and probably your holiday table):
- Festive magic: That red cherry layer peeking through golden crumbles? Instant holiday cheer on a plate. They look like you spent hours, but shhh - our little secret.
- Easy as pie (easier, actually): No fancy skills needed - just mix, layer, bake. Perfect for when you're drowning in holiday chaos but still want to impress.
- Crowd-pleaser: Kids go nuts for the sweet-tart cherries, adults love the buttery crust. Even Uncle Bob who "doesn't like desserts" will sneak seconds.
- Make-ahead win: Bake them the day before - they actually taste better as the flavors settle. One less thing to stress about on party day!
- Versatile: Serve them fancy on a cake stand at your cookie exchange or casually grab one with coffee while wrapping presents. Zero judgment either way.
Seriously, these bars are like edible holiday happiness. You'll see!
Ingredients You'll Need for Christmas Cherry Bars
Gather these simple ingredients - chances are, you've got most in your pantry already! I've grouped them to make prep super easy:
Main Ingredients
- 1 cup (2 sticks) softened butter - Leave it out for 30 minutes beforehand. No microwave shortcuts here - trust me, room-temperature butter makes all the difference!
- 4 large eggs - Crack them into a separate bowl first to avoid shells in your batter. Been there, done that.
- 2 cups sugar - Regular granulated works perfectly, but for extra depth, try swapping ¼ cup with brown sugar.
- 1 teaspoon vanilla powder - Or 1 tablespoon vanilla extract if that's what you've got. The powder just gives a more intense flavor.
- 3 cups all-purpose flour - Spoon it into the measuring cup, then level off. No packed flour - we want light, crumbly bars.
- 1 teaspoon salt - Balances the sweetness beautifully.
- 1 can (21 oz) cherry pie filling - Look for the "extra fruit" kind if you can find it. That extra cherry goodness? Worth it.
Optional Glaze
- 1 cup powdered sugar - Sift it first to avoid lumps. Your future self will thank you.
- ½ cup milk - Whole milk gives the richest glaze, but any kind works.
- ½ teaspoon vanilla powder - Or almond extract for a festive twist!
Quick tip: For gluten-free bars, swap the flour with your favorite 1:1 gluten-free blend. And if dairy's an issue, coconut oil works instead of butter - just expect a slightly different texture.
Step-by-Step Instructions for Christmas Cherry Bars
Preparing the Batter
- Preheat & prep: Crank your oven to 350°F (175°C) and grease a 9x13-inch baking pan really well. I use butter wrappers for this - zero waste and perfect coverage!
- Cream it like you mean it: In a big bowl, beat the softened butter and sugar together for 2-3 minutes until fluffy and pale. Scrape down the sides - those sneaky unmixed bits love to hide there.
- Egg-cellent addition: Add eggs one at a time, beating well after each. Your batter might look a bit curdled after the first egg - don't panic! It'll smooth out. Mix in the vanilla until just combined.
- Dry team: In another bowl, whisk flour and salt. Gradually add to the wet ingredients, mixing on low until just combined. The dough will be thick like cookie dough - that's perfect!
Layering and Baking
- First layer: Press half the dough into your prepared pan. It'll seem thin - that's okay! Use slightly damp fingers to spread it evenly without sticking.
- Cherry time: Dollop the pie filling over the dough and gently spread it with a spatula, leaving a tiny border around the edges. Pro tip: If your filling is super thick, give it a quick stir first to loosen.
- Top it off: Drop spoonfuls of remaining dough over the cherries - no need for perfect coverage! Those gaps let the ruby filling peek through beautifully.
- Bake to golden: Pop it in the oven for 23-25 minutes. You'll know it's done when the edges are golden and the top looks set. A toothpick should come out clean (ignore cherry streaks!).
Adding the Glaze (Optional)
- Mix it up: While the bars cool slightly, whisk powdered sugar, milk, and vanilla until smooth. Want it thicker? Add more sugar. Thinner? More milk, a teaspoon at a time.
- Drizzle with flair: Use a spoon or piping bag to zigzag glaze over warm (not hot) bars. It'll melt slightly into the nooks - that's the magic!
- Glaze-free option: These are just as delicious plain! Or dust with powdered sugar right before serving for a snowy effect.
Cool before cutting: I know it's hard, but let them cool for at least 30 minutes. They'll hold their shape better when sliced - promise! Use a sharp knife wiped clean between cuts for perfect squares.
Variations for Christmas Cherry Bars
Want to mix things up? These bars are like a blank canvas for holiday flavors! Here are some of my favorite twists:
- Fruit swap: Try blueberry, apple, or even raspberry pie filling instead of cherry. (My cousin swears by peach - unexpected but delicious!) raspberry coconut magic bars
- Nutty crunch: Stir ½ cup chopped pecans or almonds into the dough for extra texture.
- Flavor boost: Add ½ teaspoon almond extract with the vanilla - it pairs amazingly with cherries.
- Chocolate lover's dream: Sprinkle chocolate chips over the fruit layer before adding the top dough. The melty pockets? Absolute bliss.
- Festive sparkle: Before baking, brush the top with milk and sprinkle with coarse sugar for a glittery finish.
The best part? No one will guess how easy it was to customize. Happy experimenting!
Serving and Storage Tips for Christmas Cherry Bars
Here's how to keep your cherry bars looking and tasting their best:
- Patience is key: Let the bars cool completely in the pan-about 45 minutes-before slicing. I know, the wait is torture, but hot bars crumble like a snowman in July.
- Serve slightly warm or room temp: They're delicious either way! Pop chilled bars in the microwave for 10 seconds if you want that fresh-baked feel.
- Storage smarts: Keep them in an airtight container at room temp for up to 3 days. Layer parchment between bars if stacking-cherry filling can be clingy!
- Freezer-friendly: Wrap individual bars tightly in plastic, then freeze for up to 2 months. Thaw at room temp or give 'em a quick oven warm-up (300°F for 5 minutes). Perfect for sneaky holiday treats!
Pro tip: The glaze holds up better if added just before serving. For gifting, pack unglazed bars with a little pouch of glaze mix-let them drizzle their own!
Helpful Notes for Perfect Christmas Cherry Bars
A few golden rules I've learned after making these bars approximately a zillion times:
- Don't overmix: Once you add the flour, mix just until combined. Overworked dough = tough bars, and we want that melt-in-your-mouth texture!
- Even baking: Rotate your pan halfway through if your oven runs hot. Those back corners love to brown faster than the center.
- Cherry distribution: If your filling clumps, spread it gently with a fork - no naked spots, but don't mash it flat either.
- Healthier swaps: Use low-sugar pie filling or reduce the sugar in the dough by ¼ cup. For gluten-free, my favorite 1:1 blend works like a charm.
- Sticky situation: Grease your knife between cuts for cleaner slices. Or lick the knife - I won't tell!
Remember: Imperfect bars still taste amazing. Burnt edges? Call them "caramelized." Lopsided? "Rustic charm." You've got this!
Frequently Asked Questions About Christmas Cherry Bars
Got questions? I've got answers! Here's the scoop on the most common cherry bar mysteries:
- Can I use fresh cherries instead of pie filling?
You can, but you'll need to cook them down first with a bit of sugar and cornstarch to thicken. Honestly? The canned filling's consistency is perfect here - and way easier. - Can I make these ahead of time?
Absolutely! They actually taste better on day two as the flavors meld. Bake up to 48 hours ahead and store covered at room temp (just add glaze before serving). - How do I prevent dry bars?
Don't overbake! Pull them out when the edges just turn golden. Using room temp butter (not melted!) also keeps them tender. - Can I freeze them without glaze?
Yes! Freeze unglazed bars for up to 2 months. Add the glaze after thawing - frozen glaze gets weirdly opaque. - Why did my top layer sink into the cherries?
Your dough might've been too soft. Chill it for 15 minutes before layering next time - cold dough holds its shape better.
Still stumped? Shoot me a message - I'm happy to troubleshoot your baking adventures!
Final Thoughts on Christmas Cherry Bars
There you have it - my absolute favorite way to spread holiday cheer through baking! These Christmas Cherry Bars are more than just a dessert; they're little edible hugs wrapped in festive flavors. Simple enough for beginners, special enough to impress, and guaranteed to make your kitchen smell like holiday magic. I can't wait for you to try them and start your own cherry-stained tradition. Share them with neighbors, pile them on cookie plates, or (no judgment) enjoy them straight from the pan with a mug of cocoa. However you serve them, they're sure to become a much-requested treat. Happy baking, and may your holidays be as sweet as these bars!
Christmas Cherry Bars
Ingredients
Main Ingredients
- 1 cup softened butter
- 4 eggs
- 2 cups sugar
- 1 teaspoon vanilla powder
- 3 cups all-purpose flour
- 1 teaspoon salt
- 1 can cherry pie filling
Optional Glaze
- 1 cup powdered sugar
- ½ cup milk
- ½ teaspoon vanilla powder
Instructions
- Preheat your oven to 350°F (175°C). Grease a 9x13-inch baking pan.
- Cream together the softened butter and sugar until light and fluffy.
- Beat in the eggs one at a time, then stir in the vanilla powder.
- Combine the flour and salt; gradually add to the creamed mixture.
- Spread half of the batter into the prepared pan. Top with cherry pie filling. Drop remaining batter by spoonfuls over the filling.
- Bake for 25 minutes or until golden brown.
- If using glaze, mix powdered sugar, milk, and vanilla powder until smooth. Drizzle over warm bars.


Leave a Reply