Oh my goodness, you guys-I have to tell you about these Chocolate Peanut Butter Dream Bars. They're the kind of dessert that makes people stop mid-bite, look at you with wide eyes, and say, "Wait, YOU made these?" And the best part? They're ridiculously easy. I first stumbled upon this recipe when I needed a last-minute dessert for a potluck, and now it's my go-to whenever I need something that looks fancy but secretly takes almost no effort.
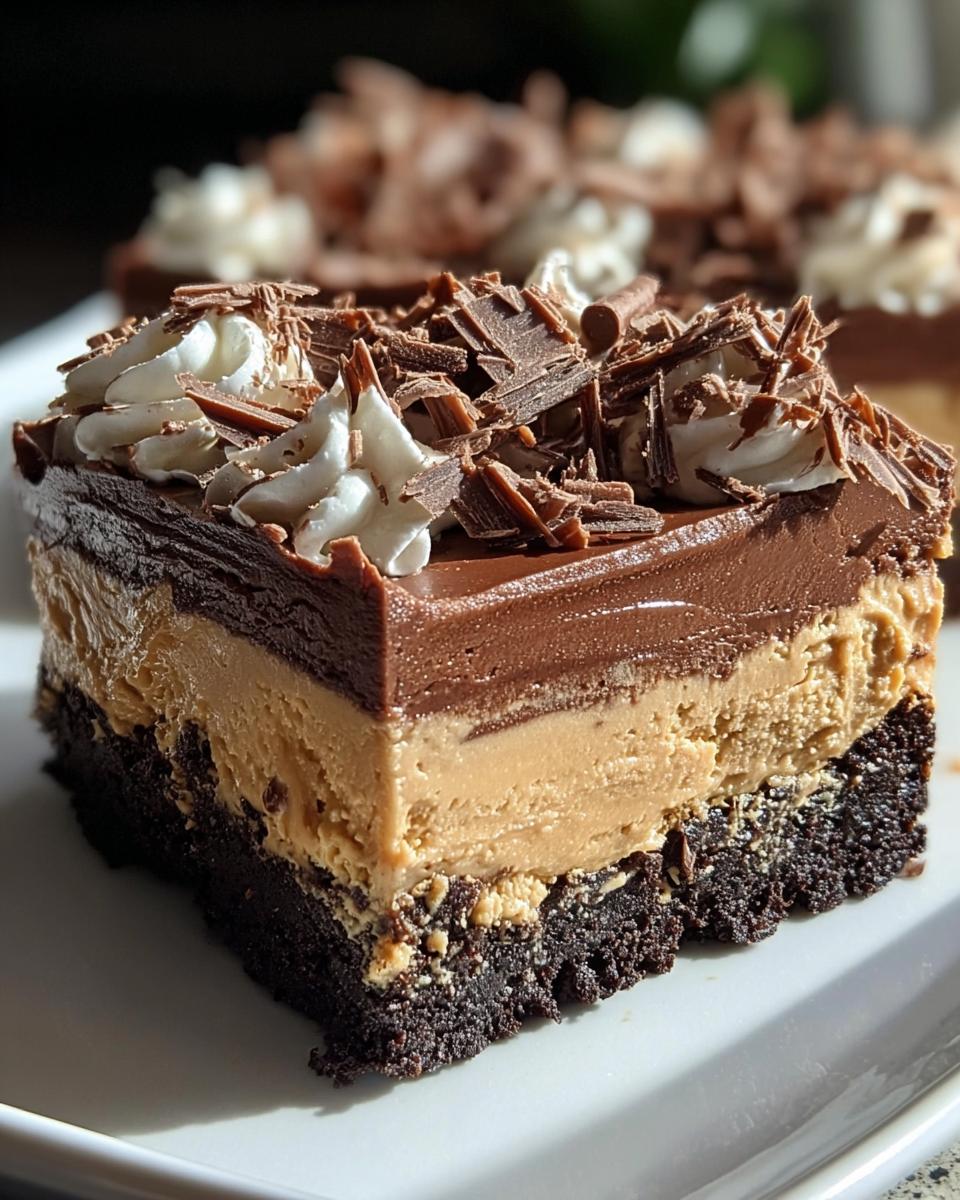
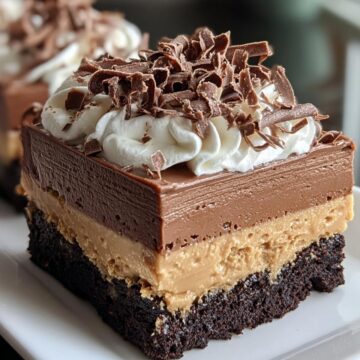
Imagine this: a crunchy chocolate cookie crust, a layer of creamy peanut butter fluff that melts in your mouth, and a silky chocolate pudding topping that ties it all together. It's like a Reese's Peanut Butter Cup had a love child with a chocolate mousse pie. And because it's a no-bake dessert (well, except for that quick 10-minute crust bake), it's perfect for summer when you don't want to turn on the oven. Trust me, once you try these, you'll be making them all year round-for parties, family dinners, or just because it's Tuesday.

Why You'll Love These Chocolate Peanut Butter Dream Bars
Okay, let me count the ways you're going to obsess over these bars. First off, they're the ultimate lazy baker's dream-minimal effort, maximum payoff. But don't let their simplicity fool you. These bars are the kind of dessert that disappears from the platter before you even finish saying, "Help yourselves!"
Perfect for Any Occasion
I've brought these to everything from backyard BBQs to fancy dinner parties, and they always steal the show. Need a last-minute treat for book club? Done. Craving a midnight snack that feels indulgent but won't keep you slaving in the kitchen? Absolutely. They're like your favorite little black dress-dress them up with chocolate curls for a party or keep it simple for a weeknight treat. No matter the event, these bars fit right in.
Irresistible Texture and Flavor
Let's talk about that magical layered texture. The crust? Crunchy, buttery, and just sweet enough. The peanut butter layer? So fluffy it's like biting into a cloud (a peanut butter cloud, which is obviously the best kind). And that chocolate pudding topping? Smooth, rich, and decadent without being too heavy. Every bite is a perfect little symphony of textures and flavors that'll have you sneaking back for "just one more" piece.
Ingredients You'll Need for Chocolate Peanut Butter Dream Bars
Alright, let's gather up the goodies! The beauty of this recipe is that most of these ingredients are pantry staples-or at least they are in my house (I may or may not keep extra peanut butter on hand for emergencies). Here's everything you'll need, broken down by layer so you don't miss a thing. And don't worry, I've got notes on substitutions and prep tips too!
For the Crust
- 16 oz chocolate sandwich cookies (that's one standard package-I use Oreos, but any brand works)
- ½ cup unsalted butter, melted (if you only have salted, just skip adding extra salt later)
Quick tip: When crushing the cookies, you want them fine-like sand, not gravel. I throw them in a zip-top bag and roll them with a rolling pin while pretending I'm in a baking competition. No food processor? No problem!
For the Peanut Butter Layer
- 1 cup creamy peanut butter (the regular kind, not natural-it blends better)
- 8 oz cream cheese, softened (leave it on the counter for 30 minutes, or microwave for 10 seconds if you're impatient like me)
- 1 cup powdered sugar (no need to sift-just give it a quick stir to break up lumps)
- 8 oz whipped topping, thawed (yep, the stuff in the tub-Cool Whip works great)
Pro move: If your peanut butter layer feels too thick, let the cream cheese soften completely. Trust me, lumpy cream cheese is the enemy of smooth, dreamy layers.
For the Chocolate Layer
- 3.9 oz instant chocolate pudding mix (one small box-not cook-and-serve!)
- 1.5 cups milk (whole milk makes it extra creamy, but any kind works)
Important: Whisk the pudding and milk for a full 2 minutes-it seems like overkill, but this ensures it sets up perfectly. And yes, you must use instant pudding here. The other kind won't work, and we don't have time for pudding disasters.
For Garnish (Optional but Highly Recommended)
- Extra whipped topping (because more fluff is always better)
- Chocolate curls (or just shave a chocolate bar with a vegetable peeler-fancy-looking but secretly easy)
Feel free to get creative here! Crushed peanuts, mini chocolate chips, or even a drizzle of caramel would be amazing. Or, you know, all three. I won't judge.
Step-by-Step Instructions for Chocolate Peanut Butter Dream Bars
Alright, let's get to the fun part-making these dreamy bars! Don't let the layers intimidate you; it's seriously as simple as mix, spread, repeat. I'll walk you through each step with all the little tips I've learned from making these way too many times.
Prepare the Crust
- Preheat your oven to 350°F (175°C) and grease a 9x13-inch baking dish. A quick spritz of cooking spray or a light rub of butter will do the trick.
- In a bowl, mix your finely crushed chocolate cookies with the melted butter. It should look like wet sand-if it's too dry, add another tablespoon of butter. No one's judging here.
- Press the mixture firmly into the bottom of your prepared dish. I like to use the bottom of a measuring cup to really pack it down-this keeps the crust from crumbling later. Bake for 10 minutes, then let it cool completely. Seriously, don't rush this step-warm crust + peanut butter = messy layers.
Make the Peanut Butter Layer
- In a large bowl, beat the peanut butter, softened cream cheese, and powdered sugar together until smooth. If your mixer starts protesting (or you're doing this by hand), just keep going-it'll come together, promise.
- Gently fold in the whipped topping with a spatula. Think of it like folding a cloud into your peanut butter-slow, swoopy motions to keep it fluffy. Spread this heavenly mixture over your cooled crust, smoothing it out with the back of a spoon.
Add the Chocolate Layer
- Whisk the pudding mix and milk together for a full 2 minutes. Set a timer-this ensures the pudding thickens properly. Let it sit for 5 minutes; it'll get even thicker as it stands.
- Pour the pudding over the peanut butter layer and spread it gently. If you're worried about mixing the layers, start from the center and work outward. It's okay if it's not perfectly even-it'll taste amazing either way.
Chill and Garnish
- Pop the dish in the fridge for at least 4 hours, but overnight is even better. I know, the wait is torture, but it's worth it-this lets all the layers set up properly.
- When you're ready to serve, top with extra whipped topping and chocolate curls. Pro tip: Run your knife under hot water before slicing for super clean edges. Then stand back and watch them disappear!
See? Easy-peasy. The hardest part is waiting for them to chill-but hey, that just gives you time to clean up (or, you know, sneak a spoonful of peanut butter straight from the jar).
Delicious Variations for Chocolate Peanut Butter Dream Bars
Okay, let's talk about playing with this recipe-because honestly, it's like a blank canvas for your dessert dreams. Once you've mastered the classic version (which, trust me, you will), it's time to get creative. Here are some of my favorite twists that keep things exciting without messing up that perfect balance of textures.
Crust Swaps
- Graham crackers: Swap the chocolate cookies for 2 cups of graham cracker crumbs (about 16 full sheets) mixed with the same amount of butter. It gives a sweet, almost honey-like base that pairs beautifully with the peanut butter.
- Gluten-free cookies: Use your favorite gluten-free chocolate or vanilla sandwich cookies. I've even seen people use crushed gluten-free pretzels for a salty-sweet twist!
- Nutty delight: Replace half the cookies with finely chopped toasted pecans or almonds. Just pulse them in the food processor first so you don't end up with chunk-city.
Flavor Twists
- Nut butter swap: Not a peanut butter fan? Almond butter or cashew butter work like a charm. Or go wild with cookie butter for a speculoos-inspired version that'll blow minds.
- Dark chocolate upgrade: Use dark chocolate pudding mix instead of regular for a richer, slightly less sweet vibe. Bonus: sprinkle flaky sea salt on top before serving.
- Caramel drizzle: Before adding the chocolate layer, swirl in a few tablespoons of caramel sauce. It'll seep into the peanut butter layer and create little pockets of gooey goodness.
- Espresso kick: Add 1 teaspoon instant espresso powder to the pudding mix for a mocha twist. It's subtle but makes the chocolate flavor pop even more.
The best part? You can mix and match these ideas. Graham cracker crust with almond butter and caramel? Yes, please! Just remember: no matter how you tweak it, the magic is in those distinct layers, so keep the ratios roughly the same. Now go forth and experiment-your dessert game is about to level up.
Serving and Storage Tips
Here's the thing about these bars-they're even better the next day, so don't stress if you need to make them ahead! For picture-perfect slices, pop the whole pan in the fridge for at least 4 hours (overnight is golden). When you're ready to serve, run a sharp knife under hot water, wipe it dry, and slice with confidence. That warmth helps glide right through the layers without squishing them. Want to impress? Serve them on a platter with extra chocolate curls and a dusting of cocoa powder. Leftovers (ha, as if!) keep beautifully covered in the fridge for up to 5 days-just layer a paper towel over the top before wrapping to prevent condensation. And no, they don't freeze well-the pudding layer gets weepy. But let's be real, they'll be long gone before that's a problem.
Helpful Notes for Perfect Chocolate Peanut Butter Dream Bars
Listen, I've made these bars more times than I can count, and here's what I've learned the hard way so you don't have to. First off, patience is key-letting them chill overnight gives you the cleanest slices and the dreamiest layers. If your cream cheese isn't fully softened, you'll get little lumps in your peanut butter cloud, and nobody wants that. Microwave it for 10-second bursts if you're in a hurry. Also, don't skip the "whisk pudding for 2 minutes" step-it's the difference between silky chocolate and sad soup. And hey, if your layers aren't Instagram-perfect? Who cares. They'll still taste like heaven.
Frequently Asked Questions
Okay, let's tackle those burning questions I get every time someone falls in love with these bars (which, let's be honest, happens a lot). Here's the scoop on all the little hiccups you might run into-and how to avoid them!
1. Can I freeze these dream bars?
Honestly? I wouldn't. The pudding layer tends to get watery when thawed, and the texture goes from dreamy to slightly sad. If you must freeze them, skip the whipped topping garnish and wrap individual slices tightly in plastic, then foil. Thaw in the fridge overnight, but expect a bit of texture change.
2. How do I keep the crust from getting soggy?
Two words: cool completely. Let that baked crust come to room temp before adding the peanut butter layer. Also, press it really firmly into the pan-like you're mad at it-to create a tight barrier against moisture.
3. Can I use natural peanut butter?
You can, but the texture might be grainier since natural PB tends to separate. If you go this route, stir it really well first and maybe add an extra ¼ cup powdered sugar to help stabilize it.
4. My pudding layer isn't setting-help!
Did you use instant pudding mix (not cook-and-serve)? That's crucial. Also, make sure you're whisking for the full 2 minutes-it's like magic pudding CPR. If it's still too soft after chilling, pop the whole pan in the freezer for 30 minutes before slicing.
5. Can I make these ahead for a party?
Absolutely! They're actually better after 24 hours in the fridge. Just hold off on garnishing until right before serving so the whipped topping stays fluffy.
Final Thoughts: Enjoy Your Chocolate Peanut Butter Dream Bars!
And there you have it-the easiest, dreamiest dessert that'll make you look like a baking rockstar with barely any effort. Whether you're whipping these up for a crowd or just treating yourself (no judgment here), these bars never disappoint. Crispy, creamy, chocolatey, peanut buttery perfection in every bite. Now go make them, share them, and prepare for the onslaught of recipe requests. Oh, and when you do? Tag me in your photos so I can drool over your creations!
Chocolate Peanut Butter Dream Bars
Equipment
- 9x13-inch baking dish
- mixing bowls
- electric mixer
Ingredients
For the Crust
- 16 oz chocolate sandwich cookies, crushed 1 package
- ½ cup unsalted butter, melted
For the Peanut Butter Layer
- 1 cup creamy peanut butter
- 8 oz cream cheese, softened 1 package
- 1 cup powdered sugar
- 8 oz whipped topping, thawed 1 container
For the Chocolate Layer
- 3.9 oz instant chocolate pudding mix 1 package
- 1.5 cups milk
For Garnish
- extra whipped topping
- chocolate curls
Instructions
- Preheat oven to 350°F (175°C). Grease a 9x13 inch baking dish.
- Mix crushed cookies and melted butter in a bowl. Press mixture into the bottom of the baking dish.
- Bake crust for 10 minutes. Let cool.
- In a large bowl, beat peanut butter, cream cheese, and powdered sugar until smooth. Fold in whipped topping. Spread over cooled crust.
- Whisk pudding mix and milk for 2 minutes. Let stand for 5 minutes. Spread over peanut butter layer.
- Refrigerate for at least 4 hours before serving. Garnish with whipped topping and chocolate curls.


Leave a Reply