I'll never forget the first time I made Butterfinger fudge-it was one of those happy accidents that turned into an obsession. I'd grabbed a bag of Butterfinger minis on sale after Halloween, thinking they'd be perfect for… well, eating straight from the bag, obviously. But then I got this wild idea to chop them up and swirl them into fudge, and friends, it was a *revelation*. The way the creamy chocolate hugs those crispy, peanut-buttery bits? Absolute magic. And the best part? It's embarrassingly easy-just 15 minutes of active time, and you've got a treat that disappears faster than I can hide the evidence from my kids.
This fudge is my go-to for last-minute gifts, potlucks, or those nights when you need something sweet *now*. It's rich without being heavy, with this incredible contrast of smooth and crunchy that makes it impossible to eat just one piece. Trust me, once you try it, you'll start stockpiling Butterfingers like I do-just in case of emergencies.

Why You'll Love Butterfinger Fudge
Okay, let me count the ways this fudge will steal your heart (and your snack drawer):
- No oven required! Just a saucepan and a little patience while it chills-perfect for summer or when you're too lazy to turn on the stove.
- That crunch. The Butterfinger bits stay miraculously crisp against the velvety chocolate, like a party in your mouth.
- Five ingredients-and one of them is literally just chopped candy bars. Couldn't be simpler.
- Every bite is nostalgia. Tastes like childhood, but fancier.
- People lose their minds over it. Seriously, I've seen grown adults trade favors for the last piece.
Perfect for Any Occasion
Birthdays, holidays, "I survived Monday" celebrations-this fudge fits right in. It's equally at home on a fancy dessert platter or wrapped in wax paper for a quick gift. (Pro tip: Keep a batch in the fridge for surprise guests. You'll look like a hero.)
Minimal Effort, Maximum Flavor
You're basically melting chocolate, stirring in candy, and letting the fridge do the rest. Even if you've burned toast before, you can handle this. And that 15 minutes of work? Totally worth it when you see people's faces after the first bite.
Ingredients You'll Need for Butterfinger Fudge
Gather these five simple things-I promise, you might already have most of them lurking in your pantry. And don't stress about exact measurements; fudge is forgiving (unlike my toddler when I run out of snacks).
- 3 cups semi-sweet chocolate chips - I swear by Ghirardelli for that melt-in-your-mouth smoothness, but any good-quality brand works. If you're feeling wild, swap in dark chocolate!
- 14 oz sweetened condensed milk - The secret to creamy, dreamy fudge. Don't even think about substituting evaporated milk-it's not the same thing, trust me.
- ¼ cup heavy cream - This little splash takes the texture from "good" to "oh-my-gosh-I-need-another-piece" level.
- 2 cups roughly chopped Butterfinger bars - About 8 full-size bars. "Roughly" means pea-sized chunks-you want those satisfying crunches!
- 1 cup finely chopped Butterfinger bars - Same bars, different cut! These get sprinkled on top like edible confetti. (Pro tip: A food processor makes quick work of the fine chop, but whacking them in a zip-top bag with a rolling pin is way more therapeutic.)
See? Told you it was simple. Now go raid your candy stash-I'll wait.
Step-by-Step Butterfinger Fudge Instructions
Okay, let's get to the fun part-making the magic happen! Don't worry, I'll walk you through every step. If I can do this while simultaneously refereeing a sibling argument over Legos, you've got this too.
Preparing the Pan
First, grab that 8x8-inch pan and line it with parchment paper, letting the edges hang over the sides like little handles. This isn't just for looks-those overhangs are your golden ticket to lifting the fudge out later without any tragic crumbling. (Worst. Feeling. Ever.) If you're out of parchment, aluminum foil works in a pinch, but give it a light spritz of cooking spray.
Melting the Chocolate Mixture
Now, toss the chocolate chips, sweetened condensed milk, and heavy cream into a medium saucepan. Low heat is key here-we're going for slow and steady, not a scorched chocolate disaster. Stir constantly (yes, really-no multitasking!) until it turns into this glorious, velvety pool of chocolate. You'll know it's ready when you can't see a single stubborn chip resisting the melt.
Adding the Butterfinger Crunch
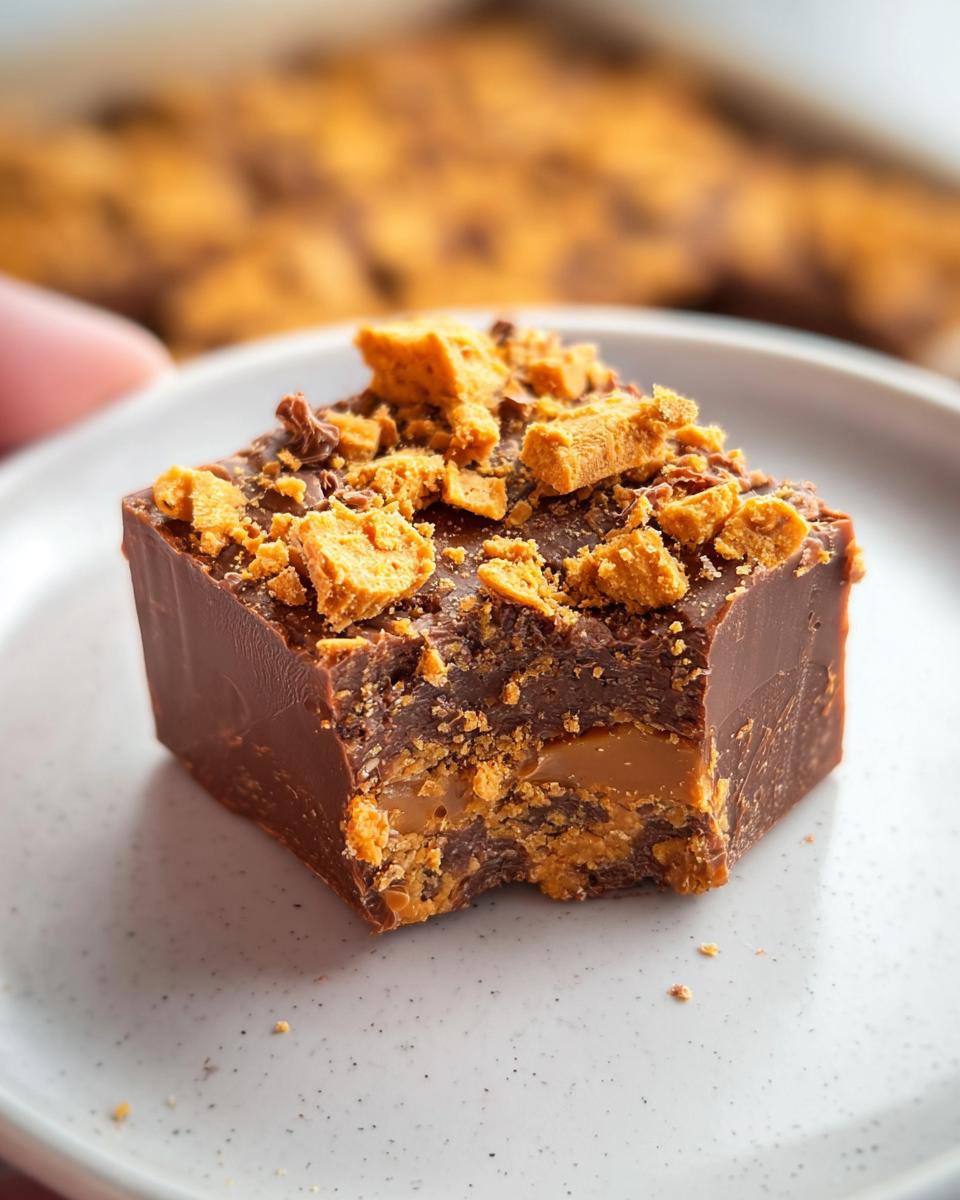
Take the pan off the heat and stir in those 2 cups of roughly chopped Butterfinger pieces. Fold them in gently but thoroughly-you want every future bite to have those crispy surprises. Then, pour the whole luscious mess into your prepared pan. Sprinkle the finely chopped Butterfinger bits over the top like you're decorating the world's most delicious cake, and lightly press them in so they stick.
Chilling and Cutting
Pop the pan into the fridge for at least 2 hours-I know, the wait is torture, but it's worth it. When it's firm, use those parchment handles to lift it out. For picture-perfect squares, run a sharp knife under hot water, dry it quickly, and slice with confidence. (Repeat the hot water trick between cuts for Instagram-worthy edges.) Now try not to eat half the batch before sharing. I believe in you!
Butterfinger Fudge Variations
Look, I adore the original version, but sometimes you gotta mix it up-especially when your pantry's looking a little bare or you're feeling adventurous. Here are my favorite twists that still deliver that addictive Butterfinger magic:
- Milk chocolate swap: Use milk chocolate chips instead of semi-sweet for a sweeter, kid-friendly version. (Bonus: It's extra nostalgic-tastes just like the inside of a Butterfinger!)
- Peanut butter boost: Stir in ¼ cup creamy peanut butter with the chocolate for an even richer peanut flavor. Just don't blame me when you eat the whole pan.
- Salty-sweet upgrade: Sprinkle flaky sea salt on top before chilling. Trust me, it makes the chocolate sing.
- Halloween hack: Use leftover fun-size Butterfingers-no need to unwrap them perfectly, just chop 'em up, wrapper bits and all. (Okay fine, maybe remove the wrappers.)
See? Endless possibilities. Now go play with your food-I won't judge.
Serving and Storing Butterfinger Fudge
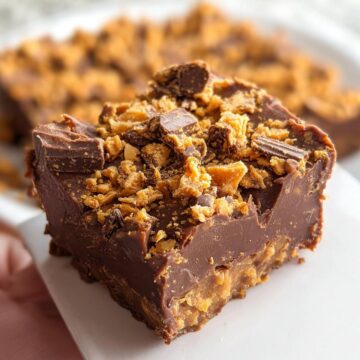
Here's the best part-this fudge is basically ready to party straight from the fridge, but I like to let it sit at room temp for about 10 minutes before serving. That way, the chocolate gets this dreamy, melt-in-your-mouth texture while the Butterfinger bits stay gloriously crisp. Serve it on a pretty plate, or just sneak squares directly from the pan when no one's looking (I won't tell).
Storage? Easy. Keep it in an airtight container in the fridge for up to a week-if it lasts that long. For longer-term hoarding (wise), layer pieces between parchment in a freezer bag and freeze for up to 2 months. Thaw in the fridge overnight, and it'll taste like you just made it. Pro tip: Hide a stash behind the frozen peas. Your future self will thank you.
Helpful Notes for Perfect Butterfinger Fudge
A few insider tricks to make sure your fudge turns out flawless every time (because even easy recipes have their quirks):
- Low and slow wins the race. If your chocolate starts looking grainy or separates, the heat was too high. No panic-just take it off the burner and whisk in a splash more warm cream until smooth again.
- Chop those Butterfingers unevenly on purpose. Some big chunks, some crumbs-that texture contrast is everything.
- Feeling fancy? Drizzle melted peanut butter over the top before chilling, or sprinkle with crushed peanuts for extra crunch.
- Short on time? The freezer sets fudge faster (about 45 minutes), but don't forget about it-you don't want Butterfinger bricks!
Remember, even "ugly" fudge still tastes amazing. Perfection is overrated-deliciousness isn't.
Frequently Asked Questions
I've gotten so many questions about this fudge over the years-here are the big ones that pop up again and again (along with my very opinionated answers):
1. Can I freeze Butterfinger fudge?
Absolutely! Freeze it in a single layer first (so the pieces don't stick together), then transfer to a freezer bag. It'll keep for 2 months-just thaw overnight in the fridge. The texture stays perfect, though I dare you to wait that long.
2. What if I don't have Butterfingers?
First, I'm sorry for your loss. But yes-Crunch bars or even chopped-up peanut butter cups work in a pinch. Just know it won't have that same nostalgic peanutty crunch.
3. Why is my fudge too soft?
Either it didn't chill long enough (patience, grasshopper), or your chocolate-to-milk ratio was off. Next time, add an extra ½ cup of chocolate chips for a firmer set.
4. Can I make this dairy-free?
Yep! Use dairy-free chocolate chips and coconut cream instead of heavy cream. The texture's slightly different, but still dangerously good.
5. How do I stop eating it all in one sitting?
Ha! Good luck with that. I've yet to find a solution.
Final Thoughts on Butterfinger Fudge
If you take one thing away from this, let it be this: Butterfinger fudge is the ultimate "looks fancy but couldn't be easier" dessert. It's the kind of recipe that makes people think you slaved over the stove, when really, you were just stirring chocolate and smashing candy bars like a kid with a rolling pin. And isn't that the best kind of kitchen magic?
So go grab those Butterfingers-you know, the ones you've been hiding from your family-and make a batch. Share it (or don't, I won't judge), but either way, savor every bite of that crispy, creamy perfection. Because life's too short for mediocre desserts, and this fudge? It's pure joy in every square.
Butterfinger Fudge
Equipment
- 8x8 inch baking pan
- Parchment paper
- Medium saucepan
Ingredients
- 3 cups semi-sweet chocolate chips Ghirardelli brand
- 14 oz sweetened condensed milk
- ¼ cup heavy cream
- 2 cups roughly chopped Butterfinger candy bar mixed into fudge batter
- 1 cup finely chopped Butterfinger candy bar for topping
Instructions
- Line an 8x8 inch baking pan with parchment paper, leaving overhang on two sides for easy removal.
- Combine chocolate chips, sweetened condensed milk, and heavy cream in a medium saucepan over low heat.
- Stir constantly until the chocolate is fully melted and the mixture is smooth.
- Remove from heat and stir in 2 cups of roughly chopped Butterfinger pieces until evenly distributed.
- Pour the fudge mixture into the prepared pan and spread evenly.
- Sprinkle the top with 1 cup of finely chopped Butterfinger pieces, pressing lightly to adhere.
- Refrigerate for at least 2 hours until firm before cutting into squares.


Leave a Reply