There's something magical about the 4th of July—the fireworks, the backyard barbecues, and that feeling of pure summer joy. Every year, I find myself scrambling to put together a dessert that wows my guests without keeping me stuck in the kitchen. Last year, I had a revelation while staring at my niece's half-eaten bag of gummy bears: why not turn patriotic candies into the star of the show?

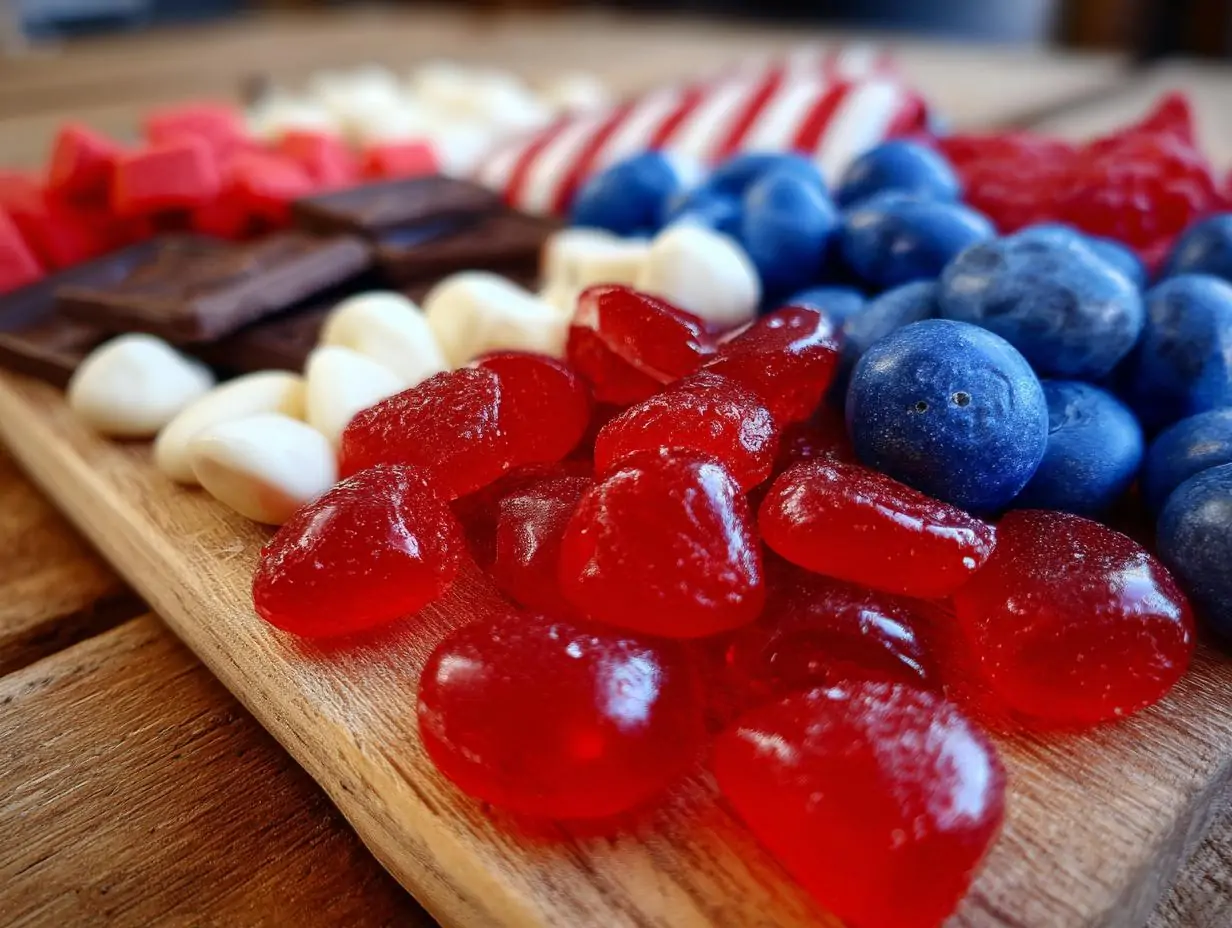
That's how my 4th of July Dessert Board was born—a no-fuss, eye-catching spread that brings all the red, white, and blue vibes to your celebration. Picture this: a wooden board overflowing with ruby-red licorice ropes, snowy yogurt pretzels, and electric-blue gummy rings. It's ridiculously easy to assemble (we're talking 15 minutes tops), yet looks like you spent hours crafting the perfect patriotic centerpiece. The best part? Kids and adults alike go crazy for it, and you can customize it with whatever candies make your heart sing.
Why You’ll Love This 4th of July Dessert Board
Trust me, this dessert board is about to become your new favorite party trick. Here’s why:
- Zero baking required – Your oven gets the holiday off! Just grab store-bought candies and arrange them.
- Instant patriotic vibes – The red, white, and blue color scheme screams "America" without any fuss.
- Guaranteed crowd-pleaser – From sugar-crazy kids to nostalgic adults, everyone dives right in.
- Takes 15 minutes flat – Perfect for last-minute hosts (we’ve all been there).
- Endlessly customizable – Swap in your favorite candies or add fresh berries for a healthier twist.
I’ve used this for everything from backyard BBQs to block parties, and it always disappears faster than the fireworks!
Ingredients for Your 4th of July Dessert Board
The beauty of this dessert board is how flexible it is—use what you love or what’s easiest to grab at the store! Here’s my go-to lineup, organized by color for maximum patriotic punch. Pro tip: raid the bulk candy bins for smaller quantities if you don’t need full bags.
Red Section
- 1 cup red heart gummies (cherry or strawberry flavors work great)
- ½ cup red licorice ropes, cut into 3-inch pieces (Twizzlers or Red Vines both rock)
- ½ cup red rock candy sticks (break them in half for easier nibbling)
- ¼ cup red lip gummies (or swap in any red sour candies)
- ½ cup red and white sour gummy skulls (these add fun texture!)
Optional: Toss in fresh strawberries or raspberries for a juicy pop of red.
White Section
- 1 cup yogurt-covered pretzels (the sweet-salty crunch is addictive)
- 10 oz white chocolate squares or melts with red/blue sprinkles
- ½ cup mini marshmallows (great for filling gaps)
- ¼ cup white candy melts drizzled over blueberries (my fancy touch)
Fun swap: Vanilla meringue cookies add cloud-like fluffiness.
Blue Section
- ½ pound blue sour gummy tape, cut into strips (kids love pulling these apart)
- ¾ cup blue gummy bears (I use the tropical flavor ones)
- ½ cup blue and white sour gummy rings (stack them like mini lifesavers)
- ¼ cup blue rock candy crystals (for sparkly crunch)
Healthy twist: Fresh blueberries or blackberries blend right in!
See? No fancy ingredients—just pure, sugary joy. Mix and match based on what makes your taste buds happy!
How to Make a 4th of July Dessert Board
Alright, let’s get this patriotic party started! Assembling this 4th of July Dessert Board is as easy as 1-2-3—no fancy skills required. Just follow these simple steps, and you’ll have a showstopper that’ll have everyone reaching for their phones before they dig in.
Step 1: Prepare the Board
Grab your favorite serving platter—I always use a 16-inch wooden board because it’s sturdy and gives that rustic-chic vibe. If you don’t have one, a large baking sheet lined with parchment paper works just fine (bonus: easy cleanup!). Pro tip: Give it a quick wipe with a damp cloth first to make sure there’s no dust lurking. Oh, and clear some space on your counter—things might get a little chaotic with all those colorful candies!
Step 2: Arrange by Color
Think of your board as a tasty American flag. Start by piling all your red candies on the left side—I like to cluster the gummy hearts and licorice ropes first, then fill in with smaller pieces. Leave a little breathing room between candies so it doesn’t look overcrowded. Next, create a snowy white middle section with those yogurt pretzels and marshmallows (they’re like little edible clouds). Finally, load up the right side with your blue gummy tape and rings. Don’t stress about perfection—the messier it looks, the more inviting it becomes!
Step 3: Add Texture and Height
Here’s where the magic happens! Stack a few gummy rings vertically like a tiny tower, or prop up rock candy sticks against a small bowl. I love using mini ramekins to hold loose candies like blue rock crystals—it keeps them from rolling away and adds dimension. For a wow factor, drizzle melted white chocolate in zigzags over the blue section. Step back every so often to check the balance—you want every angle to scream “festive!”
That’s it! Seriously, the whole process takes less time than watching the first firework of the night. Now go impress your guests—and try not to snack too much while you’re building it!
Tips for the Perfect 4th of July Dessert Board
After making more dessert boards than I can count (and eating my fair share of test batches), I’ve picked up a few tricks that take your 4th of July spread from good to "How’d you do that?!" Here are my can’t-live-without tips:
- Plastic wrap is your BFF – If you’re prepping ahead, just drape plastic loosely over the board. Pressing it down smushes marshmallows and makes gummies sweat (ew). Bonus: It keeps sneaky fingers away until party time!
- Crunchy + chewy = magic – Mix textures like nobody’s business! Pair soft gummy bears with crisp rock candy or yogurt pretzels. That contrast keeps every bite interesting—my niece calls it "the surprise factor."
- Fresh fruit saves the day – Toss in strawberries or blueberries to balance the sugar rush. They add juicy pops of color and make you feel slightly less guilty about that third licorice rope. (No judgment here!)
- Small bowls work wonders – Use little ramekins or shot glasses for loose candies like rock crystal crumbs. It looks intentional and prevents a blue gummy bear avalanche when someone grabs a pretzel.
Oh, and one last thing—always make extra. Because nothing’s sadder than reaching for that last gummy heart and finding an empty board!
4th of July Dessert Board Variations
Once you've mastered the classic version, it's time to play! Here are my favorite ways to mix up the 4th of July Dessert Board—because why stop at candy when you can get creative?
The Cookie Lover's Dream Board
Swap half the candies for patriotic cookies—it's genius for potlucks where you need something more substantial. I use star-shaped sugar cookies decorated with red and blue icing (store-bought works fine in a pinch!). Add mini flag cupcakes with white frosting and berry toppings. Pro tip: Nestle some chocolate-dipped Oreos with red and blue sprinkles in between for that extra "wow" factor.
Keto-Friendly Freedom Board
Yes, you can keep it low-carb and still festive! Replace sugary treats with dark chocolate-covered almonds (dyed red and blue with food coloring), sugar-free gummies, and fresh berries. I love adding fat bombs shaped like stars—just mix cream cheese with a bit of sweetener and freeze in silicone molds. Sprinkle with coconut flakes for "firework" effects!
Sparkler Spectacular Board
For the ultimate party starter, tuck unlit sparklers into the board (remove before eating, obviously!). Arrange them like rays around a cluster of red, white, and blue candies in the center. I once used battery-operated fairy lights woven through the board—total game-changer for evening BBQs. Just watch guests' faces light up when you bring it out!
The best part? These variations take the same 15-minute assembly time. Mix and match ideas to make it your own—that's the beauty of dessert boards!
Serving and Storing Your 4th of July Dessert Board
Okay, let's talk logistics—because what good is a gorgeous dessert board if the gummies turn into cement before the fireworks start? Here's how I keep my 4th of July Dessert Board looking and tasting fresh from assembly to last bite.
Serving it right: Timing is everything! I always assemble my board no more than 2 hours before guests arrive—any earlier and the marshmallows start to weep, and nobody wants sad, sticky candy. If it's super humid out (hello, summer!), I'll even wait until 30 minutes before showtime. Pro tip: Set it out just as the first guests arrive—that way, it's still picture-perfect when everyone sees it for the first time!
The storage secret: Need to prep ahead? No problem! Just loosely tent the whole board with plastic wrap—don't let it touch the candies, or you'll get condensation nightmares. I sometimes prop toothpicks in the corners to create a little dome. Store it in a cool spot (not the fridge—that makes chocolate bloom and gummies harden). It'll stay fresh overnight this way, though I try not to assemble more than 12 hours early.
Leftover magic: Let's be real—there usually aren't leftovers. But if you somehow end up with extra, transfer candies to airtight containers (separate by type—nobody wants licorice-flavored marshmallows!). They'll keep for about 3 days... not that they'll last that long. The yogurt pretzels might soften after day two, but hey—that just means you've got an excuse to make another board!
4th of July Dessert Board FAQs
I get asked the same questions every year when I bring out this dessert board—so let’s tackle them head-on! Here’s everything you need to know to make your 4th of July Dessert Board foolproof.
Can I make this dessert board ahead of time?
Absolutely! You can assemble it up to 1 day in advance—just cover it loosely with plastic wrap (don’t let the wrap touch the candies) and store it somewhere cool and dry. Skip the fridge—humidity makes gummies sticky and chocolate sweaty. Pro tip: If using fresh berries, add those right before serving so they don’t get mushy.
What are some healthier swaps for the candies?
Oh, I’ve got you covered! Try these easy swaps:
- Instead of red gummies: Fresh strawberries or raspberries (bonus—they look jewel-toned!)
- Instead of white chocolate: Greek yogurt-covered raisins or dark chocolate–dipped banana slices
- Instead of blue gummy tape: Blueberries and blackberries mixed with coconut flakes
My favorite combo? Dark chocolate–covered almonds with a dusting of freeze-dried strawberry powder—it’s sneaky-good!
What’s the best board size to use?
Aim for a 14–18 inch platter—big enough to look abundant but not so huge that you’re scrambling to fill it. My 16-inch wooden board is perfect for feeding 8–10 people (though I’ve stretched it to 12 by adding extra marshmallows and popcorn!). For smaller gatherings, a 12-inch tray works great—just scale back the quantities by about a third.
There you have it—no question left unanswered! Now go forth and create the most festive dessert board your 4th of July party has ever seen.
Nutritional Information
Let's be real—this is a dessert board, not a salad bar! But in case you're curious (or just want to balance out that third helping of gummy bears), here's the general nutritional scoop. Estimates vary by brand, but per serving (about 1/10 of the board), you're looking at roughly:
- 150 calories
- 25g sugar
- 3g fat
- 30g carbs
Remember, these numbers can swing wildly depending on which candies you use—those yogurt pretzels might be lighter than chocolate melts, while gummy tape packs more sugar than fresh berries. My philosophy? Enjoy every patriotic bite guilt-free—it's the Fourth of July, after all!
Now go show off your creation! Share your festive board with #JulyDessertBoard—I can't wait to see your red, white, and blue masterpieces!
Print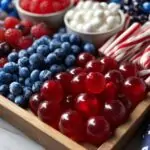
15-Minute 4th of July Dessert Board That Wows Every Guest
- Total Time: 15 minutes
- Yield: 1 dessert board (serves 8-10)
- Diet: Vegetarian
Description
A festive 4th of July dessert board featuring red, white, and blue candies and treats. Perfect for patriotic celebrations and easy to assemble with store-bought items.
Ingredients
- Red Heart Gummies
- Red Butterfly Gummies
- Red Rock Candy
- Red Lip Gummies
- Red Licorice Ropes
- Red and White Sour Gummy Skulls
- Red Gummy Bears (optional)
- Yogurt Covered Pretzels
- White Chocolates with Red and White Sprinkles
- Blue Sour Gummy Tape
- Blue Gummy Bears
- Blue and White Sour Gummy Rings
Instructions
- Arrange a large wooden board or platter.
- Separate the candies into red, white, and blue sections.
- Place red candies on one side of the board.
- Add white treats in the middle.
- Fill the remaining space with blue candies.
- Mix textures and shapes for visual appeal.
- Serve immediately or cover lightly until ready to enjoy.
Notes
- Use any red, white, and blue candies you prefer.
- Keep the board covered to prevent the candies from drying out.
- Add fresh berries for a healthier option.
- Prep Time: 15 minutes
- Cook Time: 0 minutes
- Category: Dessert
- Method: No-Cook
- Cuisine: American
Nutrition
- Serving Size: 1/10 of board
- Calories: 150
- Sugar: 25g
- Sodium: 30mg
- Fat: 3g
- Saturated Fat: 1g
- Unsaturated Fat: 1g
- Trans Fat: 0g
- Carbohydrates: 30g
- Fiber: 0g
- Protein: 1g
- Cholesterol: 0mg
Keywords: 4th of July, dessert board, patriotic, candy, no-bake, party food


Leave a Reply